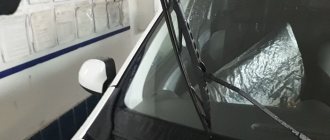
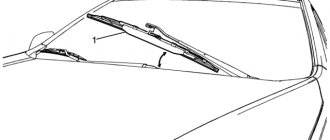
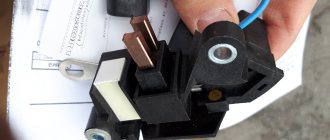
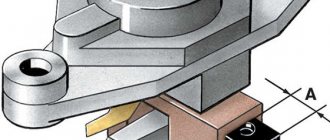
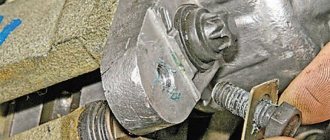
The main symptoms of failure of the windshield wiper motor or trapezoid
The windshield wiper system includes two main elements that drive the blades - a gear motor and a so-called trapezoid. If, when the right steering column switch is installed in the appropriate position, the brushes do not move, this may indicate either a malfunction of the motor electric motor or a jammed trapezoid.
As a rule, when the shafts and hinges of the mechanism are severely oxidized, the windshield wipers do not stop working “at once.” Up to this point, there is a slowdown in the speed of movement of the brushes and their wedging in various positions. This is a sufficient reason to think about taking appropriate preventive measures (see the article Prevention of the trapezoid and windshield wiper motor) or replace the trapezoid and windshield wiper motor.
The cause of the malfunction may also be damage to the contacts or a short circuit in the motor caused by moisture getting inside. Usually in such a case the fuse responsible for the wipers blows out. Please note that the windshield washer continues to function in this case. Another common cause is the formation of plaque and rust on the engine shaft or joints as a result of corrosion.
Main reasons and methods of repair
Trapezium problems
The most common reason for poor windshield wiper performance is a rusted trapezoid.
As an emergency remedy, you can spray WD on the wiper mounting axles. If you are on the road and cannot service your car, this will help solve the problem for a while.
It is necessary to remove the trapezoid, clean it from dust and rust, and lubricate all moving parts with lithol.
Sometimes the problem can be fixed by simply changing the wiper brush holders.
Wear and contamination of the gear motor
To eliminate the malfunction, the motor is removed, sorted out, cleaned of dirt and then sanding the petals, lubricated and reassembled.
Incorrect installation
When replacing linkages or other wiper parts, some connections may have been connected incorrectly.
Why wipers work slowly on Lada Priora and how to speed them up
March 30, 2021 LadaOnline 37 906 3
Many Priora owners notice that over time the wipers begin to work slowly. The speed has decreased several times and does not rise even when cleaning the wet windshield. Let's look at the main reasons for slow wipers, as well as ways to solve this problem.
The main reason for slow Priora wipers is the lack of lubrication:
- in the windshield wiper motor;
- on the hinges of the windshield wiper trapezoid.
Try to use a lubricant that does not thicken at low temperatures. The trapezoid with the motor can be removed, like on a VAZ 2110.
- 5-pin connector, like on the windshield wiper motor;
- 5-pin relay with socket - 3 pieces;
- wires 25 mm2;
- round terminals.
Quick diagnosis by weight
The ground outlet is located on the lower bolt of the windshield wiper drive, in the sump. If you suspect that the problem is a bad ground, turn the windshield wipers on maximum and note the speed of their movement. Then turn on the stove. The heater and wipers are connected to the same ground output, so if this is the problem, the speed of movement of the wipers after turning on the heater will decrease significantly.
To fix the problem, find the ground outlet, clean the contacts, solder the terminals if necessary, coat the connection with protective grease, and tighten the fastening nut well.
If you need to quickly eliminate voltage losses, extend an additional ground wire to the wiper motor mounting frame.
Dimensions of Granta liftback wipers
| № | Location | vendor code | Price, rub.)* |
| 1. | Front right (400mm) | 3397004667 | from 150 |
| 2. | —/— left (600mm) | 3397004673 | from 190 |
| 3. | Rear wiper size Grant liftback, station wagon (500mm) | ||
| 4. | Analogues from AVS Crystal | AV9014426S | from 250 |
*prices are as of September 17, 2018.
The given prices are for budget components; when purchasing products from famous brands, the cost increases.
Mechanical faults
mechanics Often the wipers on a VAZ 2110 car do not work due to a banal loosening of the nut that presses the brush holder to the trapezoid shaft.
You can restore the system's functionality instantly by adjusting the angle of the brush and tightening the lever with a nut. An unscrewed nut that facilitates the transmission of torque from the gearbox to the trapezoid can be reported by one of two events:
- the electric motor remains operational in all modes, but both brushes do not move;
- the brushes spontaneously stop working in an intermediate position.
However, stopping of the brush holders in an arbitrary position can occur due to poor pressing of the “limit switch” contacts to the gear motor gear or oxidation/burning of the same contacts. And the brushes are not able to move even after chipping the teeth of the gears, which do not have a long service life - after all, they are made of plastic.
Repair of windshield wiper motor gearbox Lada Granta
To disassemble the gearmotor, unscrew the screws securing the gearbox cover 6 and remove it together with the limit switch panel 4.
Then unscrew the screws securing the gearbox housing 11 to the electric motor housing 8 and disconnect them.
Remove armature 9 of the electric motor.
To remove gear 3 of the gearbox, unscrew the crank nut, remove the retaining ring from the axle and remove the axle with gear and washers from the housing.
After disassembly, blow out the internal cavities of the electric motor with compressed air to remove carbon dust deposits and check the condition of the brushes and commutator.
The brushes must move freely in the brush holders without jamming, and the springs must be intact and have sufficient elasticity.
Clean the commutator with fine-grained sandpaper and then wipe with a clean rag lightly greased with petroleum jelly.
If the collector is severely burnt or worn out, it is better to replace the gearmotor with a new one. Check for signs of jamming on the armature shaft journals.
If necessary, sand them with fine-grained sandpaper.
When assembling, move the brushes away from the commutator so as not to break them or damage their edges, and insert the armature into the body with extreme caution, avoiding hitting the armature on the poles so as not to break them.
Windshield wiper drive device
The wipers are driven by a small DC electric motor, which is equipped with a built-in gearbox.
Three brushes are installed in the motor armature, with the help of which three modes of operation of the entire system are provided. In addition, the electrical circuit for controlling the operation of the windshield wipers includes:
- steering column switch for operating modes;
- relay K2 type 524.3747, which includes intermittent operation;
- additional relay;
- limit switch;
- bimetallic fuse;
The bimetallic fuse and limit switch are located in the electric motor gearbox, and all other circuit elements are located in the mounting block installed in the engine compartment of the car. All elements of the electrical circuit diagram are connected to each other using wires and mounting blocks.
Devices for diagnostics of electrical equipment
The set of basic diagnostic instruments includes a circuit tester or voltmeter (although it is quite possible to use a banal 12-volt test lamp equipped with a set of connecting wires). If available, you can use an open circuit indicator, which includes a lamp, an independent power source and connecting wires.
In addition, you should always carry a set of cables in your car to start the engine from an alternative source (usually the battery of another car). These wires are equipped with alligator clips.
It would be a good idea to have an electrical circuit breaker, since this equipment can be used to connect circuit elements and bypass electrical equipment during diagnostics.
Troubleshooting Methods
If the wipers start to stop in the middle of the car's windshield, you must perform the following steps:
- check whether the windshield wipers are correctly installed on the drive splines and the condition of the trapezoid. Particular attention must be paid to the drive crank. If assembly errors are detected, they must be eliminated;
- carefully inspect the drive splines. They can chip, break or wear out, causing the splines to slip and the wipers not returning to their original position. Sometimes the wiper lever may jump out of its place.
The defect is eliminated by replacing worn parts.
Advice! If the wipers begin to stop in the middle of the glass while driving, and there is no service station nearby, then the defect can be eliminated if you have a drill and drill bits in the trunk. By drilling several holes, you can temporarily secure the windshield wiper arm using available materials. To reduce friction, the areas of modification must be thickly lubricated with some kind of lubricant.
The next operation is to check the integrity of the electrical wiring. To do this, you need to check the voltage at the drive connector without turning off the ignition. The voltage should be 12 V. If there is no voltage at the connector contacts, it is necessary to check the integrity of the electrical wiring and the serviceability of the relay sequentially, starting with the fuse in the mounting block. Detected faults must be corrected.
In addition, taking this opportunity, it is recommended to clean and bend the contacts of the windshield wiper drive mounting connectors. Sometimes this also eliminates the defect.
Also, the windshield wipers may not return to their original position due to a defect in the electric motor itself or its switch. In this case, it is necessary to replace the faulty electric motor. The car enthusiast may encounter other, more complex faults that lead to the wipers stopping either in the middle of the windshield or in any other position. In this case, it would be better to contact specialists who will quickly detect and fix the problem.
Interesting! Some car enthusiasts have noticed that in the winter, wipers stopped in the middle of the windshield are exposed to hot air. Thus, the elastic elements of the windshield wipers, hardened in severe frost, thaw simultaneously with the icy glass during the process of warming up the power unit of the car after a long stay, which helps to increase the service life.
Therefore, an original solution emerged: when parking a car in severe frost, force the blades to stop in the middle of the windshield. To do this, you just need to break the windshield wiper drive chain and install an additional switch on the car's dashboard.
Having parked the car, for example, at night, the wipers in the middle of the windshield are stopped using a switch. In the morning, after warming it up, using the same switch, the windshield wipers are returned to the transport (initial) state.
- How to change silent blocks on a VAZ 2114
- How to change silent blocks on Toyota
- How to change valve stem seals on a 16-valve Priora
- How to change the boot of the internal CV joint on a Ford Focus 2 car
Refinement of windshield wipers on Priora
Priora owners note two drawbacks of the windshield cleaning system: slow operation of the wipers and 4 working strokes of the wipers when the washer is turned on, when two would be enough. The article discusses the reasons for these shortcomings and provides ways to solve them by modifying the Priora windshield wiper.
How to speed up the work of Priora wipers
The problem of slow windshield wipers appears over time. The speed may decrease several times; the windshield wipers begin to move slowly even on wet glass covered in rain. There are three reasons for the malfunction:
- engine malfunction;
- poor performance of wiper hinges;
- problems with the engine power supply.
Motor malfunction may be due to worn brushes or bearings. But the wiper motor is quite reliable, so more often the reason is in the hinges or power supply.
The operation of the hinges can be adjusted using high-quality lubricant. To do this, you need to remove the trapezoid with the motor, wash the hinge joints and apply a lubricant that does not thicken at low temperatures.
Power supply problems are solved by updating the Priora windshield wiper circuit. The wiper switch circuit contains many electrical connections and contacts that oxidize over time. As a result, there is a drop in the voltage supplied to the wiper motor, and it does not develop the required power.
For this you will need:
- 5-pin relay - 3 pcs.;
- 5-pin relay motor connector;
- round terminals - 5 pcs.;
- wire with a cross section of 2.5 mm.
The connection diagram involves installing three relays in the wire gap in front of the windshield wiper motor and does not make changes to the standard car wiring (Figure 1). As a result, the voltage supplied to the engine through the contacts and switches of the wipers only controls the activation of the relays, which supply the on-board network voltage to the engine without loss.
Particular attention should be paid to the insulation of the contact wires. The relay unit must be installed in a suitable plastic case and the holes sealed to prevent moisture from entering, which could cause oxidation of the contacts and damage to the relay.
This solves the problem of slow operation of the wiper motor.
When using the Priora windshield washer, the wipers make four passes instead of two, as on most cars.
This “bug” can be corrected by modifying the Priora windshield wiper. It consists of modifying the windshield wiper relay, after which the number of strokes will decrease.
The work requires minimal skills in handling a soldering iron in order to be able to replace one resistor in the relay.
To upgrade the wiper relay you will need:
- resistor 40-70 kOhm;
- screwdriver or knife;
- soldering iron;
- solder;
- rosin.
The number of movements of the wipers when the washer is turned on depends on one of the resistors in the relay circuit. Its resistance is 141 kOhm, and for two cycles a resistor of approximately 51 kOhm is required.
To upgrade the relay, you must perform the following steps:
remove the wiper relay from the fuse panel;
- use a knife or screwdriver to open and disassemble the relay;
- heat the soldering iron;
- remove resistor 140 km;
solder a 40-70 kOhm resistor onto the vacant space (with higher resistance, the wipers can make 3-4 strokes instead of 2);
Note: If a resistor of a suitable value is not available, you can replace it by connecting resistors of a suitable value in series or in parallel. For example, solder two 20 kOhm resistors connected in series (you get 40 kOhm) or two parallel connected 100 kOhm resistors (you get 50 kOhm).
- assemble the relay housing;
- install the relay on the fuse panel;
- Check the functionality of the relay by briefly turning on the glass washer.
The modification of the Priora windshield wiper has been completed. The wipers will perform two strokes.
You can also install an additional pause regulator between wiper movements based on a variable resistor. For this you will need:
- wires;
- male and female connectors;
- variable resistor.
To install the regulator, you must perform the following steps:
- solder two wires to the resistor;
- install male and female connectors at the ends of the wires;
- disassemble the steering column casing;
- find the yellow wire with a green stripe;
- pull out the wire connector from the block;
- connect one wire coming from the variable resistor to the block, the other to the tip of the yellow-green wire disconnected from it;
- attach the variable resistor in an accessible place (for example, on the steering column);
- assemble the column casing.
Such modification of the Priora wipers is not feasible on luxury cars equipped with rain sensors.
Trapezoid - the mechanism for direct operation of the wipers
One of the most complex mechanisms in the wiper system kit is the trapezoid. Today, no car manufacturer has such a reliable wiper drive mechanism to guarantee long-term operation of the device. Banal jamming of brushes or excessive emphasis on the glass, improper activation of the wipers, freezing to the glass in winter - all these reasons can be detrimental to the trapezoid. Among the possibilities for restoring this mechanism, it is worth highlighting only a few possible steps:
- purchasing a new trapezoid is often the best step for domestic cars, in which the wiper mechanism costs about 1000-1500 rubles;
- for foreign cars, purchasing a new trapezoid will cost exorbitant amounts of money, so in this case, repairs should be made and broken parts restored;
- Often the bushings and tips in trapezoids fail, which are often plastic and are terribly resistant to frost, so they can simply be replaced;
- if it is not easy to find a repair kit for a trapezoid for your car, you can try installing bushings and other parts from other cars of a similar class;
- Direct replacement of the trapezoid is necessary if even repair work does not eliminate the problem, or after repair the mechanism begins to tap during operation.
Any sounds coming from the trapezoid may be a harbinger of its death. This is exactly the sign that indicates a possible failure of the entire device. However, you should not change the trapeze immediately after unpleasant sounds occur. Before replacing, you can wait until the device completely fails or try to eliminate the sound by tightening the components of the trapezoid using standard tools. It's not difficult and can be done right in your garage.
Do-it-yourself modification and replacement of wipers
The wipers are modified if you are not satisfied with how they work. The modification consists of increasing their speed and improving the pressing of the rubber bands to the glass.
Photo gallery “Replacing windshield wiper blades”
The replacement procedure is carried out in stages:
- First, the lower arm is removed from the glass.
- Next, we find the plug that holds the blade. By pressing it, remove the used brush.
- When replacing rubber bands, make sure that the holders do not hit the glass and break it. You can wrap them with rags or a towel.
- The next step is to install the brush. It is inserted into the holder, carefully turning the part so that the hook fits into place.
- Next, you need to secure the hook and return the lever to its base position.
To ensure vehicle safety during precipitation, you need to ensure that the glass wipers are working properly. Replacing them is a simple procedure and can be performed by any car enthusiast.
Symbols in the drawings
The Lada Granta car has been produced since 2021. This modern car has many of the latest instruments and electronics. All this ensures maximum safety and comfort for the driver. The AvtoVAZ corporation produces 3 types of modifications of the Lada Granta: Standard, Norma, Lux. The connection diagrams for the Norm and Standard trim levels are the same, but for the luxury version they are different.
New Lada: Is the comfort block on the Grant Luxury being treated or only for replacement?
Electrical wiring consists of a large number of bundles. The drawings contain symbols and serial numbers of on-board network devices. The connection of elements to each other is shown by lines. For greater clarity, the lines vary in color. The wires are combined into bundles. The harnesses connect the blocks using detachable plugs.
The reader must study the operating principle of individual electronic control units and instruments on his own. Simple malfunctions will not create any special problems when repairing or replacing spare parts. In the event of a breakdown of a complex electronic unit, you will have to contact service. There is no need to remember by heart all the details of installing parts. It is advisable for the driver to understand the layout of the drawing and clearly know the locations of the most important devices and electrical wiring.
There is no intermittent wiper mode - we are looking for a relay
Often, along with the lack of intermittent mode, problems arise with returning the windshield wiper blade to its original position. In this case, the culprit of the situation is a burnt-out relay. At the same time, the mode of continuous strokes of the windshield wiper blade is present, as well as the mode of accelerated cleaning of the glass. These options for operating the windshield wiper are designed to bypass the relay; they are implemented directly from the handle for switching on the wiper operating modes. When a relay fails, you simply need to replace it by following this procedure:
- searching for the installation location of the relay in your car - again, forums, the car’s operating instructions or recommendations from specialists who repair your car will help;
- Next, the non-working relay should be removed from the installation location, the device number should be rewritten so as not to make a mistake when choosing a new electrical device to replace it;
- go to the store or order on the Internet an original production relay with the same catalog number to ensure normal operation of the wiper on the car;
- Having received the device in your hands, take a good look at it, make sure that this is exactly the element that was originally installed in your car at the factory;
- turn off the ignition, be sure to check that the wiper switch is in the “off” position and insert the relay into the slot from which the non-working device was removed;
- turn on the ignition and check the quality of the wipers, taking into account the new installed electrical part.
Do the wipers turn on themselves on the VAZ 2114? Solution
Water and dirt accumulate on the windshield during rain, snow, and dust flows. To get rid of this, the design of the car provides for the presence of special elements - wipers.
Circuit breakers
Inside the cabin, at the driver's fingertips, there is a windshield wiper speed control . Brushes can have different sizes and function in several modes.
If we talk about windshield wipers on the VAZ 2114, they have four operating modes:
- With interruptions;
- At first speed;
- At second speed;
- Together with washer.
There are two modes on the rear window:
- With washer;
- No washer.
Dimensions
In fact, the size of the wipers on the VAZ 2114 plays a fairly large role in the quality and efficiency of glass cleaning.
Windshield wiper wiring diagram
Small brushes are also not good, because then the cleaning area is reduced and not the entire glass surface is cleaned, which would provide the required visibility for the driver.
Then what should be the size of these same brushes in the case of the “fourteenth” model?
- The windshield of the VAZ 2114 has two blades of the same size - 51 centimeters. The brush on the driver's side can be replaced with an element 53 centimeters long, but on the passenger's side it is important to leave 51 cm. Otherwise, a strip of cleaned water will remain on the glass between the driver and passenger.
- There is also a cleaner on the rear window of the VAZ 2114. But in this case, the size of the element is 30 centimeters. It is possible to install the wiper at 33 centimeters, which allows it to fit perfectly into the dimensions of the rear window. Some even install components at 40 centimeters, but in this case you will definitely have to increase the wiper stroke limit. To do this, remove the motor, shift the teeth by several units and put it in place.
Common problems
It is not uncommon for car owners to encounter a situation where the wipers on a VAZ 2114 do not work properly. The causes of the problems may be different, so you should carefully examine the breakdown, and then take appropriate action.
Typical faults include:
- They work constantly;
- The windshield wipers may operate on their own, even though the driver has not turned anything on or pressed anything;
- May work too slowly;
- Spontaneous switching occurs.
Replacing the motor
In practice, replacing wipers on a VAZ 2114 may be necessary in several cases. The most common is the failure of the gear motor.
There are different reasons:
- The brushes constantly work, the shutdown relay does not work;
- Turning on the regulator does not allow the wipers to start;
- Sometimes the windshield wipers simply do not turn off when the corresponding buttons are pressed, etc.
To avoid breaking the teeth of the new gear motor due to the crank (the curved rod that connects the motor and the trapezoid arms), proceed in the following sequence:
- Turn off the safety block.
- Mark the crank position.
- Disconnect the crank fasteners.
- Unscrew the trapezoid fixing bolts.
- Remove the motor.
Trapezoid repair
If the wipers on a VAZ 2114 work slowly, this indicates the need to repair the trapezoid. Although in reality it cannot be repaired, you just need to replace the failed element.
Replacing the trapezoid
Replacement will be required in case of mechanical damage. The procedure is quite simple, but here you will have to follow a certain sequence.
- Disconnect the wires under the hood that connect to the fuse box.
- Remove the protective cover that covers the heater fan.
- Remove the heater (stove) filter.
- Turn off the heater motor. It simply slides to the side; there is no need to dismantle it.
- The cover is removed from the wiper.
- Under the rubber protection cover there is a nut that holds the windshield wiper. You need to lift the cover a little and the nut will be easy to unscrew. Remove the wiper.
- Remove the rings and gaskets from the wiper shaft.
- Carry out a similar procedure with the second wiper.
- Under the hood, remove the bolts that connect the trapezoid to the body.
- Remove the fuse box and the stove motor, or unscrew the gear motor from the trapezoid, after which the motor and trapezoid are removed one by one. These are two ways that will allow you to get a failed trapezoid.
Washer problems
Diagram of the washer system
Breakdowns and methods for eliminating them are different. Let's get to know them in more detail.
- The steering column switch does not work. Make sure of this by closing two contacts under the steering wheel - front contact 53ah-w, rear - 53ah-wh, and then measure the resistance. If it is low, the switch is replaced with a new one.
- There is no water flowing through the washer pump. It should also be replaced.
- Dirt has formed in the injectors. Use a sharp needle to clean them.
- The wire that connects the pump and the switch has broken. You understand that the only option is replacement.
- Relay K3 is faulty. Again, you have no choice but to change the relay.
- The hose ruptured and its integrity was compromised. What do you think should be done in such a situation? Absolutely right - change the hose.
Lada Granta wipers do not work
Hello everyone, today I would like to talk about why the wipers on the Lada Granta do not work, and consider the main reasons for this malfunction.
As you know, the Lada Granta is not equipped with the most expensive wipers, or rather, windshield wipers. And the first thing drivers encounter is the whistling sound of their wipers. And this happens because the rubber bands of the wipers simply harden especially noticeably in winter. The solution is to replace them with more expensive ones, but in general it is advisable to change the wiper blades at least once a year.
The next malfunction associated with wipers is incorrect installation of the brush leads. As a result, one brush does not reach, and the second, on the contrary, oversteps the boundaries of its working area. Solved by proper installation.
If the wipers do not work at all, then you need to start troubleshooting with fuse F 4 at 20A. The wiper fuse on the grant is located in the mounting block to the left of the steering wheel. If the fuse is blown, then it should be replaced, but if it is intact, then you need to check relay K 6. You can check the relay by replacing it with a working one of the same type.
The next reason why the windshield wipers do not work is a nut that has unscrewed from the output shaft of the gearbox.
If the wipers only work in one position, then the microcircuit located inside relay K 6 may have failed. And if the wipers do not work at first or second speed, then the commutator brushes in the electric motor may be stuck.
Well, that's all, we looked at the main reasons why the windshield wipers do not work on a Lada Granta car.
Steering wheel shift paddles are a common cause of problems
Windshield wipers in most modern cars are activated using steering column switches in the form of levers with data on the operating modes of the equipment printed on them. These levers must work well and have the necessary signals to turn on the wipers. Often the handle fails, the switch does not send the necessary signals, and because of this, the wipers themselves do not work properly. The main tasks in this case are the following:
- it is necessary to remove the plastic parts of the steering column in order to get directly to the installation site of the wiper switches;
- in most cars, the switches are very easy to remove; the maximum work awaiting you will be unscrewing a few bolts;
- after removing the switch, you can use a tester to check its operation by connecting the contacts one by one to different terminals and turning on the wiper operating modes;
- if the switch really fails, you should simply replace it with a new one, installing it as simply as disassembling it;
- If the switch works, you will have to look for other causes of the problem; it is quite possible that the reasons lie in the area where the switch is connected.
Often, wires simply come off the terminals of this steering column switch and need to be returned to their place. Most likely, after carrying out a complete audit of the electrical system, including switches and other important technical aspects, you will be able to determine the problem and easily fix it. You don't even need any special tools or abilities for this. All you need to do is perform a high-quality restoration of the operation of all simple wiper systems. We offer a short video on how to deal with the problem if the wipers suddenly stop working:
Removing and disassembling the windshield wiper
Lift up the protective cap of the lever.
Use a 10mm wrench to unscrew the nut.
Using sliding pliers, we pull the lever from the slots.
Similarly, remove the second lever.
Using a thin screwdriver, we remove the six plugs for the bushings securing the front panel trim.
Using a slotted screwdriver, unscrew the six self-tapping screws securing the cladding
We take out the screws along with the plastic bushings.
Using a 24mm wrench, unscrew the nut securing the outer panel cladding.
Disconnect the fluid supply hose from the tee.
Using a 24mm wrench, unscrew the nuts securing the two wiper bushings
Remove the sealing gaskets.
Disconnect the wiper block in the engine compartment
Using a 10mm wrench, unscrew the two bolts securing the windshield wiper bracket to the body
Other section materials
| Technical description |
| Vehicle specifications |
| Vehicle registration details |
| Location of controls and instruments |
| Car keys |
| Ignition switch (lock) |
| Front and rear doors |
| Hood |
| trunk lid |
| Fuel filler plug |
| Seats |
| Rear view mirrors |
| Interior lighting |
| Instrument cluster |
| Granta steering wheel adjustment knob |
| Steering column switches |
| Granta headlight beam direction control unit |
| Granta heating and ventilation system control unit |
| Safety precautions during maintenance and repair of Granta |
| Location of the main components and assemblies of Granta |
| Vehicle check |
| Maintenance schedule |
| Checking the condition of wheels and tires |
| Replacing windshield wiper blades |
| Checking the fluid level in the windshield washer reservoir |
| Checking the engine oil level |
| Changing the engine oil and oil filter |
| Checking the level and topping up Granta coolant |
| Coolant replacement |
| Checking the condition and replacing Granta spark plugs |
| Removing the Granta air filter replacement element |
| Replacing the fuel filter |
| Adjusting thermal clearances in the valve drive of the Lada gas distribution mechanism |
| Checking the condition and replacing the generator drive belt |
| Checking the condition and replacing the Lada timing belt |
| Checking the condition of the exhaust system |
| Checking the gearbox oil level |
| Changing the gearbox oil |
| Checking the fluid level in the hydraulic brake reservoir |
| Bleeding the hydraulic brakes Granta (VAZ-11183, |
| Checking the condition of the chassis and transmission |
| Checking the steering condition |
| Checking the condition of the brake system |
| Adjusting the parking brake |
| Replacing the heating and ventilation system filter |
| Adjusting the direction of headlight beams |
| The crankshaft does not turn with the starter |
| Loud noise when the starter is running |
| The crankshaft is turned by the starter, but the engine does not start |
| The engine is running erratically |
Do-it-yourself modification and replacement of wipers
The wipers are modified if you are not satisfied with how they work. The modification consists of increasing their speed and improving the pressing of the rubber bands to the glass.
Photo gallery “Replacing windshield wiper blades”
The replacement procedure is carried out in stages:
- First, the lower arm is removed from the glass.
- Next, we find the plug that holds the blade. By pressing it, remove the used brush.
- When replacing rubber bands, make sure that the holders do not hit the glass and break it. You can wrap them with rags or a towel.
- The next step is to install the brush. It is inserted into the holder, carefully turning the part so that the hook fits into place.
- Next, you need to secure the hook and return the lever to its base position.
To ensure vehicle safety during precipitation, you need to ensure that the glass wipers are working properly. Replacing them is a simple procedure and can be performed by any car enthusiast.
