July 15, 2016 Lada.Online 49 774 6
Many modern Lada cars (for example, Granta, Kalina, Vesta or XRAY) have a standard rain sensor, which is installed from the factory. On machines that do not have this option, you can install it yourself. Let's look at the features of connecting the DDA rain sensor on different Lada models.
How to turn on the rain sensor on a Priora
To install a windshield wiper control system, it is not necessary to use the services of a car repair shop; you can do this work yourself.
Almost all modern cars have this function, so the operation of the wipers in different weather conditions is controlled automatically. The rain sensor is built into the front window of any foreign car, so it is impossible to remove it. However, you can install a rain sensor on an old domestic car. This device is quite easy to make, and it is quite suitable for VAZ cars. To work you will need a universal sensor.
How the device works
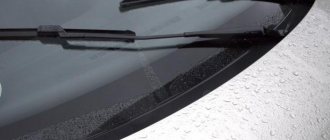
The device operates on the basis of optics, which must be positioned vertically. Place the universal sensor on the inside of the windshield. The installation location must be within the coverage area of the brushes, and cracks, chips and other defects are not allowed on the transparent surface.
Using infrared radiation, the sensor scans the condition of the outer surface of the glass. Raindrops and dirt change the reflection strength of the light signal. After this, the electronic control unit gives a command to turn on the windshield wipers. Time lags between brush movements are set automatically and depend on the intensity of precipitation.
Such a rain sensor can be installed on the windshield. In this case, the upper tinted strip will not interfere with the adequate operation of the device. The sensor will not fit cars that have an infrared filter on the glass.
Turning on the rain sensor
The sensor only works when the windshield wipers are activated in the first position; the device selects the intensity of movement of the blades automatically. If the wipers are in the second or third position, their speed does not change.
When installing a rain sensor, you must leave the possibility of manual control of the windshield wipers. Any situation can arise on the road, and you shouldn’t rely entirely on automation. For example, on the driver’s side there is a lot of splashes from oncoming traffic, but these splashes do not reach the sensor’s operating area, and the glass does not clean.
Experts recommend keeping the rain sensor turned off in dry weather. Since the device reacts to different objects: a flying insect, tree leaves and fluff. In this case, the windshield washer must always be started manually. Automatic water supply to the glass can frighten the driver, unexpectedly limiting the view.
When making a sensor, you can choose an imported microprocessor as a basis or use domestic developments.
Rain sensor on a foreign microprocessor model RS-22 RAIN sensor
The microprocessor is made in the USA and is suitable for any car with 12 V equipment. Connecting the rain sensor consists of four stages:
- Attach a special holder to the inside of the windshield using glue;
- Apply the gel to the surface of the working area of the sensor to equalize the refractive index;
- The position of the sensor body on the holder is fixed with a screw;
- Check the work area for air bubbles.
Such a rain sensor can be connected in VAZ cars using the wiper mode switch:
- The sensor is connected to the car body with a blue wire;
- A red wire is pulled from the sensor to pin I on the switch;
- The yellow wire of the sensor is attached to a cord of the same color, but with a green stripe.
- The device is connected with a black wire to the block at pin No. 53.
For proper operation of the device, at the initial stage you need to calibrate the sensitivity of the elements and check the throughput of the windshield. The windshield wipers will begin to work adequately only after setting the response threshold for the rain sensor.
Domestic developments of a rain sensor
Russian engineers have created a rain sensor that has no analogues in the world. Its main advantages are:
- Simplicity and reliability of system management;
- Possibility of self-installation;
- The sensor is connected autonomously. The car's electrical wiring is not involved (and this factor is especially important when the car is under warranty);
- Possibility to disable the sensor and switch to manual wiper control mode;
- Low cost.
The device has the function of adjusting pauses that accompany the movements of the windshield wipers. Changing the operating frequency of the brushes has a direct relationship with the speed developed by the car on the road. With slow movement, the pauses lengthen, and with fast movement, they shorten. If the driver wants to storm a deep puddle in his car, the system will detect the approach of a large volume of liquid to the glass in advance. At a distance of 5 to 10 cm, approaching water and dirt will be detected and the system will activate the wipers in advance.
The most widely used sensor model on the domestic market is DDA-25. Typically, Lada cars (Kalina or Priora) are equipped with such devices. The rain sensor has several modes to protect against snow and rain. Three built-in programs can be changed using a button on the device body. You can install such a sensor yourself; to do this, just follow the established procedure:
- Attach the optical sensor to the windshield using an adhesive base;
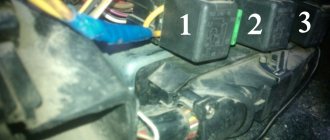
- Install the sensor in place of the relay in the vehicle’s mounting block (while observing the markings and position of the key);
- Lay the wiring along the front glass pillar;
- Set the sensitivity level of the sensor.
The installation of the rain sensor is shown more clearly in the video:
A suitable rain sensor can be found in most online stores for motorists. The cost of such a device is usually not high: you can focus on a price in the region of a thousand rubles.
Many foreign cars use a windshield with a rain sensor, that is, the device is completely built into the windshield and there is no way to remove it. Car owners who do not have a rain sensor as standard can retrofit their car with this option themselves. A universal rain sensor will help you do this , which can be installed in almost any car and the “ten” is no exception. Let's figure out how it works:
General operating principle of a rain sensor (universal)
Stories from our readers
“Fucking basin. “
Hi all! My name is Mikhail, now I’ll tell you a story about how I managed to exchange my two-wheeler for a 2010 Camry. It all started with the fact that I began to be wildly irritated by the breakdowns of the two-wheeler, it seemed like nothing serious was broken, but damn it, there were so many little things that really started to irritate me. This is where the idea arose that it was time to change the car to a foreign car. The choice fell on the melting Camry of the tenth years.
Yes, I had matured morally, but financially I just couldn’t handle it. I’ll say right away that I am against loans and taking a car, especially not a new one, on credit is unreasonable. My salary is 24k a month, so collecting 600-700 thousand is almost impossible for me. I started looking for different ways to make money on the Internet. You can’t imagine how many scams there are, what I haven’t tried: sports betting, network marketing, and even the volcano casino, where I successfully lost about 10 thousand ((The only direction in which it seemed to me that I could make money was currency trading on the stock exchange, they call it Forex. But when I started delving into it, I realized that it was very difficult for me. I continued to dig further and came across binary options. The essence is the same as in Forex, but it’s much easier to understand. I started reading forums, studying trading strategies. I tried it on a demo account, then opened a real account. To be honest, I didn’t manage to start earning money right away, until I understood all the mechanics of options, I lost about 3,000 rubles, but as it turned out, it was a precious experience. Now I earn 5-7 thousand rubles a day. I managed to get the car buy after half a year, but in my opinion this is a good result, and it’s not about the car, my life has changed, I naturally quit my job, I have more free time for myself and my family. You’ll laugh, but I work directly on the phone)) If If you want to change your life like me, then here’s what I advise you to do right now: 1. Register on the site 2. Practice on a Demo account (it’s free). 3. As soon as you get something on the Demo account, top up your REAL ACCOUNT and go to REAL MONEY! I also advise you to download the application to your phone, it’s much more convenient to work from your phone. Download here.
Using infrared radiation, it scans the condition of the outside of the glass. If there is moisture or dirt on the glass, the level of the reflected signal changes, which is a command for the electronic control unit, which turns on the wiper. The system is capable of automatically changing the pause of brush movement depending on the intensity of the rain.
The rain sensor can be installed on various types of windshields, including windows with a tinted top strip. The only exception can be glass with a better infrared filter, for example, such isothermal glass is installed on the Chevrolet Niva Lux.
How to turn on the rain sensor ? The sensor starts working only if the wipers are turned on to the first position; then the sensor itself recognizes and works by increasing or decreasing the speed of the wiper swing. The second and third positions of the wipers remain standard.
Manual control of the windshield wiper should be in any case, because the situations may be different. For example, splashes from a puddle hit only the driver's side, without reaching the sensor and passenger areas. Or you got into your car in the morning and found bird droppings in front of your eyes.
In dry weather, it is better to turn off the rain sensor , because false alarms are possible. For example, flying insects in the sensor area, sand, fluff, leaves, and in some cases shadows can cause wipers to operate on a dry windshield. Turning on the glass washer remains available only in manual mode. On its own, a jet spraying at the wrong time (during a maneuver) can surprise, frighten or limit your view.
Let's consider two models of rain sensors, the first one is based on a foreign microprocessor, and the second one was created by our domestic specialists:
Features of the rain sensor RAINsensor (RS-22)
Features of the DDA rain sensor (DDA)
When creating a rain sensor, Russian developers did not copy other people’s solutions, problems and mistakes, but followed their own path. When designing the sensor, the following requirements were taken into account:
- Easy system management;
- Possibility of installing a rain sensor with your own hands;
- Connection without interfering with the electrical wiring (relevant for cars under warranty);
- Ability to disable the rain sensor and control the wiper manually;
- Low cost.
In addition, the finished product has the ability to adjust the pause in the movement of the brushes depending on the speed of the car; lower speed means longer pause. And the sensor “sees” a large mass of water (a wave from a puddle from an oncoming car) while approaching the glass from a distance of 5–10 cm. and turns on the windshield wipers in advance. A rain sensor is used , and the DDA-15 is also suitable for the VAZ 2108-09, Niva-Chevrolet, UAZ-Patriot and is installed instead of the standard wiper relay 524.3747; 528.3747; RALD10.3747; 412.3777; 2110-37477. For Priora, Kalina and other VAZ models, they use DDA-25, which differs from DDA-15 only in the location of the contacts on the relay block. There are modes: rain snow standard. On the front side of the sensor there are two indicators and a button for quickly changing the operating mode.
The product is being improved all the time; based on feedback and requests, the developers are improving the rain sensor . For example, in the first models there was no adjustment of the sensitivity of the rain sensor. The problem was solved by placing several layers of tint film under the sensor elements. But a useful function was soon added in the next version of DDA (instructions).
Installation of rain sensor DDA:
- The optical sensor is glued to the windshield in the cabin.
- The windshield wiper relay is removed from the vehicle mounting block. Instead of the relay, a DD control unit is inserted, observing the markings and position of the key.
- Route the wiring along the left windshield pillar.
- Adjust the sensitivity of the sensor.
Also, installation of a rain sensor is shown in the video:
Buy a rain sensor for a VAZ
Conclusion
It is impossible to say that this system is indispensable, because many consider it useless. But when the driver is not distracted from the road to operate the windshield wiper, safety and comfort in bad weather conditions increases - this is a fact (the main thing is that the system works correctly).
Negative reviews most often arise from the fact that the rain sensor does not work properly, for example, the wipers are triggered when the left turn signal is turned on or when it is not possible to adjust the sensitivity of the sensor. But if we summarize, then such a system still has more advantages than disadvantages. Another advantage can be the fact that now it is no longer necessary to modify the windshield wiper relay.
Source: xn--2111-43da1a8c.xn--p1ai
Rain sensor on Priora
The rain sensor (on Priora) is an element of the automotive system that records and transmits information about the presence or absence of precipitation on the windshield of the car. Depending on the results of such fixation, a decision is made on whether to turn on or off the windshield wipers, the intensity of their operation, as well as the degree of brightness of the headlights.
This system is very convenient because it makes driving a car much easier and frees your hands from unnecessary manipulations. For example, when driving in rainy weather on a highway or highway. In situations where there is a need to switch the wiper operation intensity from lower to higher, or vice versa. Unfortunately, the element is not standardly installed on all priors, but only on those that have a luxury package. However, this circumstance does not prevent the installation of the kit on your vehicle.
How to adjust the sensitivity of the rain sensor
On the front side of the sensor there are two indicators and a button for quickly changing the operating mode. There are modes: rain snow standard. The rain sensor also has automatic level adjustment (to adjust to different glass, tinting, lighting). When turned on, the sensor shows the current sensitivity:
- Low sensitivity - 1 indicator flash.
- Average sensitivity - 2-3 flashes
- High sensitivity - 4 flashes.
To change it, press and hold the button for 3 seconds. This will be followed by a number of flashes indicating the current sensitivity. We continue to hold the button until a series of flashes follows. Release the button when the desired level is reached. An example of a rain sensor operating at a minimum level:
Have you ever had to install a rain sensor on your Lada car? What feedback can you give about his work? Let us remind you that the website presents other useful improvements, for example, replacing the washer nozzles with fan nozzles or installing a rear view camera washer.
Operating principles of a rain sensor on a Priora
If we talk about how the rain sensor on the Priora works, the principle of operation is as follows. In fact, the device is a set of photosensitive elements that are located in the product body directly on the board. The sensor itself is attached to the windshield with a photosensitive element. Determination of the presence of precipitation by the device is achieved through the principle of reflecting light pulses. In other words, the LED sends the required amount of light beam to the front glass, then it is reflected, received and recorded by a photodiode. If there is no moisture or dirt on the glass, the light is reflected back in almost the same quantity and the wipers are not used. And, conversely, in a situation where precipitation begins to fall on the glass surface, the amount of light reflected and captured by the LED changes. Due to this principle of operation, the controller determines the level of precipitation and accordingly starts one or another mode of operation of the windshield wipers.
Device
The entire system consists of the following elements:
- engine, wipers and their blades;
- relay in the mounting block;
- switch for operating modes and switching on;
- the sensor itself;
- wiring.
The device itself has the following components:
- the sensor body itself;
- operation sensitivity regulator;
- special fastening bracket;
- wire connection chip (connector);
- fastening ring.
Replacing rain sensor priors
To carry out the work you will need: - a key to “10”; - flat-head and Phillips-head screwdrivers.
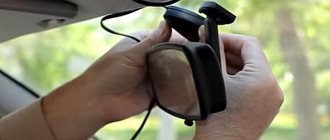
The removal process consists of 4 steps: 1. Place the car in a convenient place. Disconnect the negative terminal from the battery. 2. Remove the interior lighting lamp. 3. Using a Phillips screwdriver, remove the rear view mirror. 4. Disconnect the terminal block with the wires connected to the device. Carefully remove the product from the windshield.
The reinstallation procedure includes 6 steps:
- Before you begin installing a new part, you will need to thoroughly clean it, remove any adhesive residue, fingerprints, and dust from the surface of the glass. To do this, you will need a handy tool (for example, a scraper) with which you need to remove traces of contamination. To ensure the greatest adhesion of the sensor to the surface, you will need to degrease the area where it is intended to be installed.
- Apply a special polyurethane glass adhesive to the ring that will be in contact with the surface.
- Place the mounting ring directly against the surface of the windshield. Press the surface of the ring and wait 30 seconds.
- Installation of the sensor housing itself should begin only after the glue has completely dried (wait 1-2 hours).
- Next, remove the protective plate from the new product and install it in the mounting ring. Mount the bracket, connect the contact wires, attaching the block to the sensor.
- Install the pad together with the sensitivity regulator. This completes the installation.

