Adjusting the wiper pause on Lada cars [+video]
Details Category: Repair Published 04/11/2021
An adjustable wiper pause is available on many foreign cars. Lada cars are sometimes equipped with a rain sensor, but only in expensive trim levels. Meanwhile, for most domestic cars it’s easy to do a similar function yourself, spending literally 200 rubles.
To do this, we will need to purchase a windshield wiper relay with an adjustable pause. For example, for Lada Kalina, Priora, VAZ-2109, VAZ-2114, IZH-2126 cars, relay 723.3777-01 or 54.3777 is suitable for this. It costs about 200 rubles.
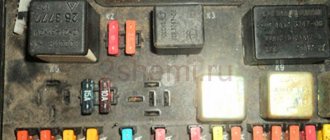
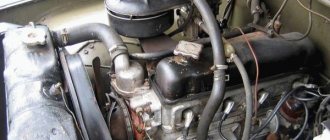
A windshield wiper relay with an adjustable pause is installed in a standard location in the mounting block, instead of the standard windshield wiper relay. To do this, open the cover of the mounting block, remove the old relay, and in its place install a windshield wiper relay with an adjustable pause.
The pause is adjusted as follows. You need to set the windshield wiper mode switch to the “Intermittent mode” position - the standard pause of the windshield wiper operation will be set, 5 seconds between sweeps of the blades.
To change the pause, you need to turn off the wipers and, after maintaining the required pause, turn on “Intermittent mode”. The new pause value will be set.
For example, if we need a pause between sweeps of 10 seconds, we need to turn the wipers on to intermittent mode, then turn them off, and after 10 seconds turn back to intermittent mode. That's it, now the wipers will automatically turn on every 10 seconds.
Advantages of a windshield wiper relay with an adjustable pause over a standard one:
- pause range from 1 to 70 seconds;
- When water is supplied, the movement of the brushes begins with a delay of 0.5 seconds, which allows you to accumulate a sufficient amount of water on the windshield before the first stroke of the brushes and avoid friction on dry glass;
- if you briefly turn on the water supply to the glass, the wipers make 3 strokes (with a standard relay - 4 strokes, the last one usually goes over the dry glass and scratches it), if you hold the water supply, the wipers make 4 strokes;
- If you turn on the washer for literally half a second, the wipers only make 2 strokes.
You get used to this function literally right away - it’s unclear why AVTOVAZ doesn’t install such relays right from the factory.
"Niva Tuning 24/7" - values every client
Mast Have (and in Russian, every car owner should have)! A convenient thing, installed instead of the standard relay, no modifications required.
Saves time and nerves. Clean glass from water - according to Your Rules! Reduces brush wear. Reduces the risk of obtaining characteristic “grinding” marks on the windshield.
Description
The pause varies from 1 to 70 seconds and is determined by the driver based on the degree of contamination of the car windshield.
There is no need to change electrical wiring or make additions to the front panel of the car in order to “teach” your car to adjust the wiper pause.
Each product is supplied with detailed instructions for installation and use.
When purchasing it, there is no need to go to a workshop for installation. Any car enthusiast can take advantage of the new relay capabilities!
Installing the Wiper Interrupter
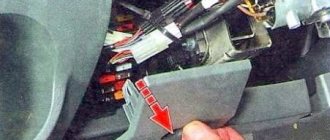
Disconnect the wiring harness from the wiper stalk by opening the 6-pin connector located behind the instrument panel or inside the steering column housing.
Connect the relay to the resulting gap in the harness using the 6-pin relay sockets.
Using the quick connect clip, connect the free wire from the relay to the wire connecting the steering column switch to the washer motor. This is one of the conductors of the 2-pin block of the steering column switch, the potential of which, when the washer is turned on, changes from +12 V to 0 V or vice versa (depending on the specific brand of car).
Using the hole in the housing, mount the relay to the vehicle. The relay is ready for operation.
PAUSE ADJUSTMENT
Move the windshield wiper mode switch to the “Intermittent mode” position - a standard pause of the windshield wiper operation will be established (approximately 4 seconds between sweeps of the blades).
To change the pause, move the switch to the “Off” position and, after maintaining the required pause, move it to the “Intermittent mode” position. The new pause value will be set.
The pause can be reduced. To do this, maintain the required time interval in the “Intermittent mode” position, then move the switch to the “Continuous mode” position and, during the first stroke of the brushes, back to the “Intermittent mode” position. The new pause value will be set.
When washing glass, the brushes make 2-4 strokes after the washer is turned off (a larger number of strokes corresponds to longer operation of the washer).
The pause can be changed at any time by repeating step 2 or 3.
Modification of the windshield wiper control relay.
I won’t say “for all cars” of the VAG concern, but on VW there are 2 types of windshield wiper control relays. Some have the number “19” written on the end, while others have “99”. Those that are “99” are very cool! In intermittent operation of the windshield wiper, they allow you to adjust the pause between brush strokes from 6 to 20 seconds. But there are none. That is, there is, but little and expensive. But relay “19” - there are many of them and they are cheap, but they have a constant pause value. 6 seconds.
However, there are ways to somewhat eliminate the discomfort in the soul of the owner of a car with a low-grade relay. The simplest one is to buy a “99” relay and plug it in instead of “19”. It will fit without any modifications. But then the car will not understand how dearly you love it and what you are ready for for it.
Therefore, you can pick up a soldering iron, screwdriver, knife or scalpel, scatter a bunch of radio components, pencils, erasers and pieces of paper on the table and use all this junk to give the relay number “19” a more user-friendly interface.
We will teach him to love his new homeland (in the person of the owner of the car), and at the same time cherish the windshield! Yes, in a way that even a sophisticated “99” relay cannot do. The fact is that the Germans did not think of making a sufficient pause between the moment the windshield washer pump turned on and the moment the windshield wiper turned on. Therefore, the brushes begin to rub on the dry glass. You know what happens because of this. The glass gets scratched, the brushes deteriorate, and dirt is difficult to wash off. But all this can be fixed...
What are we going to fix?
Relay, of course. But before we start tearing the lid off it, I want to thank HarryGolf (Alexander Ponomarev) for the idea published in the conference (https://www.auto.ru/wwwboards/vw/0544/171322.shtml). And later, in correspondence, he gave another great idea - to add a delay to the rear windshield wiper (look at my page in the spring - by then, you’ll see, I’ll have finalized it and described everything. And then the windshield wiper will thaw...). So, we remove relay “19” from the fuse panel. Let's see what's written on it.
If it says “321 955 531A, SIEMENS, 5WK166”, then everything is absolutely fine. I remade just such a relay and everything that is written below is a direct guide to action (with one caveat). If there is anything else there, then the following should be taken as a concept, that is, you will need a more creative approach to the revision process.
Promised disclaimer: I do not vouch for SIEMENS, which can (without warning either me or you!) make changes to the relay circuit and not change anything in the inscriptions on the cover.
Basic basics.
“There is nothing more practical than a good theory!” (Niels Bohr)
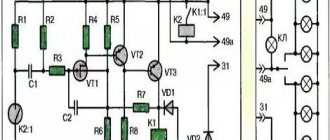
You won't find anything unusual under the relay cover. It will be necessary to find and adjust two timing chains. The first (let's call it the “pause circuit” or “pause”) is the delay in turning on the windshield wiper in the intermittent mode of operation of the windshield wiper, and the second (let's call it the “delay circuit” or simply “delay”) is the delay in turning on the wiper when the washer is turned on. Even a novice visitor to the “Skillful Hands” club can do the task.
I can say with almost 100% confidence that the pause circuit necessarily includes the largest (both in terms of value and dimensions) capacitor inside the relay. The delay circuit is its closest deputy. Yes, most likely, there will only be two capacitors in the relay, hardly more. We can also say about the delay circuit that it will start from the contact (narrow contact in the corner of the relay) with the designation I (although it should be marked as J; on VW diagrams, the connectors of the washer and delay circuits have the letter J in the designation!), then it will be a resistor that limits the charging current of the capacitor (that is, this resistor will determine the delay time of interest to us between turning on the pump and the start of the wiper operation; in my diagram it is designated R10), the capacitor itself (if the designer was a mentally normal person, then the other terminal of the capacitor will go to ground; in my diagram it is designated C1) and a resistor that limits the discharge current (it determines how many working strokes the windshield wiper will make after the washer is turned off; in my diagram it is designated R8). That's the whole chain. After applying voltage to the washer pump, C1 is charged through R10. After some time, the voltage on it becomes sufficient to open transistor V4. The transistor opens and the wiper blades begin to move continuously. Charging of capacitor C1 continues until power is removed from the pump. After removing power from the pump, C1 is discharged through R8 and the emitter junction V4. Until the voltage across the capacitor drops to a value at which V4 closes, the wiper will continue to operate.
To completely put an end to ideology, we need to say a few more words about the pause chain. So I will say that the description made by HarryGolf did not fit the pause circuit in my relay at all. In turn, if my description does not fit “like a native” to your relay, be vigilant. And I will also say that the windshield wiper diagram in the description of the WV Passat B3/B4 published by TechnoBook is incorrect! In fact, the contact group in the wiper gearbox has THREE contacts, not two. So be vigilant again, many, many more times...
What to do before you do?
Remove the cover from the relay. The task is not difficult. Next, we estimate how much what was revealed before our eyes corresponds to what I had.
What did I have? Here's what:
All symbols on the relay diagram correspond to the symbols on the relay board. Designations that I am not sure of (the design elements prevented me from seeing their designations on the board) are indicated by the symbol * (for example, R6*). The on-board network diagram is shown conditionally, so that it is clear who turns on what, when and where. The pin designations in connectors T4, T5 and the relay connector correspond to the VW diagrams. The designations for the steering column switch and wiper relay (E22 and J31) also correspond to VW diagrams and specifications. The limit switch contacts in the wiper gear are shown with the motor stopped (or, in other words, the blades have returned down into place and the wiper motor has stopped). SW1 - washer switch (pump power circuits not shown), SW2 - intermittent operation switch. SW1 and SW2 are independent and SW1 has, so to speak, priority: regardless of the state of SW2, when SW1 is turned on, the glass will be splashed and the brushes will work as I described above. And when SW1 is turned off and the washing/cleaning process is completed, the circuit will work in accordance with the position of SW2.
What was done and why.
The value of resistor R10 has been increased. Now it is 22 kOhm. I like it so. You can temporarily solder instead of R10 a 15 kOhm constant resistor and a 15 or 20 kOhm trimmer (or variable) connected in series. Select a delay that suits you (I drove for 4 days, trying different options) and replace the temporary circuit with a permanent resistor with the closest value. Or leave it in place, in case tastes change, a trimmer (variable? With a beautiful handle? On a dashboard? Yes, you are a maniac worse than me!). Just be creative in securing this trimmer so it doesn't wobble. I must admit, I was going to do this... Take a multi-turn trimmer (say, SP5-1A), secure it to soldered stands or “cold welding” with the slot towards the driver... Drill a hole in the relay cover opposite its slot... But I thought better of it in time!
Be prepared for the fact that the number of brush strokes will decrease after the washer is turned off (capacitor C1 now takes longer to charge and may not have time to fully charge while the washer is running). If this does not suit you, increase the resistance of resistor R8 - then it will take longer to discharge.
Now about the pause. First you need to disconnect the existing resistor R7*. It is located under the relay, and unsoldering it is problematic. Or lazy. And there's no reason to. It's easier to cut the path. Using a knife, cut out a millimeter-long piece from it. No more. Instead of R7*, R7′ and R7 will work." R7′, a constant resistor with a nominal value of 20 kOhm (10 kOhm is possible, but, in my opinion, this is not enough) limits the minimum pause value (I like about 3 or 4 seconds; otherwise it’s easier to enable continuous operation), and variable resistor R7" will determine the maximum pause value. I have a 100 kOhm variable resistor as R7.
Structurally, the pause regulator is designed as follows: two MGTF wires are soldered to the contact pads R7*, which are brought out from under the relay cover (two small cuts are made: in the board with the parts and in the cover) to the connector (“female”, 2 contacts), reinforced with electrical tape on the relay cover, on its lower side, closest to the floor of the car. One of the plugs on the dashboard (next to the rear window heater switch and the fog lamp switch) was removed and a variable resistor R7 was embedded into it.” R7′ is soldered to its pins. Short wires go from these resistors to the connector (“male”, 2 contacts) mounted on R7.” This allows, if necessary, to remove the plug with resistors like a regular switch. A wire with connectors is laid from the resistors to the relay; on one side (near the relay) it ends in a “male”, and on the other side (near the resistors) it ends in a “female”.
Read more about the details.
Resistors R7′ and R10′ have a power of 0.25 W. Type - any.
Resistor R7" can be taken of any type. But, if you are a connoisseur, I recommend taking it with a logarithmic (group B, (lat. register)) dependence. Then at first the pause will increase slowly, and then quickly. And if you are a connoisseur with opportunities, then I advise you to look into, say, “Chip and Dip” and think about the available choice.
You can take a slide resistor, type SL-20V1-A100K. Their case length is 34 mm. In a standard plug, you only need to cut a slot for the engine (the distance between the side walls is 33 mm plus a little; this resistor fits into the plug and snaps into place as if it had been there all its life). And pick up a poncho pen for it. The handle will probably have to be attached with glue, because the wall of the plug is thick and the height of the slider is small. Well, it's not scary. But resistors of this type are only available with a linear (group A) dependence. Pros: easy to install, nice looking.
Another option: take a resistor of type R12-N2, choose a handle for it, or make a handle yourself. Advantages: they come in type B; The regulator can be made in a true VW spirit, just like the brightness control of the instrument panel or the headlight range control are made. It might even be possible to use the brightness control knob (with a little modification). Don’t even try the headlight range control - its design is very specific, there’s nowhere to plug in the resistor. The rotation angle is limited). You can attach a resistor of this type to a textolite (for example) adapter glued to the plug.
And another option: take a resistor of type R17-N1-B and also with a pontoon handle. Advantages: ease of installation. This is exactly what I have implemented. On the car, in the dashboard (next to the rear window heating and rear fog lamp switches) there was a loose plug, and in addition, for some reason, someone had drilled a hole in it with a diameter of 18 mm. And not in the center yet. I suffered aesthetically for a long time and thought - why? But it turned out that 18 mm is what we need. The resistor nut and the excessive height of its bushing fit perfectly into this hole! I just cut and glued a suitable (21mm x 24mm) panel from suitable plastic. The hole for the resistor has a diameter of 7 mm. The remaining space on the side can be used for some kind of LED indicator or, if you like, a “beacon” to find the pause adjustment knob in the dark. And I came across the handle itself with a diameter just the size of the plug. The hole is not visible. There is another handle, even larger in diameter. It will be more convenient to twist, but the dimensions of the unit will be... Mmmm... Unstylish...
More information about all these resistors can be found on the website of the Chip and Dip store, https://www.chip-dip.ru/shop/showgroup.xtml?gid=10702. Please also note that the tolerance for the listed variable resistors is +/- 10%. And it would be better for you and me to be in “+” (but I got in the minus...). So go to Chip and Dip with a tester. Or ask them there. Take five or ten resistors from the seller and measure them. Don't be shy, the customer is always right!
More about the details: I made the connectors from PLD and PBS connectors purchased in Chip and Deep. Strictly speaking, they are intended for soldering into printed circuit boards. PLD is a “comb” of many pairs of pins. The vapors can be separated well with a knife, just be careful not to kill the table - the plastic is fragile. The cut off pairs tend to fly away - again, due to the fragility of the plastic. PBS sockets have the same pitch as PLD and come in one, two, etc. pairs of contacts. So I bought an 18-pin PLD and two two-pin PBS.
Also about the details: if you need an in-depth study of your relay, then a program for determining resistor values based on the color markings applied to them may be very useful to you. This program can be downloaded here: https://remont.nm.ru/soft/resist.zip.
What's missing from this soup?
Backlights.
And the dependence of the pause size on the speed of the car. If you do it, tell us how you did it!
Instead of a conclusion.
- Do you want to criticize? Praise first! (Hunter from the movie “An Ordinary Miracle”)
Send all questions, comments and suggestions to me. I tried very hard not to violate anyone's copyrights. Well, except that I distorted the quote from “An Ordinary Miracle” - I don’t remember it word for word, sorry.
If you are going to reprint my creation, make a mention of me. Or my page. I will be pleased...
Best regards, Dmitry Orlov.
PS Some older browsers are not able to show you pictures in *.PNG format. If you are one of the unlucky owners of such a browser, but are unable to either part with it or persuade it to renounce heresy (and this makes sense! The relay circuit in PNG format takes 16Kb, and it is made from 178Kb JPG; and, if necessary, is converted back to the same size JPG, i.e. the picture is stored in PNG without loss of quality!), then try saving the entire page, and then view it using, say, ACDSee. Or WinWord in general, if when installing it on your computer you selected to install all graphic file converters. Or write to me - I will send you a big JPG.
Standard relay types
The windshield wiper relay in modern cars most often has 2 operating modes. During intermittent swings there is a pause of a certain duration. It doesn't exist during constant operation. The default pause period is 4 seconds.
Many drivers have encountered a situation where it is drizzling lightly and the windshield wipers glide across almost dry glass, leaving streaks of droplets. This reduces visibility. To solve the problem in the car without adjusting the length of the pause between brush strokes, drivers resort to one of two methods.
The first approach is to turn on the brushes manually. The driver is forced to start the windshield wipers approximately once every 20 seconds and then stop them. This is especially distracting on a long trip. Inattention can cause an accident. Therefore, this option is considered not the best way out of the situation. The second approach is to redesign the windshield wipers. Otherwise, you just have to put up with the existing work of the brushes. You will have to change your wiper blades much more often.
Installation
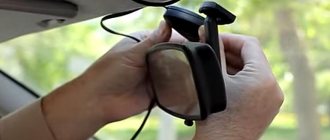
By connecting the device to the car (the same three contacts from the photo at the beginning + installing the handle itself) and making sure that it is fully operational.
. I carefully printed it to avoid any possible short circuits:
After that, I carefully put it all away in the space behind the fuse and relay block under the cover (on my Vectra there is a compartment at the back of the block where such things fit perfectly and there they are protected from getting stuck inside the dashboard, because they are securely pressed and fixed).
As a result, all that reminds me of the presence of a new convenient function in my car is a new knob with a wheel for adjusting the pause of the intermittent wiper mode:
Device selection
If you want to replace a standard part with a new brush control device, you should study the rules for choosing such devices. The most popular today are the windshield wiper relays for VAZ-2107, 2109, 2114, IZH-2126 and other domestic cars models 54.3777 and 723.3777-01. The first device is produced by Russian Partner LLC, and the second by Energomash CJSC. The cost of the presented devices is about 150-170 rubles.
The designs shown are suitable for vehicles with a new fuse box. However, this is not possible in all models. For domestically produced cars with an old fuse block, a relay model 39.3777-03 (“Russian partner”) has been developed. For foreign cars with a new contact block, you should purchase model 723.3777-05 (Energomash). To correctly select the presented design element, it is better to consult with an experienced specialist.
Installing a new relay
Having studied where the windshield wiper relay is located, as well as the rules for choosing it, you can independently replace it with a new part. To do this, you need to open the cover on the wiper mounting block. The old relay was also removed from here. Next, the new part is mounted in the place intended for it.
To adjust the pause, you must follow a certain procedure. The wiper switch must be set to intermittent mode. In this case, the pause between swings will have a standard value. To set a new interval for the windshield wiper system, you must turn off the wipers. Next, the driver maintains the required pause, for example 8 seconds. Then the wipers come back on intermittently. The system remembers the required interval and will work according to the user settings. In this case, the interval will be 8 seconds.
Used relay
A windshield wiper relay with an adjustable pause for VAZ-2110, IZH, Priora and other car models does not have to be new. On sale are control units that have already been installed in one or another brand of vehicle. There are quite a lot of high-quality relay models presented in this category.
The advantage of used types of control units is that they are completely ready for installation. Most often, such designs have undergone high-quality modifications. In this case, installing the relay in the seat will be much easier. The connection is made using prepared wires. The location for installing the relay will not need to be re-equipped.
Experts say that used designs are largely intended for domestic car brands. Owners of foreign cars are recommended to purchase new units. In this case, the modification of the design will be optimal for the corresponding brand of car.