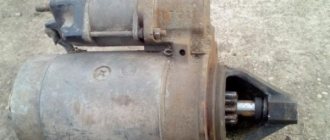
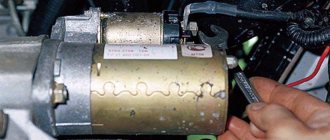
Starter malfunctions
What is the approximate service life of a starter?
The average value is 5 years or 120 thousand km. How long the starter lasts directly depends on the operating conditions. For example, if you drive short distances in urban areas and constantly start the engine, the starter will quickly fail. I’ll tell you about the signs that accurately indicate a device malfunction. These are symptoms such as:
- A specific crackling sound is heard.
- There is a delay in starting the engine after the driver turns the ignition key.
- The starter motor can be heard starting, but there is no sound of the engine running.
- There is no action after turning the ignition key.
- The starter operates after the engine starts.
What possible malfunctions can occur with the starter?
- Poor contact. This is a common breakdown, and the driver can notice it when starting the engine. In this case, you should check the device's mounting and contacts.
- Magnets may fall off. This applies to modern devices. Here it is better to entrust repairs to experienced auto repairmen.
- Wear of support bushings. In this case, the armature will seem to “dangle” and there will be no full contact of the brushes with the commutator. In this case, there will be sparks, the brushes will burn and wear out. In this case, you need to replace the brushes and support bushings, and groove the commutator.
- Wear of rollers in bendix. In this case, it is towed. The bendix needs to be completely replaced.
- Solenoid relay malfunction. Most often, nickels burn. The copper melts in them, and the nickels are soldered to the contacts. In this case, even after starting the engine, the starter will continue to work. All this drains the battery a lot. Therefore, here you should disconnect the wire from the battery as soon as possible, remove the device and replace the solenoid relay.
If the crankshaft rotates slowly, the reasons for this are:
- High viscosity motor oil.
- Low battery charge.
- The wire contacts have oxidized.
If the starter runs too long, it is due to a stuck ignition switch or problems with the contacts.
If the starter does not start when you turn the key, the reasons for this may be the following:
- The battery is discharged or broken.
- There is no contact of the ground wire with the battery or between the winding and the collector.
- The anchor is worn out.
- The brushes do not adhere to the commutator.
- Solenoid relay is faulty.
- The device control connector is disconnected.
- In automatic transmission, the selector is not in position N or P.
- The gearbox switch is faulty.
If the starter rotates very slowly, this is indicated by the following faults:
- The battery does not work or is low.
- Bushings are worn.
- The wire between the battery and the starter is faulty.
- Damage to the solenoid relay.
- The stator or armature winding is faulty. The mechanisms must be replaced.
- Poor contact of the armature or stator winding with ground.
- The brushes have poor contact with the commutator due to wear or incorrect position.
- Commutator burning.
The starter works, but the engine does not:
- Overrunning clutch worn.
- Parts in the gearbox are broken.
The starter rotates together with the flywheel:
- Solenoid relay is broken.
- Failure in the contact group of the ignition switch.
There is no click of the solenoid relay:
- Low battery charge.
- Contacts or coil of the solenoid relay are burnt out.
- The contact on the positive terminal of the battery or starter has oxidized.
- There is a malfunction in the ignition switch component.
- Short circuit to ground in the coils of the solenoid relay. Here it is better to replace all the parts.
- The relay armature mechanism is stuck.
If the crankshaft does not rotate the starter armature, then the probable causes of the breakdown are:
- Towing the freewheel.
- Jamming when moving parts along the screw thread of the shaft.
- Broken clutch release lever.
- Malfunction of the clutch spring or drive ring.
If loud noises appear when starting the engine, you should check the fastening in the starter parts.
If a gear grinding noise occurs in the starter, you should check the switch contacts, the gear travel adjustment, the drive device spring, and the flywheel ring teeth. If the ring gear is damaged (it is often made of plastic), then it is better to replace it with a metal one. There is also a possibility that the solenoid relay is stuck.
Video: Checking a car starter, all methods and breakdowns
This video is suitable for beginners; an experienced mechanic talks very interestingly.
VAZ 2106 starter does not start
What signs indicate that the starter needs to be repaired or is time to be replaced? Why does the starter sometimes not start?
These questions have their own answers:
- The relay functions without problems. However, the anchor does not respond or makes slow rotational movements. Solution ! As a rule, this is due to burning of the collector. It is also necessary to pay attention to the winding. It must be complete. It is also possible that the relay fastening elements are loose, there is a short circuit in the commutator, the brushes are stuck or have become completely unsuitable for further use. However, the reason may lie in a discharged battery.
- The starter responds, but the armature relays do not function. Solution ! Often the whole point is that the anchor is stuck. In this case, it is worth checking how the tips are fixed. Is there a short to ground and what is the condition of the wiring?
- The armature rotates, but problems arise with the crankshaft. Solution ! It's worth checking the buffer spring. Most likely it's broken. Some components of the coupling may be damaged.
- Powerful noises are heard. This is often the result of damaged bushings and gears.
- In turn, the starter turns, but does not start. You need to take a closer look at the return spring. The device may also be skewed. It is also possible that the relay and drive handle are jammed.
Solenoid relay design
To understand how to identify a malfunction, you first need to understand the design and operating principle of the retractor relay, as well as the starter relay, since they are located in the same housing.
So, there is a housing, inside of which two coils are installed - retracting and holding.
On the one hand, the body is covered with an ebonite or plastic cover. Three terminals for connecting wiring are installed on the outside of this cover.
One of the terminals is intended for connecting the “positive” wire from the battery, the second is for supplying electricity to the starter motor, and the third is for connecting the relay to the ignition switch.
On the inside of the cover there are two contact plates of the “positive” terminals.
Schematic diagram.
Inside the housing with the coils there is an armature, spring-loaded on one side, and a starter relay rod.
On the outside of the armature there is an eyelet, with which it engages with the Bendix fork and gear.
Lada 2107 › Logbook › Replacing the traction relay (retractor) starter
Hello everyone! As you may have guessed from the title of the post, something has come up for me again. I came out of work like this last night with a lot of plans in my head and got into the car. I start the engine, but it doesn't start. There is a retractor click, and it’s kind of different, but there is no “Dryndygydyn”. Just silence. How come it was still normal?! The first thought was that the battery was drained by an incorrectly connected new device, but experience spoke otherwise. Checking the contacts did not give any results. Well, there's nothing to do. I remove the battery, move the washer fluid reservoir to the side, remove the heat-reflecting shield and take out the starter. In fact, it’s not that simple, you need to get a little tricky)
It is clear that a “patch” has fallen off the back cover of the traction relay or, as it is also called, the retractor. Either he ejected himself, or I “helped” during the removal. The first option is quite likely judging by the dust on the cut. The second option also has the right to life, judging by experience) Upon closer inspection, it turned out that the plastic (or something) of the back cover, under the influence of temperature from a nearby outlet and time, lost its properties and became brittle. That's why he flew away.
I closed everything and stomped towards the nearest spare parts store where this relay was purchased:
I didn’t bother about the manufacturer, I didn’t have time for that. And everything was done quite well. Even the nuts and washers were all present. There’s one thing I don’t understand: how can it be forbidden to modify something in a car that initially contains all sorts of different things?! For example, here is the same starter: the starter itself is 21213, geared, and the retractor is from 2110. And this is just one example)) Just in case, I compare it with the previous retractor. It seems like this:
(K) Problems with starter | Topic started by: Ananias
Alexander (Spyridon) Remove the starter and clean it, look at the place where the bendix moves.
Ivan (Kellagh) cleaned)
Ivan (Kellagh) I just don’t believe what people are saying, like the flywheel is twisted like shit and could break a tooth, like it comes into contact with the Bendix, I think it’s nonsense, there’s almost 1.5 cm difference
Alexander (Spyridon) If the flywheel was not screwed in properly, then the engine would rock like a child. Just get a starter from someone and try installing it.
Source
Starter solenoid relay
The design of the relay in the starter of a VAZ 2106 car is considered to be quite simple, and every even slightly enthusiastic motorist can easily disassemble and assemble it independently. However, removing and then reinstalling the solenoid relay turns out to be an impossible task for many. However, professionals can handle this without difficulty.
If you suspect that the solenoid relay in your car is broken, you should definitely check it. The relay in the VAZ 2106, as in other car models, works as an electromagnet. In order to check its serviceability, you need to close it with a metal object, for example, a screwdriver. If the starter starts to rotate, then the fault is indeed in the relay. If you hear clicks from the retractor relay, but the starter does not start to rotate, then you need to look for the breakdown in it itself.
Why might the starter relay stop functioning? There may be several reasons. Firstly, materials can deteriorate due to age. Secondly, the winding may burn out. And finally, thirdly, the nickels inside the relay itself can burn out.
VESKO-TRANS.RU
AutoNews / Reviews / Tests
Where is the Starter Relay on the VAZ 2106
Checking and repairing the starter electromagnetic relay
Many people have apparently had to find themselves in a situation where their car, for unknown reasons, did not want to start. If the electronics are fine and the battery is working and charging, then it looks like the problem is with the starter. If the next attempt to start the engine fails, then it’s time to prepare for repairs.
The bottom line is that the starter is not complex in design, and if there is an abstract, then at least some motorist will be able to disassemble and reassemble it. But even with this conventional design, removing and reinstalling the electromagnetic relay turns out to be very problematic for many.
First you need to diagnose the part and determine the location of the failure. The mechanic's eyes were the first to catch the ignition switch and relay under the hood of the car.
If the starter is silent when you start the engine, there is probably a breakdown in these places. If at the moment of starting the starter roars, clicks, noises, then the center of the breakdown is located in a different place.
So, just in case, check the battery and replace it if necessary. If the problem persists after replacement, a more complex repair will be required.
Car starter: main purpose
Sooner or later, every car owner, regardless of its make and model, has to face the problem that his vehicle refuses to start. The first thing, naturally, is to check the fuel level, battery charge, and electronics. If all this does not cause any complaints and doubts about serviceability, then most likely the problem is in the starter. After all, successful engine starting depends on it.
Currently, as a rule, relays 35.3708 with an end-mounted collector are installed on cars of this model.
However, on some copies of the VAZ 2106, starters made in Germany or Belarus may be installed, since they can be interchanged with starter 35.3708.
At an earlier time, approximately in the 70-80s, the ST-221 starter was also installed.
How to install the VAZ-2110 starter solenoid relay?
- We remove the terminals from the battery, put the gearbox in neutral, otherwise when the starter is turned on, the car may start moving.
- We purchase a four-contact relay with open contacts, three wires with “mothers” with which we will connect the relay to the retractor starter and plus to ground, of which: two 25 cm each - on one “mother” at both ends, one with a terminal at one end and a ring for an M8 bolt on the other, also 5 cm with a terminal and a ring for M6.
- We connect the relay with the retractor as follows:
- Using one nut to ground, we tighten the wires, with the second we secure the relay, plus it will come from the power stud:
Signs of a generator malfunction
Generator faults are not always easy to identify. Some of them (the so-called “floating” faults) are determined only on a special stand.
But if you notice that the headlights have become dimmer while the engine is running, and that extraneous noise interferes with the normal sound of the running engine or that the battery is quickly discharged, then it’s time to contact the experts. Because it is better to prevent a malfunction by repairing the generator in a timely manner than to ruin your day one day with an unexpected breakdown.
Recently, it has become very convenient to contact specialized companies whose specialization is the repair, maintenance and sale of starters and generators. Modern equipment, combined with qualified personnel and a large selection of spare parts, will allow you to eliminate any malfunction in just a few hours. And diagnostics with disassembly and analysis of the degree of wear of parts will help to quickly determine the degree of performance and carry out restoration work.
However, you can try to diagnose and eliminate some of the causes of generator malfunctions yourself.
If the battery in the car is not charging, then first of all you need to check the tension of the alternator belt - the belt should be tensioned without sagging. This, of course, can be done by eye, but it is better to use a dynamometer: if you pull the longest branch of the alternator belt with a force of 10 kgf, then it should bend no more than 10-15 mm.
On most machines, the tension of the alternator belt can be adjusted by loosening the nut securing the alternator housing to the adjusting bar and using a pry bar to move it away from the engine. After setting the required belt tension, tighten the generator mounting nut back.
If the tension of the generator belt is normal, then most likely the voltage regulator relay needs to be replaced. On older cars it is a plastic box screwed to the front fender mudguard, but in modern cars the regulator is built directly into the generator itself.
To replace the relay-regulator in the generator, you must first unscrew the two mounting screws, disconnect the contacts, and then remove the regulator along with the brush assembly from the generator housing.
Check the slip rings: burnt ones should be cleaned with fine-grained sandpaper and wiped with a cloth soaked in solvent.
For the first time after installing a new regulator, the voltage may be slightly different from the nominal one. When the new generator brushes get used, everything will return to normal.
Starter malfunctions
As you operate a vehicle with a starter, problems of various types may occur. Each breakdown manifests itself with its characteristic symptoms, which allow you to quickly and correctly identify the problem and eliminate it in a short time.
The starter works, but the engine does not start
If you hear that the starter is functioning, but the engine does not spin, then the problems may be of the following nature:
- Worn overrunning clutch gear teeth. This leads to the fact that there is no engagement with the flywheel teeth and rotation does not occur. Tooth wear is normal. However, the failure of this part can be accelerated by the use of thick motor oil, incorrect operation of the relay, or prolonged cranking of the starter after the engine has already started. When the teeth wear out, you will hear a characteristic buzzing sound from the device without any further action. Teeth can also wear out on the flywheel, which is quite rare. If the starter gear breaks, the Bendix will need to be replaced.
- The fork itself, which engages the gear with the flywheel, may fail. In such a situation, you will hear that the relay has activated, but the drive sprocket has not moved out of its place. With such a problem, the starter will turn, but without transmitting torque to the flywheel.
- It is possible that the Bendix drive gear may be misaligned, such that it will not fully engage with the flywheel. This happens when the Bendix spring supporting the gear is deformed. If in such a situation you try to continue to start the engine, the teeth on the bendix or on the flywheel itself may break off.
- It may be that the starter is unable to spin the crankshaft until the start occurs. The malfunction comes down to problems with power supply (wiring, brushes, oxidized battery terminals). In such a situation, the starter will simply not have enough voltage due to its drawdown.
If the bendix wears out, the starter will turn, but the engine will not be able to start.
The starter clicks but doesn't turn over
If the starter makes clicking noises, but nothing else happens, then the reasons should be looked for in the following:
- With one powerful click, you can judge that the retractor relay is working, but the force of this device is not enough to turn the motor. If several unsuccessful attempts have been made, the starter will need to be dismantled for further disassembly and troubleshooting of parts. The probable causes of this phenomenon may be wear of the starter brushes and bushings, short circuit or breakage of the coils, poor contact of the power wire, problems with the retractor or bendix.
- With several clicks, the fault lies in the solenoid relay, unreliable contact between the starter itself and the relay or ground. Before you begin repair work on the starter, you need to check the reliability of the connections, starting from the battery and ending with connecting the wires to the starter.
- Bendix malfunctions (breakage of teeth or fork).
Video: the starter clicks but does not rotate using the example of a VAZ 2110
https://youtube.com/watch?v=M4lhK1TG-ZM
Crackling sound when turning on the starter
There are situations when, when trying to start a car engine, the starter makes sounds in the form of a crackling or grinding sound. In this case, malfunctions may be of the following nature:
- The fastening of the starter to the power unit has become loose, resulting in vibration.
- The bendix is worn out.
- Lack or lack of lubricant on the shaft, which led to difficult movement of the bendix.
- Broken flywheel teeth.
The starter does not turn on
If the starter does not respond to turning the key in the ignition switch, then the reasons should be sought in the following:
- Problems with the solenoid relay. To determine that the problem is in this element, it is necessary to apply voltage directly from the battery to the starter power terminal. If the motor starts to crank, then the reason is obvious - the traction relay is faulty. The contact pads in it quite often burn out, which will require disassembling the device and cleaning the contact elements.
- Broken ignition switch. Sometimes the contact group fails, which can be replaced without completely replacing the lock.
- Problems with power supply. It is necessary to check the entire circuit from the voltage source to the consumer.
- There is a short circuit in the winding, which will be indicated by a characteristic burning smell and the appearance of smoke. In such a situation, the starter must be dismantled and the windings replaced or the old ones rewound.
Due to burnt contacts in the contact group of the ignition switch, problems with starting the starter may occur.
Starter disassembly and repair
The starter on the VAZ 2106, like on all other cars, is a rather complex device, so failure of one of its components can lead to complete inoperability of the device itself. Very often, in case of any breakdown, owners try not to carry out repairs, but to buy a new starter right away, although in fact it is enough to replace one of the parts and it will serve as before again.
Servicing the solenoid relay - just a nickel
One of the symptoms of burnt retractor nickels is a problem starting the engine when it’s hot, that is, the engine can start normally when it’s cold, but when the engine is warm, the starter refuses to turn.
This procedure is very simple and is best performed with the device removed from the vehicle. To do this you will need the following tool:
- Open-end wrench 13
- Deep socket head for 8
- Driver or ratchet handle
You must first remove the retractor, and then unscrew the three nuts, which are clearly shown in the photo below:
Then you can press the bolts with your hand so that they come out:
And after that you can remove the cover, which is clearly demonstrated in the picture below. Just keep in mind that it cannot be completely removed, as it is held in place by a thin wire, so be careful not to use unnecessary force:
In the center, as can be seen in the top photo, there is a copper plate. It will just need to be cleaned with fine sandpaper. But that is not all. Now we take a 13mm wrench and unscrew the two nuts to remove those same nickels:
After which they can be taken out from the inside:
Also, both of these nickels must be cleaned with sandpaper until shiny. Here is the result of the work done:
And now you can install everything in its original place in reverse order.
Replacing starter brushes on a VAZ 2106
Depending on the design of the device, the brushes can be closed either with a lid or with a so-called bracket (clamp), as was the case on my device from 2101. In any case, there will be no difficulties in getting to them. In the first case, it will be necessary to unscrew two bolts on the cover, and in the second there is only one, which tightens the clamp, as shown in the photo below:
When the bolt is unscrewed, the clamp comes off on its own and we gain access to the brushes:
Now, using a Phillips screwdriver, unscrew the bolt securing the brush from any window (4 brushes in total):
Then you need to bend the spring that presses the brush and remove it by hand, or pry it off with a thin screwdriver if it is tight:
And this is what it looks like after being removed from its seat:
We carry out the same operation with the remaining 3 brushes, which are dismantled in the same way. Installation proceeds in reverse order.
How to disassemble the VAZ 2106 starter with your own hands
Using a 10 mm wrench or socket, unscrew the two nuts on the cover:
Then remove the cover from the studs, as shown in the photo:
After this, you can remove the winding along with the housing, since nothing else holds it:
As you can see above, the starter is disassembled into two parts: the winding with the housing and the rotor. To replace the winding, you will need an impact or power screwdriver to unscrew the bolts on four sides of the housing, as clearly demonstrated below:
After which the winding is removed without any problems:
To remove the anchor, you need to use a screwdriver to bend the plastic bracket that holds it in engagement:
After which it can be removed without any problems:
And to remove the drive coupling, you need to pry off the retaining ring with a thin screwdriver:
And easily remove the coupling:
Here is the whole process that had to be done to disassemble the starter on a VAZ 2106 car. To do this, you needed a tool, which is shown in the photo below:
We assemble and replace all parts in the reverse order of removal.
vaz2106-remont.ru
Starter retractor relay VAZ 2106
Many people have probably found themselves in a situation where their car for some unknown reason did not want to start.
If everything is normal with the electronics, the battery is working properly and charged, then the problem is probably in the starter. If subsequent attempts to start the engine fail, then it’s time to get ready for repairs. The bottom line is that the starter is not complicated in structure, and with instructions, any motorist can disassemble and reassemble it. However, even with such a simple design, removing and then installing the solenoid relay turns out to be very problematic for many.
The first step is to diagnose the part and identify the location of the breakdown. The first thing a mechanic notices is the ignition switch and the power relay, located under the hood of the car.
If the starter is silent when starting the engine, then most likely the breakdown lies in these parts. If at the moment of starting the starter rattles, clicks, or makes noise, then the source of the breakdown is located in another place.
Just in case, check the battery again and replace it if necessary. If after replacement the problem does not disappear, then you will have to proceed with more serious repairs.
What to do if the starter and solenoid relay do not turn on.
First of all, we check the charging of the battery and recharge it if necessary. Next, you need to check the condition of the battery terminals, check their tightness and, if necessary, clean them from oxidation.
There is a break in the wire from the additional relay to the solenoid relay, check and, if necessary, fix the problem.
The contact board of the ignition switch has failed, as a result of which the lock does not supply voltage to the power supply circuit of the starter and traction relay.
The holding coil of the solenoid relay has lost contact with ground or it has become unreliable.
The solenoid relay is turned on, but the starter armature does not rotate.
Again, you must first check the charging of the battery, also check the condition of the battery terminals, if necessary, clean them and tighten them.
The malfunction may also be hidden in the traction relay itself, namely, the starter contacts could have burned out.
Remove the starter from the car and check the condition of the brushes and brush holders, replace the brushes if necessary.
As a result of the “spacing” of the winding, the starter armature is jammed and therefore, when the solenoid relay is turned on, it does not turn.
The solenoid relay turns on and off - knocking.
Again, first of all, when determining a malfunction, we look for a possible cause in the battery, check its charging and the quality of the connection of the terminals and their condition. We eliminate all defects and if the retractor does not work as it should, then we continue to look for the fault further.
The holding coil of the solenoid relay has lost reliable contact with ground.
Next, we need a minimum of tools, namely:
Screwdriver with a flat blade 13 socket with a wrench or ratchet (open-end or socket wrench)
First of all, unscrew the nut securing the terminal leading from the starter to the relay:
Then we bend the terminal to the side so that it does not interfere with us:
Now take a screwdriver and unscrew the two bolts securing the solenoid relay.
After which you can remove this part, slightly lifting it up to free it from the clutch with the starter.
Where is
— As far as I remember, under the hood on the right, near the air filter. There are three relays, two nearby - low beam, high beam and the third starter relay
— Power to the starter solenoid relay comes from the ignition switch (cl. 50 thick red wire)
American cars Asian European cars Russian Dealers Dealer advertisements Assistants »
- Traffic regulations online
- Traffic police fines
- Transport tax
- Fuel consumption
- Route online
- Online Games
- Forum
VESKO-TRANS.RU
AutoNews / Reviews / Tests
Where is the Starter Relay on the VAZ 2106
Checking and repairing the starter electromagnetic relay
Many people have apparently had to find themselves in a situation where their car, for unknown reasons, did not want to start. If the electronics are fine and the battery is working and charging, then it looks like the problem is with the starter. If the next attempt to start the engine fails, then it’s time to prepare for repairs.
The bottom line is that the starter is not complex in design, and if there is an abstract, then at least some motorist will be able to disassemble and reassemble it. But even with this conventional design, removing and reinstalling the electromagnetic relay turns out to be very problematic for many.
How to repair a starter yourself
I'll tell you how to sort out and restore the starter using a specific example. I came across a sample with the following breakdown: the starter turns the crankshaft slowly, even with a high battery charge.
Having dismantled and disassembled the device with the connected starting wires, when it starts, it rotates quite confidently. After some time, the device stopped and smoke appeared.
When the back cover of the starter was removed, black dust fell out of it. This means that the brushes are worn out. After removing the brush mechanism, remove the housing with magnets and rotor.
In order to better examine the cause of the problems, you need to sort out the starter, blow out all the mechanisms with a compressed air cylinder and wash them in gasoline. After these manipulations, it becomes clear that the brushes have practically worn out, the springs that pressed them have weakened, the brush holders have turned blue due to overheating, and the coils have melted.
How to resuscitate and repair the starter in this case? You need to take the brush mechanism (assembly) and bring it to a company that repairs automotive electrical equipment. Ask for an analogue. Approximately this will cost you 450-500 rubles. And if you compare it with the price of a starter (5,000 rubles on average, it all depends on the brand), it turns out to be quite cheap.
Then we thoroughly clean the rotor and inspect the commutator, which is in constant communication with the brushes. It turns out that the collector is also worn out (marked with arrows in the picture), but it will be able to work for some time without re-grooving it. Therefore, we simply clean the collector using fine sandpaper. As a rule, a commutator can easily work through a couple of sets of brushes. But if the collector fails, then most likely the entire starter will have to be replaced.
Go ahead. Let's carefully examine the Bendix (overrunning clutch). Let's try to rotate its gear manually. It should spin one way, but not the other. Also, the bendix should move easily along the shaft axis. In my case, everything is fine with him. If there were problems with the overrunning clutch, it would also be quite difficult to find it on the market. Most often, the rollers and springs wear out in the Bendix, which is why the gear does not lock but slips during reverse rotation. As a result, the starter works, but the engine does not. In this case, it is best to replace the bendix or the entire device.
Then he inspects the condition of the gearbox itself. We remove the gears, then wash them with gasoline. If everything is fine, then we apply just a little CV joint or high-quality bearing grease to the bearings and gears.
Additionally, let's inspect the contacts of the retractor relay. To open it you will need a soldering iron. You need to unscrew two screws and solder solder on two contacts (indicated by arrows).
The contacts were in perfect order. Clean them with a piece of sandpaper. Then you need to heat up the pistons that go on the lid and slam the lid on the table with a sharp movement. Extra pieces of solder will come out of the pistons and the holes will become free. Then the cover can be put on the wires without any problems and soldered everything in place.
Under no circumstances should the core of the solenoid relay be lubricated with anything, because in the cold this will cause it to jam. To calm your soul, you can lightly apply motor oil and wipe everything dry.
Then we assemble the starter device in the reverse order. Be sure to apply some grease to the rear rotor hub.
Some people ask how to rewind the starter? If there is a problem with the winding of the device, then re-winding is not entirely effective. Here it is better to replace the entire part or device.
Before installing the repaired starter on the car, grind the brushes to the commutator. To do this, connect the starter using battery cables. Let him work for a couple of minutes intermittently. Everything is ready, the starter can be installed on the engine and enjoy a confident start.
Video: How to make a starter with your own hands?
The author shows how you can make an UNREALLY COOL DIY product from a broken starter with your own hands. This is an impact screwdriver. Make yourself such a necessary tool!
