Tools and materials
To work you will need:
- contactless ignition system;
- electric starter;
- temperature sensors;
- relay to turn off the fan;
- air cooling complex;
- front and rear independent suspension;
- gearbox with rear welded differential;
- chain transmission.
The list of components used and their characteristics are determined in accordance with the purpose of use of the ATV.
So, the more often you plan to go hunting and fishing, the higher the autonomy should be (driving at one gas station). The suspension, luggage compartment and other parts are selected in the same way.
Tools you need to prepare:
- angle grinder;
- welding equipment;
- electric drill;
- a set of locksmith's keys;
- screwdrivers;
- calipers;
- knife;
- hammers;
- pipe bending device.
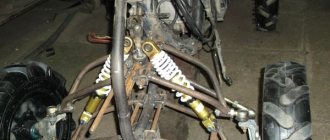
Homemade ATV with internal combustion engine Ural
Dear visitors of the site “ Samodelkin Friend ”, from the material presented by the author you will learn how to independently assemble an ATV with an engine from a heavy Ural motorcycle with your own hands. Step-by-step assembly photos and drawings are included. The ATV belongs to the division of all-terrain vehicles; thanks to its 4x4 or 2x4 wheel arrangement, it is capable of overcoming a number of different obstacles on our off-road terrain: mud, ruts, fords, snow drifts, steep ascents and descents.
You can assemble an ATV yourself, for which you will need components and other spare parts from Domestic auto and motorcycle equipment. The internal combustion gasoline engine from the heavy Soviet Ural motorcycle was additionally installed with forced cooling in the form of a heater engine from the VAZ 2108, which pumps air through a corrugated hose into the cylinders, cooling them. The frame is welded from round steel pipes; the parts were made using a pipe bender
The length of the homemade ATV is 1950 mm, width 1200 mm, height 1550 mm, wheelbase 1250 mm, track 1000 mm, weight about 320 kg.
VAZ wheels, a shortened rear axle from a VAZ 2103, an old Ural motorcycle with a sidecar was purchased as a donor.
Materials
- ICE "Ural"
- round pipe
- shock absorbers
- OKA grenades
- shortened bridge VAZ 2103
- silent blocks
- VAZ wheels and hubs
Tools
- welding inverter
- Angle grinder (grinder)
- drill
- pipe bender
- measuring and plumbing tools
- set of wrenches
- spray gun
- skillful hands)
Photos of step-by-step assembly of an ATV with your own hands and drawings.
Quad bike frame.
Rear axle VAZ 2103.
Source
Do-it-yourself ATV - we sort out all the difficulties when creating an all-terrain vehicle
Unfortunately, not every person has the opportunity to purchase an ATV in a store. All more or less interesting models are now quite expensive, and buying a used ATV is always a certain risk. In this regard, many motorcyclists advise making a four-wheeled all-terrain vehicle with their own hands, using an engine and spare parts from some old Soviet motorcycle. Earlier, we already told you about how to make an ATV from a Ural motorcycle. In today's article, we will talk about other donors that can be used if you decide to assemble an ATV with your own hands.
Preparation for work, tools and equipment
First of all, you need to carefully consider when, where and for what purposes the future ATV will be used - hunting and fishing, motorcycling in nature, transporting goods, etc. It is on this basis that you need to make a choice of a “donor” vehicle, deciding how powerful the engine is needed, what kind of suspension is suitable, what kind of trunk, etc.
You can take ready-made drawings from the Internet, create them from scratch yourself, or combine both options and ready to remake them at your own discretion.
List of required tools:
- welding machine;
- Bulgarian;
- drill;
- a set of keys;
- various small tools - calipers, hammer, knife, screwdrivers, pliers, etc.
To make your own frame, you will also need equipment for bending pipes. If you don’t have one, you can rent it or outsource the necessary work to another craftsman. Only with remarkable skill can you bend the pipes manually by heating the bend with a gas cutter or torch.
Quad components:
- engine;
- frame;
- rear and front suspension;
- steering;
- brake system;
- cooling system;
- muffler;
- electrical equipment - battery, headlights;
- body, body kit
It is strongly recommended to purchase a brake system either completely new or from a vehicle with the shortest mileage. Using old brakes is too dangerous.
It is quite possible to make a muffler yourself. Everything else is to purchase used parts on the shadow market.
Why is it worth assembling an ATV with your own hands?
Assembling a four-wheeled all-terrain vehicle by yourself definitely helps solve several problems. The first reason why people decide to make a homemade ATV is, of course, a small budget. If you analyze the market prices for ATVs, you can understand that such vehicles can be considered almost a luxury. Prices for the simplest and lowest-power models start from 150 thousand rubles, for example, Yamaha Blaster YFS200. In principle, such a single-seat “quad” will be enough, but the power will always be in short supply.
But ATV models with engines with a volume of 500-800 cm3 will cost much more, approximately 500 thousand rubles. You can also consider Chinese models, such as the Russian manufacturer Stels, but you will have to carefully monitor them. New all-terrain vehicles of this brand will cost approximately 300-400 thousand rubles, but the engines are much more interesting - 45-70 hp.
End of work
Completed work.
The panel was borrowed from the OKA car.
Quite a few hunters, fishermen, and just outdoor enthusiasts dream of owning an ATV. But the prices even for used equipment are beyond the reach of most, not to mention new equipment. Don't despair, because today we will learn how to make an ATV with your own hands! This is an excellent vehicle for household needs, for transporting trailers, has high cross-country ability due to its short wheelbase, and is also easy to drive. But we want to say right away that making a homemade ATV will take a lot of time. As practice shows, the project can take from 6 to 12 months on average.
Manufacturing
If you decide to make an ATV with your own hands from the IZH Jupiter-5 , then they take both the motor and temperature and fan sensors from this device. For independent front suspension, hubs from the VAZ 2108 and shock absorbers found on Minsk motorcycles are used. The gearbox must have 4 forward and 4 reverse gears. In used gearboxes, oil seals and sometimes bearings often have to be replaced.
The frame can be made from scratch or purchased ready-made at your discretion. But the motor must be securely bolted along it. Engine installation is possible both in the front and in the rear.
The transmission and drive need to be fixed more firmly. For homemade frames, thin-walled pipes are usually used. Tubes up to 0.25 m long are used for the spars, and up to 0.2 m long for the struts and cross members.
Most often, pipe joining is done by spot welding. After this, be sure to resort to full welding to guarantee maximum reliability. The ears for the shock absorbers and levers are welded on immediately. The brackets are mounted when it is time to install the corresponding units and components.
If a 4x4 ATV is made on the basis of an existing frame, you will have to:
- remove all additional body kit;
- remove the back;
- build up the frontal area.
Following this, elements are welded to allow storing a complete set of components and assemblies. When reconstructing a motorcycle frame, it is worth moving the seatposts by 0.4-0.45 m. The luggage racks are cut out of sheet steel according to the diagram. Then they are welded to the designated places. The frame will need to be painted with construction paint for metal, but varnish will not be required.
The motor for the ATV is taken from:
- the motorcycle itself;
- car;
- scooter (moped).
Some craftsmen even use engines from powerful walk-behind tractors of the latest generation. But the scooter drive has an important advantage - it consumes little fuel.
ATVs with this type of engine will be relatively lightweight and easy to pull out if they get stuck. If you plan to drive in hot weather, it is necessary to provide a cooling system. The fuel tank is best taken from the base motorcycle.
You can make an ATV based on IZH Planet. The engine will have to be disassembled and ground. The carburetor should be cleaned. Before welding work, everything must be carefully measured and tried on. We must not forget about priming and adjusting the luggage parts.
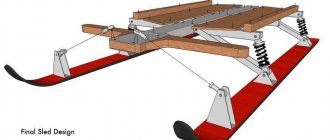
It is very useful to study drawings. For example, this diagram shows the general structure of an ATV with a width of 1.17 m. The width of the wheels is 0.046 m. The length of the structure is 2.05 m. Views with several projections are shown.
And this diagram allows you to determine where it is better to put:
- eyelets for the top strap;
- subframe cross members;
- struts;
- power plants (drives);
- subframe arches;
- flanges and locking rings;
- a number of other elements.
How to make a motorcycle with a walk-behind tractor engine with your own hands
The most logical and natural solution to install an engine from a walk-behind tractor on a motorcycle, as a rule, comes to owners of broken down scooters or bicycles who have a power plant from a walk-behind tractor or motor-cultivator on their farm (for example, if it was equipped with a different motor, but the old one remains). On the Internet you can find examples of the Ural motorcycle with an engine from a walk-behind tractor, which successfully fulfills its function as an “iron horse”. The only drawback of such a vehicle is the ban on its use for travel on public roads.
But covering long distances in nearby areas, driving to a field, to a river or to a store are tasks that a homemade moped with a walk-behind tractor engine can handle perfectly. A standard engine from a walk-behind tractor with a power of 5-6 hp. quite enough to accelerate to 60 kilometers per hour. But if an adult rides such a motorcycle, the new vehicle should be equipped with reinforced wheels that can handle a weight load of up to 100 kilograms.
In this video you will learn how to make a bike from a walk-behind tractor:
For assembly, you will need the same tools that are needed in the manufacture of most other homemade products for a walk-behind tractor and are usually available in any farm that owns small agricultural machinery. The list of tools is as follows:
- welding machine;
- grinder with metal discs;
- drill with metal drills;
- set of wrenches;
- screwdriver;
- pliers;
- level;
- hammer;
- anti-corrosion agent, metal paint and a brush (or other device for applying it).
The first step is to weld the frame. To make it you will need a steel pipe, a corner, a bracket-bracket, and a steel strip. Before starting manufacturing, you should make a drawing, make calculations and mark all the connection points of the frame parts and the connections of other parts of the moped. After this, prepare the materials from which the frame will be made and transfer the markings to them.
Next, you should weld the mounting bracket, treat it with an anti-corrosion compound and make holes for the bolts. Fix the engine onto the bracket, check the accuracy of fixation, and adjust the position. Connect the engine to the chassis using a chain or belt. Install the steering column and wheels. Install the shift cables and their controls. In addition, it would not be a bad idea to add cushioning under the seat.
After assembly is completed, the vehicle, like any motor device, needs to be run in. To do this, you need to operate the motorcycle at low speeds for 6-8 hours before giving it a full load.
Making a choice
So, how to make an ATV with your own hands? When creating a homemade ATV, we need to decide on the donor, that is, the motorcycle that will form the basis of our project. Old Soviet motorcycles are perfect for a four-wheeled all-terrain vehicle. From them we can borrow an engine with a gearbox, a frame, a steering wheel and, if desired, such parts as a tank, a seat and other elements. Since we already had an article about a homemade ATV from a Ural motorcycle, in this review we will talk about how to make an ATV based on an IZH motorcycle.
For our purpose, almost all models of motorcycles from the Izhevsk plant are suitable for us. The only thing that is important to understand is the engine power. Still, the end result will be a rather heavy structure, so the best solution would be to use the latest models - IZH Jupiter 5 or IZH Planet 5. There is no point in considering more interesting models, like IZH Planet Sport, because it is quite difficult to find them, and even if it is possible , then it’s better to restore them, because the motorcycle is quite rare and interesting. Let's move on to the main thing, how to make an ATV and what you need for this.
Optional equipment
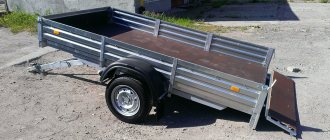
ATVs are used not only for pleasure trips, but also as a reliable, hardy assistant in the farmstead. They are used for transporting goods, crops, or used instead of a small tractor in the garden. And for these needs it is necessary to somehow place a lot of things on the ATV. If you need an ATV mainly for personal needs or going on a picnic, you can make a case for the ATV with your own hands, in which you can place the necessary things. But for a subsidiary farm, it is better to make a trailer for an ATV with your own hands. If you have already mastered assembling an ATV, then it will take you very little time to build a small trailer, but it will bring a lot of benefits.
How to make a homemade ATV is a question that is the dream of almost every young designer.
However, not everyone’s dreams of this kind come true and not at the age at which they would like. But sometimes dreamers still make their dreams come true.
Drawing skills, the ability to carry out complex technological processes, the availability of funds and time - these are the basic requirements when creating a homemade vehicle.
Today we will tell you how to construct a homemade ATV using spare parts from Oka and show this process with the help of a photo selection.
You can find out one of the ways and see the reality of creating an ATV yourself from car parts in the example below.
Training for category AI driving license
ATV training is usually carried out at training centers or specialized centers. You can get an AI license from the age of sixteen. From the documents you need to have:
§ passport and photocopies of the specified pages;
§ medical certificate and its photocopy;
§ a copy of the tax identification number.
Don't forget to also take 4 3x4 matte photographs with a corner. If you have a driver's license of any category, you also need to take it with you and make a photocopy. An important point - before enrolling in courses, they check whether you have had your license revoked two weeks before the start of training.
The cost of training for an ATV depends on the chosen center. But it is relatively low - within 7-10 thousand rubles.
Training is carried out according to the following schedule:
§ 11 hours are allocated for theory;
§ 2 hours for practice.
This refers to primary education, that is, for those students who do not have the rights of other categories. If you have a driver’s license, then several options are possible:
§ 5 hours theory and one hour practice;
§ or they give you a manual with theory to take home, and you practice for 1-2 hours on the track with an instructor.
The theory includes basic safety rules, basic traffic rules, first aid, and the design of an ATV of this model. Practice includes performing simple exercises - figure eight, snake, corridor. If desired, you can additionally exercise on an ATV for an additional fee.
It is also possible to take exams externally. In this case, you need to bring all the above documents to the training center and pay for an hour of practical training - this will cost a thousand rubles.
As you can see, training is not something difficult, since the future driver will ride an ATV exclusively off public roads and a good knowledge of traffic rules is not required from him.
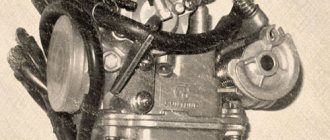
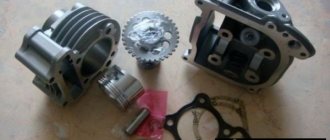
Adjusting the carburetor of the IZH Jupiter motorcycle
Setting up Peker carburetors on the IZH Jupiter 5 motorcycle is carried out as follows. First, we check the tightness and integrity of the air filter. Then we check the serviceability of the ignition. After this, we proceed to adjustment, the algorithm is as follows:
- remove the carburetor from the engine. Using measuring probes and an adjusting screw on the carburetor cover, set the distance between the lower edge of the mixing chamber and the throttle valve to approximately 1.5-2 mm. We tighten the mixture quality adjusting screw (18) completely and turn it back 1 turn;
- unscrew the 2 screws at the bottom of the carburetor and remove the float chamber cover. Turn the carburetor over so that the floats drop and close the fuel channel. We measure the distance from the edge of the carburetor connector to the middle of the float (press mold line). It should be 13 +1.5/-1.5 mm (see figure). If the distance does not correspond to the norm, we achieve the required length by bending the float tongue in one direction or another;
- install the carburetor in place. Start the motorcycle and warm up the engine for 5-7 minutes. To make things go faster, use a fuel enricher (corrector). Using the mixture quantity screw at the top of the carburetor, set the minimum stable engine speed. By unscrewing the mixture quality screw (gradually by 1/2, 1/4 turn), we look for the moment to reduce the crankshaft speed (at first the speed will increase and then decrease). By screwing in the mixture quantity screw again, we achieve a reduction in the crankshaft speed, and using the quality screw we again find the optimal position. These steps must be repeated until the minimum stable crankshaft speed is found. Correct adjustment should also be checked by sharply turning the throttle lever. When the engine stalls when opened sharply and picks up speed poorly (dips), the mixture needs to be enriched by slightly tightening the quality screw. If, on the contrary, the engine stalls when the gas is released, the quality screw needs to be unscrewed a little. After this, use the quantity screw to set the minimum engine speed. Attention! The adjustment screws must be turned slowly and gradually by 1/2, 1/4 turns. After each operation, we wait for the engine to “adapt” to the new settings;
- Later, the correct adjustment can be checked by the color of the central electrode of the spark plug. Before this, you should ride a motorcycle for 10-15 kilometers on the highway. The normal mixture is a brick-colored electrode. Carbon deposits on the spark plug indicate that the mixture is too rich. While a too whitish color indicates its excessive impoverishment;
- When operating a motorcycle in different meteorological conditions, the mixture composition is changed by moving the position of the throttle metering needle. So, at a temperature of +30 ºС, the needle must be lowered by one division, thereby depleting the mixture. At -15 ºС the needle should be raised 1-2 notches.
Recommendations
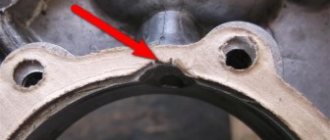
It is easy to eliminate disc runout - it helps to cut out the central block of Oka discs, to which some of the discs from various Zhiguli cars are welded. This assembly must be supplemented with several more pieces of metal, which are also welded. If there is any beating, it will be minimal. It is advisable to use the same rubber that is usually used for ATVs. Important: the clearance of an ATV is normally at least 0.3 m.
The gearbox can be taken from Oka cars. But the main pair of gears should be replaced with a chain drive. If you choose supporting pipes for work, then VGP 25x3.2 can be considered the best option. It is also advisable to prepare silent blocks. The carburetor circuit is better than using an injector.
How to make an ATV from an IZH motorcycle, see below.
Names and essence of the main stages of creating an ATV
- Construction of the supporting frame. Usually, when creating homemade ATVs, photos of samples of which are presented in the article, the frame is made of steel pipes and a metal profile. Often, the frame of an old motorcycle sitting idle in the garage is used as a supporting structure, to which a new supporting base is welded.
ATV from "Ural": assembly and features
It may seem that making an ATV from the Ural is quite difficult, but it is not so. You will need to prepare the necessary parts and tools, and also review the assembly instructions. From one old but working motorcycle you can make a universal four-wheeler, which will be used both for off-road driving and on the farm.
It is worth noting that it is quite difficult to assemble a 4x4 Ural ATV with your own hands. For its high-quality development, you will need to seek help from a team of professionals; you will need a turner, an electrician and a welder. Making the front suspension independent is more expedient than assembling a homemade 4x4 ATV from a Ural. Otherwise, control may be difficult. The fact is that to provide all-wheel drive, it will be necessary to supplement the system with a gearbox, which will lead to an increase in the weight of the ATV. To assemble a rear-wheel drive structure, you need to prepare the following:
- Work motorcycle "Ural".
- Steering rod of transverse type.
- One pair of front hubs from a rear wheel drive vehicle.
- Front suspension arms.
- Axle shaft or driveshaft.
- Thick-walled light alloy pipe.
- Rear axle.
It is worth noting that the rear axle and front hubs must be taken from the same car. This will avoid the procedure of adjusting the disks to the fixing holes. It is recommended to take these parts from Moskvich or VAZ. The work will require a set of hand tools, as well as an angle grinder and a welding machine.
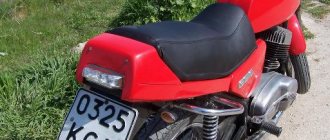
Izh Jupiter-5 is the best Soviet motorcycle in a number of parameters
Soviet motorcycles will soon remain only in legends, unless the Urals will continue to have their sidecars, which cost like a budget car. But the company that produces Ural motorcycles has been exporting for a long time, most of the motorcycles go to the USA, and the motorcycles themselves are partially assembled from imported components, where at least 30 percent of the components are imported.
But now quite a lot of Soviet motorcycles are still sold, and in villages and towns old motorcycles produced during the Soviet Union are still popular, although there are already many more Chinese motorcycles and mopeds.
Today I will tell you about one of the most popular Soviet motorcycles - Izh Jupiter-5. By the way, this model can be called not only Soviet, but also Russian, since the Izh Jupiter-5 motorcycle was produced until 2008.
Izh Jupiter-5 appeared in 1985, replacing the previous generation model on the assembly line - Izh Jupiter-4. The main difference between the Jupiter model and the Planet model, produced in parallel, is its engine - the Planet has a single-cylinder engine, and the Jupiter has a two-cylinder engine.
By the way, it is possible to install an engine from Jupiter on the Planet and vice versa, but this is out of despair, as they say.
When developing the Jupiter-5 model, it was decided, without further ado, to take Jupiter-4 and fix all the problems that the owners of these motorcycles complained about. What did the owners of Jupiter-4 complain about? If my memory serves me correctly (oh, it was a long time ago), then the main problems with Jupiter-4 were electrical problems and fuel consumption was also somehow not very modest.
In itself, Izh Jupiter-5 is a classic motorcycle, as they say now; in Soviet times it was called universal. The creators of Izh Jupiter-5 somehow failed to cope with the unreliability of electrical equipment, but they managed to reduce the appetite for the new engine.
The new engine was derated from 28 to 24 horsepower, and retuned for low-end traction due to increased torque. It’s just that in 1985 it became clear that Izh motorcycles were in demand mainly in rural areas; in cities, family people preferred cars, and urban youth bought Javas and Chesets. Why do you need speed characteristics in the countryside if there have never been normal roads there? But the traction at the bottom will never be superfluous!
Gearbox and brakes
If the quad is assembled on the basis of a car, the chain drive is replaced. This greatly simplifies vehicle maintenance. A manual transmission is installed, as it improves maneuverability. The input shafts are directed to the front and rear axles. Wheels can be removed from small cars: Oka, Niva.
The brake system is selected taking into account the mounted wheels. The steering knuckles are removed from the Niva or Oka. To assemble an all-wheel drive model, you will need: car steering, transmission drive and differentials. In this case, the frame is not used. It is better to weld the structure to suit the engine size.
The suspension is also removed from the car. A gearbox is installed on the front-wheel drive model. The next stage is the manufacture of the body. For this you will need fiberglass, fiberglass. Experts advise using the first material, as it is easier to work with.
A drawing is pre-prepared and body elements are cut out from polystyrene foam. To fix them together, glue or foam is used. Fiberglass is glued to the foam. The resulting structure is attached to the frame. The body is well dried, primed, sanded and painted.
Tires of the required size are selected. If the vehicle will be used off-road, it is necessary to create the appropriate ground clearance (distance from the bottom to the surface of the earth). For this, R17 wheels are installed.
The resulting ATV is equipped with turn signals, headlights, a dashboard, and a battery. Electrical equipment is connected according to a pre-designed diagram. For this, wiring and a multimeter are used to check the voltage in the network. The next step is to install the seats. The vehicle is checked for serviceability, and the data displayed on the drawings is compared. A quadric, correctly assembled, is not inferior in technical and operational characteristics to finished vehicles.
Features of frame development
The dimensions of the ATV frame depend on the power of the installed engine and the number of people it will carry. The optimal length is in the range of 1600-2100 mm, and the width is 1000-1300 mm. The long frame will have to be reinforced with additional rigid elements so that it does not break while riding. A frame that is too wide will experience lateral loads, but the ATV will be more stable when cornering.
An increase in the number of stiffeners will lead to an increase in weight, which will negatively affect the dynamic characteristics of the ATV and will require the installation of a powerful engine.
For pleasure walks on asphalt, you can neglect the excessive rigidity of the structure, giving preference to a low-power engine. Lightweight touring ATVs for adults have small dimensions and a lightweight design, but there are more fasteners on the frame to expand functionality - installing luggage racks.
Body and wiring
Attachments, a gas tank and other structural elements are attached to the assembled frame. Each node must be firmly fixed on the prepared platform. It is important that the vehicle remains stable after assembly.
For many motorcycle owners, it is important that the appearance of the ATV is spectacular. Therefore, the design must be thought out in advance, before assembly begins. You will need to install a driver's seat and lighting fixtures. Turn signals and headlights are also removed from the donor motorcycle.
( 2 ratings, average 4.5 out of 5 )