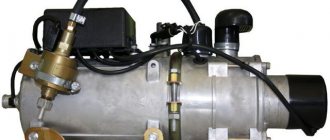
Severs M 1.5 kW, At -30, heats engine coolant to 50 degrees in 25 minutes
Prepare: tools – wrenches; screwdriver (for tightening clamps); sealant type "Avtosil" (for sealing threaded connections); socket head for size 32; knife (for cutting hose); coolant (coolant) in the amount of 1 liter; container for draining coolant.
Cut the rubber sleeve into lengths: output sleeve L2 = 480 mm; inlet sleeve L1 = 190 mm.
Secure the bracket to the heater with studs through the bushings using washers and nuts
Place the sleeves on the corresponding heater pipes and secure the connections with clamps.
Install the spring from the kit into the inlet sleeve.
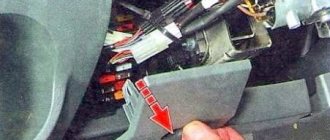
Remove the Gazelle Next engine protection.
Disconnect the air intake pipe.
- Coolant temperature sensor: where it is located, how to check and replace
Provide access to the plug in the engine head: disconnect the inlet hose from the engine; Unscrew the fastening of the interior heater pipe at the rear of the engine; disconnect the interior heater pipe hose from the engine; Unscrew the oil dipstick tube.
Unscrew the plug from the engine head (the location of the plug is indicated in Fig. 3 by arrow B).
Attach the bracket with the heater to the frame, as shown in Fig. 2. Arrow A points to the bracket mounting bolt.
Cut the lower radiator hose (see Fig. 2 and 4 arrow B).
Install the tee with clamps into the hose section with the side outlet directed towards the heater. Secure the tee with clamps.
Remove the sealing ring from the unscrewed plug from the engine head and put it on the fitting from the kit.
Buy a preheater in Moscow at the best price in
To save you from the problems associated with starting a vehicle engine in winter, there is a wide range of pre-heaters for engines of different modifications and power. We took into account the real needs of the absolute majority of potential users of the products and offer:
- preheaters for gasoline and diesel power units;
- pre-heaters designed for on-board voltage 12 and 24 V;
- pre-heaters with a power of 9 to 15 kW and so on.
Check out the full catalog of devices available for order, and you can choose the optimal preheater for a car, van, buses and automotive equipment without overpayments.
Models, their features
The “Start” line of preheaters includes the following series:
"Start"
Classic horizontal tank-type heaters with high power (2.5 and 3.0 kW). The movement of liquid in them is gravity. Designed for installation on trucks;
"Start-Turbo"
The only series of tank heaters equipped with a centrifugal pump providing forced circulation. They are mounted on the car in a vertical position, the terminals for connecting to the system are located perpendicularly. The series includes three sets - “Universal No. 1” (with a power of 1.0 kW, 1.5 kW and 2.5 kW.
The set contains components for a sequential installation method), “Universal No. 2” (heaters of the same power, but the set contains a variety of elements for installation, which allows you to make an insert in different ways) and “Universal No. 3” (the kit contains the same components, same as set No. 1, but the device itself is different - its power is 3 kW). These devices are suitable for use on both cars and trucks;
"Start-Classic"
Vertical gravity tank heaters. Models are available with two powers - 1.5 and 2.0 kW. They are intended for use on passenger car engines;
"Start M"
Gravity reservoir devices having a horizontal design. The power of the devices is 1.5 and 2.0 kW. They are intended for mid-size GAZ and ZIL trucks, but are often used by owners of passenger cars. One of the models is equipped with a bumper connector;
"Start M1" and "Start M2"
Low-power flow-type heaters. Models M1 (power 0.6 kW) are designed for installation on VAZ engines (the design of the cooling system of which uses a shortened supply pipe). And M2 heaters are designed for use with GAZ car engines. Their power is 0.7 kW;
"Start MP"
A series of low-power flow-through heaters (0.7 kW). Includes three models that differ in the diameters of the connection pins (26 mm, 32 mm and 39 mm). This series is suitable for use on cars, trucks and any other vehicles with a liquid cooling system (for example, snowmobiles);
Each heater model is equipped with everything necessary (adapters, tees, mounting brackets, clamps, rubber tubes) for installation work. There are also options when devices are sold without any additional components in the set.
To maintain the temperature regime, thermal switches are used in the design of the heaters, which eliminates the possibility of overheating of the heating element and its failure.
Pre-heaters: features of operation, installation and use
A preheater is a compact device that takes responsibility for preheating the engine before you start the engine. In addition, the preheater provides:
- increase in temperature inside the vehicle;
- defrosting car windows;
- defrosting wipers, etc.
Preheaters are 100% reliable and functional devices that demonstrate the same efficiency at any time of the year. Even in the most severe frosts, the pre-heater will cope with heating the coolant and the tasks assigned to it, eliminating the need to waste time starting the engine.
The heaters operate at temperatures down to -45 degrees and do not require turning on the engine to create comfortable conditions in the cabin or cabin. Using a pre-heater, thanks to heating the air space inside the car, icy side and windshield windows thaw many times faster, reducing risks on the road due to impaired visibility. This is a real opportunity to make the operation of the vehicle even more comfortable and increase the service life of the engine.
Liquid type heaters are in greatest demand among customers due to their versatility and efficiency. The design of heaters for automobile engines is a kind of boiler with:
- heat exchanger;
- combustion chamber;
- fuel pump;
- wire for carrying fuel;
- an additional pump for driving antifreeze.
Additionally, preheaters for automobile engines use a thermal relay, which is responsible for starting the fan inside the climate system, an electronic control unit, and a device for starting the preheaters themselves.
Car engine heaters are installed in the engine compartment by connecting a heat exchanger to a small circuit of the cooling system, and a control unit to the vehicle's electrical network.
Depending on your individual wishes, you can choose a heater controlled via:
- remote controller,
- mobile phone (devices with a GSM module).
The user independently programs the car engine heater to start at a certain time. After the heater is activated, fuel enters the combustion chamber of the device, where it mixes with air to form an air-fuel mixture. After forced ignition, heat is released, which accumulates in the heat exchanger and begins to circulate within a small circuit. Due to this, the engine warms up. And when the interior heating function is turned on, the heater successfully copes with this task.
In order to select a suitable heater from the TeplostarM assortment, read the detailed descriptions and technical characteristics of the models. Ordering engine pre-heaters is available to all customers in Moscow. You can order a pre-heater with delivery or pick up engine heaters yourself at any of the pick-up points in the capital.
We are responsible for the quality of engine heaters and guarantee that the actual characteristics of any heater correspond to the declared ones. Any heater from the collection of reliable heaters has a long service life and is ready for uninterrupted operation immediately after installation. Choose a heater now, with no doubt that using a heater will open up new benefits for you!
Design of the cooling system for UMZ-4213 and UMZ-4216 engines on UAZ and GAZelle vehicles.
To increase energy performance, improve fuel efficiency, reduce toxicity and noise, models with an integrated microprocessor fuel injection and ignition control system were developed on the basis of the UMZ-421 carburetor engine: the UMZ-4213 engine for UAZ cars and the UMZ-4216 engine for GAZelle cars. The design of the cooling system on the UMZ-4213 and UMZ-4216 is somewhat different, since it has differences in the connection diagram of the expansion tanks and heating radiators.
General design of the cooling system of UMZ-4213 and UMZ-4216 engines on UAZ and GAZelle vehicles.
The cooling system is liquid, closed, with forced circulation of liquid and an expansion tank, with liquid supply to the cylinder block. Includes a water pump, thermostat, water jackets in the cylinder block and cylinder head, radiator, expansion tank, fan, connecting pipes, as well as body heating radiators.
For normal operation of the UMZ-4213 and UMZ-4216 engines, the coolant temperature must be maintained within plus 80-90 degrees. It is permissible to operate the engine for a short time at a coolant temperature of 105 degrees. This mode can occur in the hot season when driving a car with a full load on long climbs or in urban driving conditions with frequent accelerations and stops.
Design of the UMZ-4213 engine cooling system on a UAZ vehicle.
Design of the UMZ-4216 engine cooling system on a GAZelle car.
Operation of the cooling system of UMZ-4213 and UMZ-4216 engines on UAZ and GAZelle vehicles.
Maintaining normal coolant temperature is carried out using a two-valve thermostat TS-107-01 with a solid filler. When the engine warms up, when the coolant temperature is below 80 degrees, a small circle of coolant circulation operates. The upper thermostat valve is closed, the lower valve is open.
The coolant is pumped into the cooling jacket of the cylinder block by a water pump, from where, through holes in the upper plate of the block and the lower plane of the cylinder head, the liquid enters the head cooling jacket, then into the thermostat housing and through the lower thermostat valve and connecting pipe to the inlet of the water pump. The radiator is disconnected from the main coolant flow.
For more efficient operation of the interior heating system when circulating liquid in a small circle, and this situation can be maintained for quite a long time at low negative ambient temperatures, there is a throttle hole with a diameter of 9 mm in the liquid outlet channel through the lower valve of the thermostat. Such throttling leads to an increase in the pressure drop at the inlet and outlet of the heating radiator and more intense circulation of liquid through this radiator.
In addition, throttling the valve at the liquid outlet through the bottom valve of the thermostat reduces the likelihood of emergency overheating of the engine in the absence of a thermostat, since the shunting effect of the small circle of liquid circulation is significantly weakened, so a significant part of the liquid will go through the cooling radiator.
Additionally, to maintain the normal operating temperature of the coolant during the cold season, UAZ vehicles can have shutters installed in front of the radiator, with which you can regulate the amount of air passing through the radiator.
When the liquid temperature rises to 80 degrees or more, the upper thermostat valve opens and the lower valve closes. The coolant circulates in a large circle through the radiator.
For normal operation, the cooling system must be completely filled with liquid. When the engine warms up, the volume of liquid increases, its excess is pushed out due to increased pressure from the closed circulation volume into the expansion tank. When the temperature of the liquid decreases, for example after stopping the engine, the liquid from the expansion tank, under the influence of the resulting vacuum, returns to a closed volume.
12V oil heating
The main condition for do-it-yourself oil heating of the engine is that the device must be in the sump. To do this, there is no need to make additional holes in it, since the design is used instead of a drain plug.
What will you need?
To complete the task you will need:
Algorithm of actions
Step-by-step assembly instructions:
Heating device diagram
Another simple do-it-yourself antifreeze heater
Winter has come again and now drivers are once again faced with the pressing issue of starting a car engine in the cold. When the temperature drops too much, the battery loses its power, and the engine is very difficult to crank, so starting the car right away can be problematic. This problem can be solved by installing a special device that can warm up the engine coolant before starting. Of course, you can buy such a device, but the most budget option is, of course, homemade.
In the article, the author shared how you can make a simple antifreeze heater with a minimum amount of materials and investments. The device will operate on a voltage of 12 V, therefore it can be connected from a battery, but it is best, of course, from the mains through a transformer, since it is better not to disturb the battery in winter.
Materials and tools for manufacturing: - two pipes made of thin metal, the first one has a diameter of 80 mm and a thickness of 1 mm, the diameter of the second depends on the diameter of the pipes of a particular car); — two heating elements (made independently); - wires; — 10A fuse, as well as a switch; - welding or soldering iron; - metal scissors; — thin sheet metal (thickness 1 mm); - a grinder or other tool for cutting pipes.
Heater manufacturing process:
Step one. Making the heater body
To create a housing you need to take a pipe with a diameter of 80 mm and cut it. The result should be a piece of 80 mm in length. Next, a pipe of a smaller diameter is taken (in this case 20 mm) and a piece 40 mm long is cut from it.
Step two. Creating a heating element
Nichrome wire will be used as a heating element. To install the wire, you need to cut two thick pieces of paranit. The spiral can be of any diameter and length, the most important thing is that their resistance when measured is 2.5 or 4 Ohms. If a piece of wire is too short, it may burn as the temperature becomes too high.
The wire is fixed using screws with 3 or 4 mm nuts. All contacts must be tightened thoroughly, otherwise the wire will burn out due to a weak connection.
Step three. Creating a heat exchanger
To make a heat exchanger, you will need a device such as a body or gas welding machine, since you will have to weld thin metal. Alternatively, you can use a soldering iron and high melting point solders.
In order for the heat exchange area to be higher, two plates must be welded in the inner part of the heat exchanger; they must be perpendicular to the tubes from which antifreeze will be supplied. After welding, you need to check the tightness of the structure. Now you can proceed to assembling the heater.
Step four. Final stage
On the side of the plugs you need to put thin sheets of paranit or asbestos. Now a heating device is installed, the hollow spaces are filled with sheet or cord asbestos. Now you can remove the contacts and close the structure with pre-made covers.
To operate two of these heaters, a 12-volt battery with a parallel connection is used. You can also use a 24 Volt source, but then the heaters are turned on sequentially.
After the device is assembled, it can be wrapped with electrical tape. The pump is installed in the vehicle's cooling circuit in the direction of flow. Now all that remains is to connect one wire to ground, and the other to the battery positive through a 10A fuse. You can also add a switch for ease of use.
Source
How to make a 220V antifreeze heater
To ensure the circulation of refrigerant through the system when developing a 220 V automobile electric engine heater, it is best to use a pump. If there is no pumping device, heating equipment must be installed at the lowest point of the cooling system.
What will you need?
To develop an electric heater for a gasoline or diesel engine you will need:
Algorithm of actions
| Image | Step |
| At the first stage, it is necessary to improve the tank lid; to do this, glass is squeezed out of it. The required shape is cut out of a sheet of textolite (recommended thickness 6 mm), after which the material is glued into the lid using epoxy glue. This will ensure maximum tightness and prevent leakage. | |
| Two fittings are installed at the bottom of the tank | |
| Then a heating component is glued into the lid using epoxy glue, in this case it is a heating element from an electric kettle | |
| The distribution mechanism is installed in such a way that the electrical wiring can be covered in it. Then a socket for connecting the conductor is installed in the lid of the box. | |
| This is what the completed tank and lid look like | |
| The tank is fixed using clamps. One of the fastening elements will not allow the cover to fly off due to pressure when the power unit is running. | |
| A fitting with a valve is installed, which is used to bleed air from the tank |
