How does a mechanic diagnose a P0441 code?
- First, the mechanic will connect the OBD-II scanner to the vehicle's diagnostic port and read all the stored data and error codes.
- He will then clear the error code from the ECM and test drive the vehicle.
- If P0441 appears again, have a mechanic visually inspect the evaporative emission system.
- The mechanic will then check the fuel pressure sensor in the fuel tank for damage.
- He will also check the fuel cap.
- He will then check the operation of the vacuum switch and purge valve.
- If no problem is found, the mechanic will perform a thorough check of the evaporative emission system to check for leaks.
Common errors when diagnosing code P0441
The most common mistake when diagnosing a P0441 code is not following the diagnostic protocol, as well as not performing a smoke leak test.
Also, mechanics often assume that the problem is a damaged fuel cap, but do not perform thorough diagnostics to verify this. It is imperative to check the fuel tank cap for leaks, for example using a vacuum tester.
How does the Lada Kalina gasoline vapor recovery system work?
The EVAP system in question was created to prevent the release of harmful gasoline vapors into the surrounding atmosphere resulting from fuel evaporation; it includes:
- fuel shut-off valve;
- adsorber;
- solenoid valve for purging the absorbent element;
- connecting pipelines.
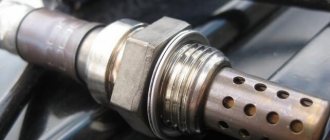
The most important component in the system is the adsorber (also called a carbon filter), the basis of which is activated non-edible carbon, enclosed in a plastic housing.
The resulting gasoline vapors are absorbed by the carbon of the absorbent element, gradually accumulating in it.
When the engine starts, the canister purge valve (KPA) is turned on, and due to the vacuum, all accumulated vapors enter the intake manifold and then burn out.
On the Lada Kalina, the adsorber is located in the gas tank area, and getting to it is very difficult.
To dismantle this EVAP element, it is necessary to remove the fuel tank, but the control unit is located in an accessible place - the valve is located in the engine compartment, in close proximity to the battery, on the rear wall of the air filter housing.
It should be noted that for turbocharged engines, a vacuum is not created in the intake manifold, and in order to force the vapors in the desired direction, an additional two-way valve is included in the circuit.
Design of the VAZ Kalina adsorber purge valve
KPA is present on all modern injection internal combustion engines, and Lada Kalina is also no exception.
The purge valve (another name is Evap-Solenoid) is connected on one side to the carbon filter, on the other to the intake manifold, when there is no electrical signal to the control unit, the pipeline channel is closed, and vacuum is not created in the system.
When an electrical signal is supplied while the engine is running, the valve is activated, the channel opens, and gasoline vapors freely pass from the adsorber into the intake manifold.
Malfunctions in the fuel vapor recovery system Lada Kalina
Since the solenoid valve itself is not a complex device, it has few malfunctions as such - it may not open or close when necessary, or may freeze in a certain position. But the culprit of the breakdown may not only be Evap-Solenoid; the gasoline vapor recovery system does not work correctly for other reasons:
- connecting pipes are pinched or clogged;
- normal vacuum is not created in the system;
- due to an open circuit, there is no voltage on the valve;
- the carbon filter is completely clogged (which is rare);
- The control unit malfunctions.
If the CPA is stuck in the open position and does not block the channel, the following defects may occur:
- the fuel mixture becomes richer, causing “blackness” to appear on the electrodes of the spark plugs;
- the engine begins to operate unstably, this is especially noticeable at idle;
- gasoline consumption increases;
- The throttle response of the internal combustion engine decreases.
When the EVAP channel is constantly blocked by the purge valve, excess vapor pressure is created in the gas tank, due to this:
- there is a risk of fuel pump failure;
- The fuel level sensor may fail.
It should be noted that purge occurs in a certain mode after starting the engine, the program is executed depending on the crankshaft speed, and the system does not work at idle. An impulse arrives at the CPA if:
- the coolant has heated to a temperature of at least 75 degrees Celsius;
- the throttle valve is open at least 4%;
- the car is moving at a speed of more than 10 km/h (but this is not a necessary condition).
Problems in the electrical part of the EVAP are detected by the control unit, and the Check Engine warning lamp lights up on the instrument panel. The fault code can be determined using a special diagnostic scanner or a computer with a program installed; the most common errors in the vapor recovery system detected by the diagnostic device are P0441 and P0455.
Replacing the adsorber purge valve on Kalina
If the check shows that the Evap-Solenoid is faulty, the part must be replaced (catalog number - 11181164200). There is no point in repairing the device:
- the price of the valve is in the range of 400-800 rubles;
- You can buy the device in almost any store that sells VAZ spare parts;
- changing the KPA is very easy and simple.
But before making a replacement, it would be a good idea to check the control circuit; quite often the valve does not work due to a break in the wires going to it. To complete the work, you will not need a pit or a lift, and the procedure itself will take no more than one to two hours, even if the operation is performed by an inexperienced worker without metalworking skills.
We change the valve as follows:
- turn off the ignition, raise the hood;
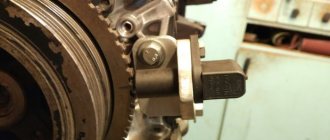
- we find Evap-Solenoid, it is located just below the air duct, on the air filter housing (indicated by an arrow in the figure below):
- just in case, disconnect the negative terminal from the battery;
- move the plug tab to the side and disconnect the wires;
- so that the air flow sensor does not interfere, use a Phillips screwdriver to loosen the clamp securing the air duct, and move the pipe to the side. For convenience, the air flow sensor can be removed;
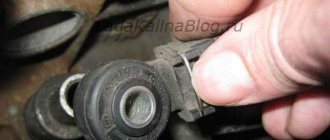
- Now access to the valve is free, all that remains is to gently pull it up to pull it out of the grooves;
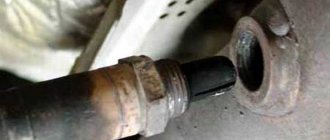
- but that’s not all - since the tube on the valve itself is sealed, we do not touch this connection for now, it is necessary to release the other end of the hose, to do this we remove the latch and pull the pipe out of the connection;
- We dismantle the valve together with the tube, and the disassembly is almost complete.
Replacing the purge valve could be considered a very simple task, if not for one “but” - it is very difficult to remove the plastic tube from the CPA without damaging it, and it does not come with the new valve. There are two options here:
- try to carefully heat the connection with a hairdryer and pull off the pipe;
- cut the tube at the connections, and instead buy an ordinary fuel hose with a diameter of 8 mm and two clamps.
We install everything in place, start the engine, and test the car on the move.
The adsorber valve is knocking on Kalina
Many owners of Lada Kalina cars are faced with a problem - while the engine is running, an incomprehensible clattering sound is heard from under the hood; when identifying the cause of the noise, it turns out that the sound comes from the purge valve. Although the knocking does not affect the operation of the car in any way, some car owners are annoyed by it, and car owners want to get rid of it. You can “overcome” the unpleasant clattering sound; you just need to do the following:
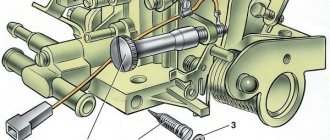
- remove the valve and inspect it carefully;
- Find the adjusting screw on the side; it will be filled with epoxy resin on top;
- pick out the epoxy, tighten the screw half or three-quarters of a turn;
- install the valve in place, check for changes in the operation of the internal combustion engine.
What repairs can fix the P0441 code?
- Replacing the fuel tank cap
- Repairing a leak in the fuel vapor recovery system
- Repair or replace damaged evaporative emission system components
- Replacing the purge valve
- Vacuum switch replacement
- Repair or replacement of wires
Additional comments for troubleshooting P0441
To properly diagnose the P0441 trouble code, a mechanic will need an advanced OBD-II scanner. It is necessary to check the operation of the vacuum switch and purge valve, as well as to carry out certain tests.
In some cases, a smoke leak test may be necessary to detect a leak in the evaporative emission system. This test can help detect even the smallest fuel vapor leak. The fuel tank shall not be completely empty or completely full during this test.
Why the check light is on on the Lada Kalina: causes and methods of troubleshooting
Many Lada Kalina owners have encountered such a common effect as “Check Engine”. The very concept of this indicator means that there are problems in the engine. But these are the ones that are not always clear to the average car enthusiast.
"Check Engine" - the show of intuition begins
Many Kalinovites, when the check signal comes on, begin to panic and immediately go to a car service center. But not everything is as bad as it seems at first glance, and the reason may lie on the surface. So, let's look at why the check engine light is on on the Lada Kalina and the reasons for the mysterious effect:
- Failure of one of the power unit sensors.
- Throttle.
- Injectors.
- Fuel pump and filter.
- Air filter.
- Spark plugs and high-voltage wires.
- Petrol.
- ECU.
Troubleshooting methods
Now that all the causes have been identified, we can begin to consider troubleshooting.
But, before we begin, it is worth noting that a car enthusiast needs to have an idea of the design features of the engine if he wants to fix the problem himself.
Otherwise, go directly to a car service center, in order to avoid other problems that, due to lack of experience, car enthusiasts usually create for themselves.
Sensors
Often, the reason why the check light on Kalina may come on is the failure of one of the sensors. Possible ones that are worth checking right away include: mass air flow sensor, idle speed control, crankshaft position sensor, oxygen sensor and coolant temperature sensor.
You can determine the cause by going through each sensor separately and using a tester to check their functionality.
But, there is a simpler and more effective way to determine the malfunction of a particular sensor, namely connecting to the electronic engine control unit. Here you can look at the errors and, by deciphering them, determine where the problem is.
Throttle
A clogged throttle valve can often cause the check engine light to come on because not enough air is supplied to the power unit. The solution to the problem is cleaning. This process can be carried out using carburetor cleaning fluid or VD-40 fluid.
The part is removed from the car and cleaned, after which it is installed in place. It is also recommended to check the throttle position sensor, which may have failed.
Injectors
One of the common reasons for the “check” icon to appear on the dashboard is a malfunction of one or more injectors that do not spray the fuel mixture properly. So, it is worth dismantling all the elements and checking them using a special stand.
If there is none, then you can use the traditional method by pouring flushing fluid into the fuel supply pipes and activating the injectors using the battery. This way it will be clear which injector is not working well. But, experienced auto mechanics recommend cleaning and checking the nozzles on a stand, since the effectiveness of the procedure is higher.
Fuel pump and filter
Another cause of the malfunction may be a malfunction of the gasoline pump or its filter. Lack of power or contamination of the filter elements leads to the fact that an insufficient amount of fuel will enter the power unit to form an air-fuel mixture.
This can also cause such a well-known automotive effect as engine tripping.
The malfunction can be cured by checking the functionality of the gasoline pump, as well as by replacing the filter inside the gasoline pump. It is also worth looking at the fuel filter, which could become clogged when pouring low-quality gasoline.
Air filter
A clogged air filter can cause insufficient air in the combustion chambers. So, to check this element, it must be dismantled, which is done quite simply. By inspecting the filter element, you can find out how dirty it is and whether the product needs to be replaced. So, after replacement, the check signal from the dashboard may disappear.
Spark plugs and high voltage wires
Wiring is also often the reason why the check icon lights up on the panel. This happens when the spark plug is inoperative or there is a breakdown in one of the high-voltage wires.
It is recommended to check spark plugs on a special spark plug stand. But, if there is none, then you can use the generally accepted “old-fashioned” methods. But high-voltage wires are checked using a conventional multimeter, where the resistance along each wire should be about 5 ohms. If a broken part is found, it must be replaced.
Petrol
But, in addition to the above reasons, the problem may lie on the surface. Thus, ordinary low-quality gasoline can cause the “Check Engine” icon to appear on the car’s dashboard.
To eliminate the breakdown, it is necessary to drain the low-quality fuel and flush the fuel supply system.
But, if you drive for a long time on such fuel, the batteries may fail, which should also be checked when flushing.
ECU
The last reason is the accumulation of errors or “failed” firmware of the electronic engine control unit. To fix this problem, it is recommended to contact a professional car service center. Also, with the help of “brain” errors, you can determine why the check engine light came on. But where can I get the codes deciphered? Let's look at what code that means:
- 0102 Low signal level of the mass air flow sensor
- 0103 High signal level of the mass air flow sensor
- 0112 Low level of intake air temperature sensor
- 0113 Intake air temperature sensor high level
- 0115 Incorrect coolant temperature sensor signal
- 0116 Incorrect coolant temperature sensor signal
- 0117 Coolant temperature sensor signal low
- 0118 High signal level of the coolant temperature sensor
- 0122 Low signal level of the throttle position sensor
- 0123 Throttle position sensor signal high
- 0130 Incorrect signal from oxygen sensor 1
- 0131 Low signal level of oxygen sensor 1
- 0132 Crankshaft sensor 1 signal high
- 0133 Slow response of oxygen sensor 1
- 0134 No signal from oxygen sensor 1
- 0135 Oxygen sensor 1 heater fault
- 0136 Oxygen sensor 2 short to ground
- 0137 Low signal level of oxygen sensor 2
- 0138 High signal level of oxygen sensor 2
- 0140 Oxygen sensor 2 break
- 0141 Oxygen sensor 2 heater fault
- 0171 Mixture too lean
- 0172 Mixture too rich
- 0201 Open injector 1 control circuit
- 0202 Open injector 2 control circuit
- 0203 Open injector 3 control circuit
- 0204 Open injector 4 control circuit
- 0261 Short to ground injector 1 circuit
- 0264 Short to ground injector 2 circuit
- 0267 Short to ground in injector 3 circuit
- 0270 Short to ground in injector 4 circuit
- 0262 Short circuit to +12V injector 1 circuit
- 0265 Short to +12V injector 2 circuit
- 0268 Short to +12V injector 3 circuit
- 0271 Short circuit to +12V injector 4 circuit
- 0300 Many misfires
- 0301 Misfire in cylinder 1
- 0302 Misfire in cylinder 2
- 0303 Misfire in cylinder 3
- 0304 Misfire in cylinder 4
- 0325 Open circuit of the knock sensor
- 0327 Low signal level of the knock sensor
- 0328 High signal level of the knock sensor
- 0335 Incorrect crankshaft position sensor signal
- 0336 Crankshaft position sensor signal error
- 0340 Phase sensor error
- 0342 Low phase sensor signal
- 0343 Phase sensor signal high
- 0422 Low neutralizer efficiency
- 0443 Canister purge valve circuit malfunction
- 0444 Short circuit or break in the adsorber purge valve
- 0445 Short to ground of the canister purge valve
- 0480 Cooling fan 1 circuit malfunction
- 0500 Invalid speed sensor signal
- 0501 Invalid speed sensor signal
- 0503 Speed sensor signal interruption
- 0505 Idle air control error
- 0506 Low idle speed
- 0507 High idle speed
- 0560 Incorrect on-board voltage
- 0562 Low voltage on-board network
- 0563 High voltage on-board network
- 0601 ROM error
- 0603 External RAM error
- 0604 Internal RAM error
- 0607 Detonation channel malfunction
- 1102 Oxygen sensor heater resistance low
- 1115 Faulty oxygen sensor heating circuit
- 1123 Rich mixture at idle
- 1124 Lean mixture at idle
- 1127 Rich mixture in Partial Load mode
- 1128 Lean mixture in Partial Load mode
- 1135 Oxygen sensor heater circuit 1 open, short circuit
- 1136 Rich mixture in Light Load mode
- 1137 Lean mixture in Low Load mode
- 1140 Measured load differs from calculation
- 1171 Low level CO potentiometer
- 1172 High level CO potentiometer
- 1386 Detonation channel test error
- 1410 Canister purge valve control circuit short circuit to +12V
- 1425 Canister purge valve control circuit short circuit to ground
- 1426 Canister purge valve control circuit open
- 1500 Open circuit in the fuel pump relay control circuit
- 1501 Short circuit to ground of the fuel pump relay control circuit
- 1502 Short circuit to +12V fuel pump relay control circuit
- 1509 Overload of the idle speed regulator control circuit
- 1513 Idle air control circuit short circuit to ground
- 1514 Idle air control circuit short circuit to +12V, open
- 1541 Fuel pump relay control circuit open
- 1570 Invalid APS signal
- 1600 No connection with APS
- 1602 Loss of on-board voltage to the ECU
- 1603 EEPROM error
- 1606 Rough road sensor incorrect signal
- 1616 Rough road sensor low signal
- 1612 ECU reset error
- 1617 Rough road sensor high signal
- 1620 EPROM error
- 1621 RAM error
- 1622 EEPROM error
- 1640 EEPROM Test Error
- 1689 Invalid error codes
- 0337 Crankshaft position sensor, short to ground
- 0338 Crankshaft position sensor, open circuit
- 0441 Air flow through the valve is incorrect
- 0481 Cooling fan 2 circuit malfunction
- 0615 Starter relay circuit open
- 0616 Starter relay circuit short circuit to ground
- 0617 Starter relay circuit short circuit to +12V
- 1141 Faulty oxygen sensor heater 1 after the converter
- 230 Fuel pump relay circuit malfunction
- 263 Injector driver fault 1
- 266 Faulty injector driver 2
- 269 Injector 3 driver fault
- 272 Faulty injector driver 4
- 650 Check Engine Lamp Circuit Malfunction
Diagnostics
If you notice that something is wrong with the operation of the Lada Kalina vehicle, then it makes sense to diagnose the car. As a rule, all breakdowns appear immediately after checking the car. You can ask for help in carrying out diagnostics at a service station, where you will pay a certain amount for this service, or you can do everything yourself. Of course, with the help of special equipment there is a greater chance of identifying a malfunction, since when checking independently there is a possibility of obtaining inaccurate data.
As a prior driver with eight years of experience, my first thought is a bullshit question - we’ll fix it ourselves - information on how to do it periodically pops up on the drive. You just need to remove the valve, blow it out, turn the adjusting screw and that’s it)) - Remove the terminal from the battery - Disconnect the wires from the canister purge valve - Disconnect the two hoses from it - Remove the valve - Check the valve (it shouldn’t be blown out - mine was blown out a little ) — We unscrew the “pipe” on the valve and turn the screw back and forth (in the end it must be returned to its original position, so you need to remember it) — We spray carburetor cleaner into the valve and blow it with compressed air. — We return the screw to its original position — We cover the torn “pipe” with sealant, since there may also be air leaks through it. — We put it back together in reverse order. As a result, the car became a little more lively, and the idle became smoother —
But the effect lasted for several days and the error appeared again.
Knowledgeable people have already noticed my main problem - the fuel filter was not installed on the hose from the adsorber to the valve. The error came out again. And yesterday I was standing at a traffic light and the jackie-chan light came on - without worrying at all about this - just, while I was waiting for the green light, I threw an error through the BC and the jackie immediately went out)) This time I didn’t bother with rotating the screw and blowing out the old valve (there were doubts that I made a mistake with the screw by half a turn =)) and so I bought a new valve, fuel filter and a couple of clamps.
The car again became a little “lighter” and better than XX (maybe self-hypnosis), and also the consumption began to fall
All that remains is to figure out how to route the tubes so that nothing rubs, bends, or knocks.
Modern technologies are developing, equipment is becoming more complex and sophisticated, and progress does not bypass vehicles. Carburetor cars were very simple, and any driver could figure them out, but on cars with injection engines, new components were added, in particular, a fuel vapor recovery system appeared, the main element of which is the adsorber. The main task of this circuit is to remove fuel vapor from the tank into the intake manifold at the time the internal combustion engine is started, and the adsorber purge valve plays an important role here. This article will discuss the operating principle of this system, the procedure for replacing the valve, and possible malfunctions that may arise during the operation of a Lada Kalina passenger car.
VAZ Kalina error codes: causes and their elimination
VAZ Lada Kalina is equipped with a standard computer immediately at the enterprise. Moreover, it is a high-quality brand, has wide functionality, and can satisfy many car drivers. But for those who want more, it is recommended to purchase a device with serious functionality, for example, the Gamma on-board computer.
It has much more functionality compared to a standard computer. It displays and resets fault codes, and at the same time makes diagnostics. It is launched on the dashboard by pressing a key to reset the daily mileage, and at the same time turning on the ignition. After pressing the key, the firmware version of the on-board computer (BC) and error codes, if any, will be shown on the computer screen.
Possible error codes Kalina
What error codes exist for VAZ Kalina?
- The highest voltage on-board network of the machine.
- Fuel sensor error (for example, within 20 seconds it was detected that the circuit was broken).
- Coolant temperature sensor error.
- The motor is overheated.
- Oil pressure is in poor condition.
- The brake system has broken down.
- Battery low.
What should I do to troubleshoot? You should hold down the key and turn on the ignition, but do not start the car. The arrows on the dashboard will move and the lights will turn on. After this, you need to press one of the keys on the switch, which is located under the steering wheel. Then the arrows will be at the initial position, and errors will be shown on the display.
Let's give advice to those who buy a used VAZ car - most drivers don't even think about the fact that there is an option for diagnosing and resetting Lada Kalina errors.
And therefore, before buying a VAZ, you should run this option to find out everything about the past of the car you are purchasing.
The modern automotive industry is a very developed industry; it is almost always an excellent assistant to any car owner.
This does not depend on the make of the car; the presence of BC is an excellent feature of almost any car produced over the last ten years. A similar system is no exception for VAZ. Many people know what an on-board computer is, but not everyone knows how to evaluate errors that have occurred and determine their significance. Let's look at the above errors.
It should be noted that many of the errors characteristic of VAZ are understandable. For example, a temperature sensor error, the BC can issue it when the motor is cooled. But it happens that the computer gives an error falsely.
For example, once the motor was overheated, the computer suddenly notifies about the error, even if there is none. That is, errors can occur if the BC remembers information about an overheated motor.
And therefore, when this problem has been fixed, it is better to reset all BC readings.
And to fix it, you should press the Reset key - it is located under the control buttons of the on-board computer. But if the faults are not identified, you need to ask a professional for help. You should also pay special attention to the errors of the machine's bookkeeping system if it has already been used and was purchased secondhand.
Vehicle diagnostics and troubleshooting
If you nevertheless decide to buy a used car, then you should definitely make a diagnosis, paying attention to any Lada error codes that appear on the device display.
Information about existing errors will be very useful, be sure to pay special attention to this.
To diagnose and find out information, you should contact a car service center if there is no special insert on the used car you are buying.
In fact, such a procedure is a huge list of information that can tell about any possible danger. Usually this is not given importance, but in vain.
For example, if a car’s BC states that the airbags are faulty, you definitely need to check this.
Correction: what needs to be done? Immediately press the left button and the right one, from this press the on-board computer adjusts the selected parameter.
Then pressing the keys left or right changes the parameters. After pressing simultaneously, you exit from the adjustment. Reset.
By pressing the left and right keys simultaneously, the options displayed on the screen will be reset. If everything is done in the “System error” mode, after that the error disappears.
If faults actually exist, the error will remain in memory until reset occurs.
- If the BC does not turn on, the causes of the problem are:
- there is no electric current in the BC connectors;
- there is no contact in the terminals.
- BC cannot diagnose the reasons for this:
- BC cannot calculate the speed of the car, the reasons for this problem are:
- BC cannot calculate the remainder in the fuel tank, reasons:
- The BC incorrectly shows how much fuel is left in the tank, the reasons for this are:
- there is no wire in the wiring at the 8th contact and the 9th terminal in the on-board computer;
- The car panel is showing incorrectly.
- There is no BC screen backlight, reasons:
- The thermometer shows incorrectly, reasons:
- the wire has broken in the temperature detection sensor;
- incorrect contact with the on-board computer.
- No voice accompaniment, reasons:
- speaker is faulty;
- the software has crashed;
- The voice accompaniment is not reproduced (you must press the “up” key and hold it for more than three seconds).
- BC writes incorrectly, the program has gone wrong, etc., reasons:
- The on-board computer is not connected or there is no contact with it;
- there is no contact in the connected battery terminal (the contact should be securely fixed).
- Initialize the BC:
- previous settings will be reset;
- reset all parameters for the previous ride;
- set the clock to 8 hours 00 minutes;
- The alarm clock should be at zero, its notification is disabled.
Violations in the system
There are few problems observed here, since the design of the device is not at all complicated. The solenoid valve may not open or, conversely, not close, or may be stuck in any other position. But the system can malfunction for other reasons, for example:
- there are malfunctions in the operation of the control unit;
- there may be a break in the circuit and, as a result, there is no voltage in the valve;
- connecting pipes may be clogged or pinched;
- The carbon filter is clogged.
A situation where the control panel does not close can lead to the following problems:
- the dynamics of the internal combustion engine will decrease;
- fuel consumption will increase;
- the mixture will be excessively rich, and, as a result, a black coating will appear on the spark plugs;
- the engine will begin to malfunction, which will be especially noticeable at idle.
When the valve, on the contrary, is constantly closed, vapors accumulate in the gas tank that exceed the permissible limits, and therefore the fuel pump or fuel level sensor may fail.