How to open a car without keys
Here are some proven ways to solve the problem of opening a car:
The most common way is to take a spare set of keys. Surprisingly, many people are confused and forget that they have a second set of car keys at home. And if the house is located within transport accessibility, it is cheaper and faster to get there by bus or taxi than to try to open the car.
If there is no second set of keys or for some reason it is impossible to take it, you can contact a special emergency door opening service. They have special equipment for reading the alarm code, which allows you to open the door of any car in a couple of minutes. You will have to pay for the services of specialists. You also need to provide documents for the car for security purposes.
Let's say the first two methods didn't work. Then we take the wire and make a loop at the end. Next, we try to lower the glass on any door at least a couple of millimeters. You need to insert a wire into the resulting gap, hook the cap of the locking mechanism with a loop and pull it up. This method only works if the door latches have a cap. Advice - it is quite difficult to move the glass from its place with bare hands. Wear rubber gloves or pick up something rubber and press firmly. After several up and down movements, the glass will begin to lower.
If you can’t lower the glass, you can slightly bend the right edge of the door (where the seal is) and carry out a similar procedure with the wire. After bending the edge of the door, you can try to press the window button with a stick or ruler. The glass will lower, revealing the entrance to the car interior.
Another method using metal wire
Make a hook at the end (note that the wire must be strong; a metal hanger is better suited for this purpose). Next, insert the wire between the glass and the rubber seal, push it down
Feel and hook the door pull leading to the button and pull up. This will remove the blocking.
Image source: zacep.com
Another commonplace way is to enter the cabin through the trunk if it is left open. So, we find the button that folds the rear seats and press it. The seats fold down and you can easily get into the cabin.
You can try to pull out the glass of a small window, which is found in almost all cars. To do this, remove the rubber seal and carefully pull out the glass. You can then easily put it back in place.
Design and types of window lifters
The mechanical window lifter on the VAZ 2106 has a simple design and consists of a control handle, a glass lift transmission system, a cable and three rollers.
Many drivers install electric windows instead of classic ones.
They come in two types:
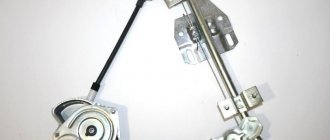
- Cable. The design includes an electric motor with a drum on which the cable is wound, and a gearbox. The upper drum is connected to a conventional window lifter using a spline. With its help the cable is activated.
- Rack and pinion. They use the principle of a steering rack in a car.
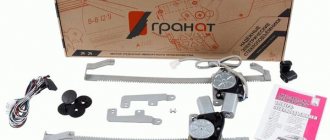
To install the electric mechanism, you need to purchase a kit consisting of wires, fasteners, backlit control keys, a decorative plug, and installation instructions (the author of the video is VALENTIN VERNIGORA).
Instructions for replacing the electric motor
Lada Kalina Station wagon PORT WINE NOT LIKE EVERYONE Logbook Rear door lock
Repair of a window regulator may include different stages depending on the breakdown. In this case, we will tell you how to repair a window regulator by replacing its electric motor; as mentioned above, this problem is one of the most common.
The replacement process is considered using the example of a Lada Kalina car:
- First you need to buy a new electric motor, which is sold in a housing with a gearbox. The door trim is dismantled - this operation cannot be performed in the cold, since the trim is fixed using plastic pistons, which will quickly break.
- Unscrew all screws and other fasteners securing the inner handle.
- All wires must be disconnected; for greater convenience, you can remove the speakers. After these steps, the glass, which is fixed in the guides, is unscrewed. In order for the glass to sink to the bottom, you need to unscrew four more screws; to do this, use a 10 key. There is a curtain at the bottom of the glass unit, which must be removed.
- The window regulator itself is mounted on nuts and guides, the electric motor itself is secured with three more nuts. The block can be pulled out through the technological holes in the door. If you disassemble the gearbox, the electric motor will fall apart into two parts. In general, the gearbox must be dismantled and replaced with a new one, further reassembling in the reverse order. The gear cable should be lubricated before use.
Window lift repair
Since repairing a window regulator in most cases involves replacing the mechanism, it is worth considering the step-by-step process from removal to installation. To do this you will need the following list of tools:
- heads or keys for 8 and 10;
- extension;
- ratchet handle;
- flat and Phillips screwdrivers.
Removing the window regulator
The procedure for removing the device from the car is as follows:
- Use a screwdriver to pry up and remove the plugs on the armrest. Use a screwdriver to pry the armrest plugs out
- Using a Phillips screwdriver, unscrew the fastening of the armrest to the door and remove it. Unscrew the armrest fastening and remove it from the door
- We remove the trim of the window lifter handle by inserting a flat-head screwdriver between the socket and the trim element. Use a screwdriver to pry off the window handle trim
- We dismantle the handle and socket. Remove the window handle and socket from the door
- Use a flathead screwdriver to pry off the inner door handle trim. To remove the door handle trim, pry it off with a flat screwdriver.
- We start the slotted screwdriver and push out the 7 clips that hold the door trim on the sides. The door trim is held in place with clips that need to be pryed off with a screwdriver.
- Slightly lower the upholstery and remove it from the inside door handle. We remove the upholstery from the door, lowering it slightly
- Lower the window completely and unscrew the cable clamp with a Phillips screwdriver. The cable is attached to the door glass using a suitable clamp
- We unscrew the tension roller fastening, then move it and loosen the tension on the window lift cable. To release the tension roller, unscrew the nut with a 10mm wrench.
- Remove the cable from the remaining rollers.
- We unscrew the fastening of the mechanism and remove it from the door. To remove the window lifter, unscrew the 3 fastening nuts.
- If the tension roller has become unusable, which can be determined by its external condition, then completely unscrew its fastening to replace it with a new part. To replace the tension roller, you must completely unscrew its fastening.
Replacing rollers
Window lifter rollers fail over time. Since replacing the top element is the most problematic, we will dwell on this process in more detail. The part to the door is fixed with hooks at the top, and with welding at the bottom. To work you will need the following set of tools:
- set of drills;
- electric drill;
- flat screwdriver;
- hammer;
- new video.
The upper roller consists of the roller itself and the mounting plate
The replacement procedure consists of the following steps:
- To remove the roller, we drill out the metal at the place where the plate is attached with a 4 mm drill.
- We drive a flat screwdriver inside the door under the roller plate and knock it down with a hammer, dismantling the roller. Over time, the window lift rollers wear out with the cable.
- Using the hole in the new plate, we drill a mounting hole in the door.
- We install a new roller and secure it with a rivet or bolt and nut. The new roller is secured with a rivet or bolt and nut.
Video: replacing the upper window lift roller
Window lifter installation
Before installing a new window lifter, you must check whether the rollers rotate freely. If necessary, lubricate them with Litol. The bracket that secures the cable should not be removed in advance so as not to confuse the mechanism, since returning everything to its original position will be quite problematic. We carry out installation as follows:
- We install the window regulator in place, securing it with nuts.
- We remove the bracket and place the cable on the rollers according to the diagram. The window lift cable must pass through the rollers according to a certain pattern.
- We adjust the tension of the cable with the appropriate roller and tighten the fastening of the latter.
- We fix the cable to the glass. Use a Phillips screwdriver to tighten the fastening screw of the clamp.
- We check the functionality of the mechanism.
- We install the upholstery and door handle, as well as the window lifter handle.
Video: replacing the window regulator on a VAZ 2106
Electric windows for VAZ 2106
How to remove the driver's door trim Ford Focus 2
Having electric windows in modern cars is not a luxury. This convenient device, which facilitates the process of raising and lowering the windows, simply must be in the car, including the VAZ 2106. Let's figure out how to install window regulators, how difficult it is to replace the standard mechanism and how to do it yourself.
Replacing the classic mechanism
For the VAZ 2106, mechanisms for raising windows come in two varieties:
| Kinds | Characteristics |
| Cable. | They consist of an electric drive with a gearbox and a reel with a wound cable. The upper drum is connected to the classic window lifter through slots and is designed to operate the cable. |
| Rack and pinion. | They have a different design and work on the principle of a steering rack in a car. Such devices are good for hard-moving car windows, since the mechanism itself moves easily. |
The classic mechanism on the VAZ 2106 is a simple device for raising and lowering the windows, which is controlled using a handle. Despite its simplicity, Six car owners encounter situations when the device needs to be replaced. Given the age of the car, the mechanism may break or malfunction.
The order of your actions when carrying out the procedure for removing a faulty product and installing a new one is as follows.
- Remove the door where the window regulator will be replaced.
- Disconnect the bar that secures the glass to the lifting cable. Move the cable itself to the side and remove the device.
- Check how easily the rollers rotate. If necessary, lubricate them with lithol.
- Attach the new mechanism to the standard connections, passing the cable along the rollers, as indicated in the installation diagram.
- Pull the cable over the rollers without sagging or strong tension.
- Secure the handles while rotating the lifting mechanism of the VAZ 2106 window regulator. The entire structure should rotate smoothly, without jolts.
- Fix the glass in the lower position, lower the device, attach the cable to the bar.
Replacing the “six” window lifting mechanism is quite simple and does not require a lot of time and money.
Sequence of actions when installing a power window
In order to tune the “six” by installing electric window lifts, it is not necessary to go to a car repair shop. You can do this yourself. On the modern automotive parts market there is a large selection of power window kits. To install the device yourself, no special knowledge or skills are required. Typically, the power window kit includes electrical wiring, control keys, and fasteners.
Installing the mechanism is quite simple and is done in the following sequence.
- Remove the door and install a power window. Use self-tapping screws to attach to the car door frame. This should be done carefully so that the door does not become deformed as a result.
- Check the glass movement for ease of sliding. Adjust the guides if necessary.
- Connect the electrical wiring, referring to the wiring diagram. Route the wires under the panel.
- Assemble the door by installing the plugs in place of the handles.
- Mount the control key in the instrument panel.
- Connect the battery and check the system's functionality. This completes the installation.
When carrying out work on electrical equipment, disconnect the ground on the battery. Do not forget that the circuits of new mechanisms must be protected by fuses.
Door Removal Tools
The window lifter handle cannot be repaired. That’s why they simply replace it with a new one, since the latter costs from 30 to 70 rubles.
Read more: Universal instructions for installing parking sensors with your own hands
Dismantling is carried out in the following order:
- take a flathead screwdriver;
- use it to pry the plastic base retainer with the U-shaped slot;
- push it towards you and it will jump off;
- Use the same screwdriver to press out the handle itself;
- remove the decorative cap.
Now all that remains is to install the new element by performing all the described steps in reverse order.
It often happens that replacing the window lifter handle turns out to be in vain, because after that the side door glass is very difficult to lower and raise by the mechanism, and this requires some effort.
This indicates a malfunction of the window lift mechanism and the need to install a new one. The most common cause of its breakdown is worn out gear splines and an exhausted cable that is no longer able to perform its functions as it should.
Remove the trim
To install a new window regulator, which does not involve removing the glass, you need to disassemble the car door in the following sequence:
- remove the window handle and door card armrest, for which you need to carefully pry off the decorative plugs using a flat screwdriver;
- Using a Phillips screwdriver, unscrew the screws that secure the armrest;
- remove the screws of the door card pocket and dismantle it;
- without much effort, pry up the handle cover that opens the door from the inside and release it;
- unscrew the door lock button;
- unfasten from the door by prying up the casing, which is mounted on several pistons, with a screwdriver;
- Use a 10 mm wrench to unscrew the bolts that secure the glass to the window lift mechanism. Then you need to lift the glass up with your hands and use the same key to unscrew the nuts that secure the window lift mechanism to the door;
- After this, you can dismantle the entire structure of the window regulator through the door hole, which was hidden under the trim.
Replace the window lift mechanism
Installation of a new element is carried out in the reverse order. The glass is fixed in special holders. The window lifter handle is put in place. The functionality of the entire mechanism is checked by lowering and raising the side window. After making sure that all the parts are installed properly and function perfectly, all that remains is to remove the handle and reattach the door trim and all its components.
Before starting the manipulations, you need to prepare the tools. To work you will need:
- heads for 10 and 13;
key - “ratchet”;
head extension;
Torx T20 bit;
adapter for nozzle;
Phillips screwdriver.
Trim Removal Tools
This is a highly specialized tool, not every car owner has it. In this case, you may have to purchase new upholstery fasteners, since the old ones may break if they are exposed to inappropriate tools. You can try replacing the blades with a shoe knife or similar tool, but a good result is not guaranteed, since you can, again, break the fasteners or scratch the upholstery.
Rear window lifter handle.
If a motorist needs to remove the window lifter handle, then it is not necessary to contact a car service center and pay money. This process is quite simple and takes 10 minutes, and therefore there is no point in wasting money and time visiting a service station.
So, let's look at what the process itself looks like:
- We insert a flat-head screwdriver between the washer and the window regulator handle.
Insert a screwdriver and loosen the thrust washer and handle.
- We press the handle and remove the thrust washer.
- Pull the handle towards you and remove it from the grooves.
Remove the window handle from the VAZ-2107 door. The VAZ-2114 is similar.
- The assembly process is carried out in the opposite order.
Window lifter handle.
Replacing such an important element as the window lifter handle is necessary when dismantling the door card, carrying out repair operations, or replacing the handle itself due to a breakdown.
Selection of new mechanisms and handles
Lambo doors for VAZ 2108 diagrams and instructions
There is a fairly large selection of accessories and spare parts in retail and online stores.
When selecting, special attention should be paid to the following issues:
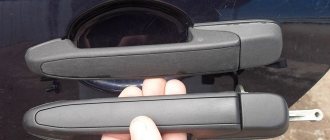
- Typically, external handles are sold in three colors: white, black and unpainted.
- Different manufacturing companies are engaged in the production of pens of a new form, respectively, their prices and quality are different.
- The use of locking mechanisms from 8 Series cars will require modifications to the devices and doors themselves.
In the process of selecting the necessary spare parts, the quality of their manufacture is assessed. Silumin and plastic parts do not have sufficient strength, especially at low temperatures. High-quality installation of new handles is possible only if its dimensions and seat configuration exactly correspond to the standard ones.
Preference should be given to those manufacturers of Euro handles for the VAZ 2107 car who have proven themselves accordingly. This kind of information can only be obtained from car owners who have previously purchased such parts and installed them. In preparation for installing parts, they must be painted in the same color as the body, if this is in the owner’s plans.
Replacing the "six" window regulator
How to install a window regulator on a VAZ 2106? The procedure for replacing the product is as follows:
- We disassemble the door where it is necessary to install a window regulator to replace the faulty product;
- We begin dismantling the defective product by removing the glass fastening strip to the window lift cable;
- We move the cable to a position that does not interfere with work;
- We remove the old window lift mechanism of the VAZ 2106;
- We check the rollers for free rotation; if they lock during rotation, they must be lubricated with lithol.
1. It is forbidden to dismantle the bracket that secures the cable in the reel in assembled condition, otherwise, if the cable comes off the rollers when the reel is wound, the lifting mechanism will malfunction and it will be quite difficult to restore it to its previous condition.
2. When unwinding the cable for installation work, it is prohibited to touch the latch.
- We attach the window regulators on the VAZ 2106 to the standard connections and pass the cable along the rollers according to the installation diagram;
- In the area of the body part of the lifting mechanism, the cable must overlap, that is, its section coming out from the bottom of the drum is directed to the top roller, and from the top of the drum to the bottom roller;
- We tension the cable on the rollers, for which we loosen the roller from below, which is subject to adjustment, and tighten it according to the attached diagram:
- If the size of the cable is not enough, then you need to pull it onto 2 rollers and release the latch - clamp and place it on the roller elements without sagging;
- After installing the window regulator, we tighten the cable without sagging, but also without special tension. If the locking device was not removed, it can now be released.
- When securing the handles of the VAZ 2106 window lifters, we rotate the window lifter mechanism, and the entire system should rotate smoothly, without jolts or jams. Now we move the glass to the lower position, lower the windows, and attach the cable to the bar.
The procedure for removing and installing a window regulator on a VAZ 2106 on a video clip can be viewed on our Internet resource.
Brief instructions for replacing the mechanism
In general, the procedure for replacing a window regulator looks like this:
- The door trim is removed.
- The cable is disconnected from the clips that hold the glass.
- The cable is removed from the rollers.
- Next comes the removal of the guide chute and the lift mechanism.
- Installing a new window regulator.
- Threading the cable.
- Fixing the glass brackets and tensioning the cable.
- Reinstalling the door trim.
To summarize, we note that the process of replacing a window regulator on a VAZ-2107 is a completely feasible task for the car owner. During the repair process, the main thing is to carefully follow all the recommendations and installing a new mechanism will not be a problem for you.
There is a special offer on our website. You can get a free consultation with our corporate lawyer by simply submitting your question in the form below.
The window regulator is an important component of any car. Although motorists do not use power windows every time they travel, they should always be in working order. In VAZ-2107 cars, the manufacturer installs manual windows with a cable drive. The presence of electric windows in the “Seven” indicates that the car has been modified by its owner.
The main difficulty when carrying out such an operation as replacing a VAZ 2107 window regulator is the small space inside the doors of this car.
Let's take a closer look at the procedure for replacing a manual cable-type window lifter on the front door of a VAZ-2107 car. So:
-First of all, remove the opening handle and the manual window drive handle from the inside of the door;
— Unscrew the door lock button;
— Remove the door trim;
— Unscrew the two clamping plates holding the cables;
— Lower the door glass to the lowest position;
— Using wrench No. 10, loosen the fastening of the tensioner roller and move the roller itself a little to the side so that it becomes possible to remove the cable;
— Using a spanner number 8, unscrew the three fastening nuts of the window lift mechanism;
— Lift the door glass and remove the window lift mechanism through the technological hole in the car door.
Installing a new window regulator is carried out in the reverse order. However, there are some features that I would like to mention:
— Before installing the mechanism, be sure to lubricate the cable with lubricant;
— The lower branch of the cable is immediately fed to the upper roller of the door, and the upper branch will correspondingly go down. Due to the need for such actions, we recommend using a wire, which is removed after the window lifter mechanism has been completely secured and all adjustment work has been carried out;
— There is also one upper invisible roller in the window lift mechanism of the VAZ-2107 car. At first glance, it is simply impossible to put a cable on it. We do this - at the top of the cable we twist an open loop and direct it to the place where this “invisible” roller is located. We move the loop up and down, trying to catch on the roller. Either way, after a few tries, you'll be hooked on this video;
— We adjust the smoothness of the glass movement and finally tighten all the fastening nuts.
That's the whole process of replacing the window regulator on VAZ-2107 cars.
How to remove window lifter handles at professional service stations
On the vast majority of cars, the door window handles use the same fixation method. The handle itself fits onto a slot, and to prevent the handle from falling out, its travel is limited by a locking ring.
At specialized service stations, a factory-made circlip puller is used. By the way, such a puller can be found on sale in many auto parts stores .
The puller is represented by a stepped plate. On one side the edge of the plate has a groove. This very groove opens the antennae of the locking ring.
The puller works very simply. You just need to start the device from the side of the antennae of the retaining ring. As is clear, you first need to visually verify where the antennae are on the staple and where the head is.
The good thing about the puller is that the plate does not leave marks on the skin . That is, the device does not contact the door card. Below is an additional video, the author of which shows 2 methods of detaching the window lifter handle: with a flap and a puller. Alternative methods for detaching the handle are shown on the Daewoo Matiz. The same techniques are quite applicable to Lanos.
If you don’t have the opportunity or desire to spend money on buying a puller, then you can make this device on your own. To create a puller, the master will only need a metal plate 200x70 (mm) with a thickness of 1.5-2 (mm). For greater aesthetics, the device can be shaped into a cone.
How to remove the window handle
If your small fleet consists of a car that is made by a domestic manufacturer, then be prepared for the fact that problems may arise with the window lifter handles. From time to time they may break, so you should have a minimal idea of how to replace this element without resorting to the help of specialists. Even if your experience in repairing car interior elements is minimal, you can still cope with such an easy task.
What you need to remove the window lifter handle
In order to remove and install a new window lifter handle, you will need to obtain:
1) Flat screwdriver;
2) A handle I just bought, complete with a washer and a latch.
No special pullers or rare tools are needed. That is why repairing the window lifter mechanism will not be prohibitively expensive from a financial point of view.
How to remove the window handle
To remove the power window handle, you will need to follow these simple steps:
1) Place a flathead screwdriver between the handle washer and the latch. The latter needs to be lifted and pressed away from the surface so that later you can remove it by simply pulling it towards you. The handle will easily come out of the “seat”.
2) After removing the handle, you need to remove the washer of the old handle.
That's all. But it’s not always possible to fix everything by replacing the handle.
For example, if difficulties arise in raising and lowering the glass, you should pay attention to the window lift mechanism itself. Maybe the culprit is the cable that lowers and raises the glass
The cause may also be worn out gear splines of the window lift system. If this is the case, then the entire mechanism will have to be changed. To do this, you do not need to remove the glass. The steps are as follows:
1) First you need to disassemble the car door itself.
2) Remove the handle and armrest. To do this, just pry off the decorative plugs with a screwdriver, after which, using a Phillips screwdriver, you will have to unscrew the screws that hold the armrest handle itself. After unscrewing the screws that hold the door pocket in place, remove it.
3) There is a pad on the handle that opens the door. It needs to be lightly pryed and then removed. Next you need to unscrew the button that blocks the door.
4) Using a flat-head screwdriver, you need to pry off the upholstery, which is secured by eight pistons. After that, remove it.
5) The glass is attached to the window regulator with two bolts, which must be unscrewed with a “10” head. Lift the glass up. Using the same method, you need to unscrew the nuts that secure the window lift mechanism itself. The parts must be removed through the door panel window. After replacing the window regulator, reassemble everything in reverse order.
6) After installing the new window lift mechanism, you will need to secure the glass and install a new handle. Next you need to check the operation of the system. Only if everything is in order will it be possible to return the upholstery, lock button, armrest, pocket and handle pad to their place.
In principle, no problems should arise. This work is not particularly difficult.
Replacing the window handle
Installing a new window handle is carried out by performing the above steps in reverse order. You need to take the washer that comes with the new handle and insert it in place of the old one. This washer must be held with your hand, while inserting a new handle in place of the old one. Many experts say that the new handle needs to be turned several times. This will facilitate better adhesion of the new handle to the splines of the lift gears. Only after you are sure that the handle holds well can you install the latches that come with the handle. After completing all work, check the operation of the window lifter handle. Just raise and lower the window several times. It should go smoothly. If this does not help, then you will have to go to the mechanism itself.
So, even the most inexperienced car owner can replace the window lifter handle with his own hands. Experts say that it would be useful to check the serviceability of the entire mechanism, so as not to return to a similar problem later. Only if you are unable to solve the problem with the window regulator yourself, you should turn to professionals for help or advice. But there is a high probability that such actions will not be necessary.
Subscribe to our feeds on Facebook, Vkontakte and Instagram: all the most interesting automotive events in one place.
Window lifter handle replacement process
Pry up the latch
Removing the window handle and installing a new one is a procedure that is not difficult. In this situation, you cannot do without a flat-head screwdriver and a new handle, which should be equipped with a washer and a latch.
Use a screwdriver
When starting to dismantle the window lifter handle, you need to do the following:
- carefully insert a screwdriver between the washer and the latch of the handle with which the side glass is activated;
- disconnect the faulty handle and remove the washer.
pry the latch with a tool and press it, then pull it towards you and remove it;
Remove the washer and latch
When installing a new part, the action is the opposite: the washer included in the kit is installed in its place, which must be held with your hand in order to successfully install the window lifter handle on the mechanism.
After this, be sure to rotate it slightly so that it is secured to the gear splines. The assembly of this element ends with the installation of a latch, which secures the window lifter handle and prevents it from jumping off. Here's how to remove the power window handle.
After replacement, it is advisable to check the proper functioning of the replaced part by lowering and raising the door glass with its help.
Replacing the front door window lifter of a VAZ 2101, 2106 with your own hands
Hello! Today we’ll talk about such a simple, but at the same time not without secrets, matter, about replacing the window lifter on the VAZ 2101 and 2106. That is, the story will be about how to tame this unruly cable, in the post we mean short windows (2101), on long glasses (2107-05) have a slightly different cable movement pattern.
Window lifter VAZ
It is necessary to start the replacement with theory, so I present to your attention a diagram according to which a regular window lifter works.
As you can see, the cable moves along three rollers; when replacing a window lifter, it makes sense to lubricate them and check whether they rotate freely.
I won’t go into details about how to disassemble the door, it’s not difficult and everything is clear. The replacement must begin by dismantling the unusable window lifter; it is secured with three nuts on “8”; also, using a Phillips screwdriver, you need to unscrew the fastening of the glass strip to the cable and move the cable to the side.
Here you need to unscrew and move the cable to the side
After dismantling the old window regulator and checking the free rotation of the rollers, you can begin installing the new one. We take the new window regulator out of the box - it will look similar to the one shown in the first photo.
The rollers are in these places
Attention! You cannot remove the bracket on an uninstalled window lift that secures the cables in a wound state; if the cable comes off, the lift will get tangled and returning it to its previous position is oh, how difficult. Next, we unwind the cable wound by the manufacturer, without touching the latch!
Next, we unwind the cable wound by the manufacturer, without touching the latch!
Latch! Do not remove until installation!
Next, you can screw the new window regulator onto the door, and put the cable on the rollers according to the diagram (photo 2). Near the lift body, the cable must cross, that is, the cable that comes out from the bottom of the drum goes to the upper roller, from the top of the drum to the lower roller.
It should look like this at first
After this, you can pull the cable onto the rollers; in order to do this, you will need to loosen the lower adjustable roller and stretch the cable according to the diagram. If suddenly there is not enough cable to put it on the rollers, then you need to put the cable on two rollers and remove the latch that secures the cables and, without loosening the tension of the cables, put it on the rollers.
Tension roller
Thanks for subscribing!
Next, using this roller, we tighten the cable; it should not sag, but it should not be stretched like a string. Also, if you did not remove the lock, you can now remove it.
Now we put on the handle and try to rotate the lift; the cable should rotate easily, without jamming. Now we lower the glass to the very bottom, do the same with the window lifter, screw the cable to the bar, and now the installation can be considered complete.
Once!
Two!
Three!
Everything must work perfectly!
Window lifter malfunctions and ways to eliminate them
The operation of the window lifter is configured and adjusted by the manufacturer, so you should interfere with it extremely carefully and carefully, otherwise the mechanism may jam, crackle and crackle.
From personal experience, I advise you to carefully study the device and read the detailed troubleshooting instructions before starting to independently repair the window lifter mechanism. Even though many of them seem quite possible to fix with a screwdriver and a wrench, in some cases it may be necessary to completely replace the window regulator.
Window lift creaking
At first glance, the creaking of the window regulator does not seem to be a serious malfunction, but you should pay attention to this signal, since this is the first sign that the mechanism is wearing out and may soon break. Methods to combat this symptom are extremely simple, accessible to everyone and do not take much time:
- lubricate the window lifter - lubricants from any manufacturer, widely available in car dealerships, are suitable for these purposes;
Window lifter jammed
The main reasons that the VAZ 2107 window lifter is jammed are as follows:
- failure of the welded joint connecting the cable bracket and the glass strip to which it is attached. In this case, you need to disconnect the window lift cable and weld the bracket;
- The cable is tangled or twisted inside the window lift mechanism. You can try simply removing and reinstalling the cable. In case of failure, the entire mechanism will have to be replaced;
- wear of the window lifter gears indicates a clear need to replace them.
Glass falls
It happens that the glass falls and does not stay up. The reason for this may lie in the weakening of the tension roller, which creates the proper tension in the cable. To fix the damage, it is necessary to restore this mount. Another cause of the malfunction may be that the end of the cable has come out of the fastener. Then you need to remove the window regulator and try to wind the cable again.
It’s easy to check whether you carried out the repairs properly: in good condition, the window lifter handle rotates freely and effortlessly, the glass rises easily, without getting stuck and without any extraneous sounds.
how to supply and install the mechanism, repair and diagram
The VAZ 2106 window lifter has a reliable design, but, like any mechanism, it can fail. The article discusses typical malfunctions of power windows on the “classic” and provides instructions for removal and installation.
Design and types of window lifters
The mechanical window lifter on the VAZ 2106 has a simple design and consists of a control handle, a glass lift transmission system, a cable and three rollers.
Many drivers install electric windows instead of classic ones.
They come in two types:
- Cable. The design includes an electric motor with a drum on which the cable is wound, and a gearbox. The upper drum is connected to a conventional window lifter using a spline. With its help the cable is activated.
- Rack and pinion. They use the principle of a steering rack in a car.
To install the electric mechanism, you need to purchase a kit consisting of wires, fasteners, backlit control keys, a decorative plug, and installation instructions (the author of the video is VALENTIN VERNIGORA).
Common faults and solutions
Over time, the window lifting mechanism becomes unusable - it is impossible to raise or lower the glass.
There may be several reasons for a device malfunction:
- cable break;
- foreign objects entering the mechanism;
- gearbox wear.
There is no point in repairing window regulators, since their cost is low; it is easier to buy a new device and replace it.
Electric lifts may have the following faults:
- All power windows do not work: the fuse is blown, there is no connection to ground, the wiring is broken. The repair consists of replacing fuses, restoring ground connections and electrical circuits.
- The lift on one of the doors does not work. The switch is faulty, the reverse current relay is broken, the electric motor is broken, the wiring is broken, the connector is disconnected. Faulty parts should be replaced, the wiring restored, the connector connected.
Removal instructions
To complete the work you will need the following tools:
- Phillips and flathead screwdrivers;
- a set of keys;
- knob;
- extension.
The removal procedure consists of the following steps:
- First of all, you need to remove the casing.
- Next, the glass is lowered as far as possible. Use a Phillips screwdriver to unscrew the bolt holding the clamp.
- After unscrewing the bolt, lower the clamp down.
- Then on the left side of the door, just loosen the roller nut using a wrench.
- The cable is now free and can be removed from the roller.
- Next, unscrew the three nuts holding the window regulator.
- When unscrewing the third bolt, the mechanism should be held from the inside.
- When the window lifting mechanism is free, move it to the side.
- After unscrewing the last nut, you can remove the window regulator from the door.
Next, repair or replacement is carried out. The rear mechanism is installed in the same way.
Installation Features
Installation of a new or repaired window lifter is carried out in the reverse order of removal.
Photo gallery “Installing a window lifter”
To install a power window, follow these steps:
- Dismantle the door, remove the door trim. Next, the electric window lifter is installed using self-tapping screws.
- After installation, you need to check the sliding of the glass.
- Connection to the vehicle's electrical network should be made according to the electrical diagram.
- Next, the door is installed on the car.
- A control button is mounted on the toolbar.
After installation, the electric window lifter must be checked for functionality. You can install a heated rear window.
Video “How to change window regulators on a VAZ”
This video demonstrates how to replace a window lifter on a VAZ (car video - Pavel Pavek).
Operating procedure
- Insert a flathead screwdriver between the latch and the washer of the broken window handle. Next, using this tool, you need to try to gently press out the jammed handle latch. Then you should carefully pull the latch towards you and remove this element out.
- The next step is to remove the broken window handle itself. First you need to remove the washer.
By the way, in order to install the handle, you must proceed in the reverse order. Next, insert a new washer, which should be included with the new handle. Lightly holding the new washer with your hand, you need to carefully install the new window lifter handle onto the mechanism. Experts advise turning the new handle a little.
This is done so that the new handle “clicks” well into the splines of the window lifter gears. Now you can secure the installed handle with the latch from that kit. It would be a good idea to check how the new window lifter handle works at the end. To do this, simply raise and lower the door glass several times in a row.
So, self-repair of the window lifter handle is quite simple. However, this method may not always solve the problem. In particular, certain difficulties may arise with removing a broken handle and installing a new analogue if the glass on the vehicle door itself is very difficult to lift and release.
- Insert a flathead screwdriver between the latch and the washer of the broken window handle. Next, using this tool, you need to try to gently press out the jammed handle latch. Then you should carefully pull the latch towards you and remove this element out.
- The next step is to remove the broken window handle itself. First you need to remove the washer.
Moreover, most likely, in this case, replacing the old handle with a new one may not solve the problem at all. Most often, if the window does not go up and down well, the problem is not in the handle, but in the window lift mechanism itself.
There is also a possibility that the lifting/lowering cable is not working correctly or that the splines of the window lifter gear have expired. If this is really the reason, then only replacing the window lifter mechanism itself can help.
For greater clarity, a video is attached to the article, which will help you better understand the question - how to remove the window lifter handle of a VAZ 2107.
Removing the window lifter handle is quite simple and even a child can cope with this task. So, there is no need to stand in line at a car service center, since the operation can be performed yourself in the garage.
Replacing the window lifter handle is a simple operation that any car enthusiast can do. When purchasing a kit in the markets, you risk receiving a defective product. In this case, it is better to purchase a kit for a later model in a specialized store. Experts also recommend checking the mechanism itself during replacement, since there are parts that fail over time.
If you are not confident in your abilities, then you can contact a service station.
Especially if a problem is found in the glass lifting mechanism. To extend the life of the mechanism, you should not make sudden movements when raising and lowering the glass and you should not pull the handle. The entry of foreign objects into the mechanism is unacceptable. Good luck and easy travels!
