Main problems:
At the same time, there are some nuances when operating a gas cylinder installation:
System malfunctions can be caused by:
- blocking of the electronic unit - an incorrect signal about gas consumption is received or is absent altogether;
- wear of cylindrical and piston surfaces of the engine;
- inaccurate gearbox adjustment;
- contamination of injectors - repairing LPG gas injectors with your own hands is not recommended, since it is impossible to guarantee uniform operation of the injector. Please note that there are two types of filters - collapsible and non-removable. The first ones do not require adjustment.
HBO control unit 4th generation
The operation is regulated using an electronic control unit included in the 4th generation HBO kit.
First you need to select a location for installing the unit. During operation, free access to it is important, and at the same time, the length of the wiring must be kept to a minimum.
The wiring coming from the controller is divided into several sections that will perform certain functions. The on-board network should be disconnected from the battery terminals before connecting. Next, you need to separate the wires responsible for powering the unit.
There should be 3 of them in total: positive terminal, ground and positive terminal of the ignition switch. After separation, they should be connected.
Next, you need to connect the wiring responsible for the operation of the injectors. It should be connected to the wiring leading to the injectors. Having determined the wires that will be connected to each of the injectors, they need to be connected. Next, we connect the connectors to the gasoline injectors and connect the connectors of the gas injectors.
Causes of malfunction of 4th generation HBO
When operating a vehicle with such equipment installed, the performance of the internal combustion engine may decrease. Such problems occur for the following reasons:
- The gearbox has failed.
- The gearbox or dispenser is incorrectly configured.
- The filter is clogged, which prevents the gas supply in the required volume.
- The temperature of the gas-air mixture is low. This often happens in winter.
- Due to the low temperature of the gearbox, the mixture turns out too rich.
If a car with HBO 4 does not start well:
- The gearbox diaphragm has failed. This happens if you often start the engine directly on gas.
- The gearbox is not configured correctly.
- The flow solenoid valve is not working correctly.
The valve may “fail” due to mechanical jamming of the armature or if a short circuit (short circuit) of the turns occurs. - The electronic control unit refuses to give a signal to start gas supply or gives an incorrect signal that does not correspond to the required amount of fuel.
- The car battery is low, which is why the solenoid valves do not operate when starting. The battery charge may decrease due to a malfunction of the starter or generator. You should also check the operation of the generator overrunning clutch.
- Compression in the engine cylinders has been reduced.
This may be due to wear on the smooth surfaces of the cylinder-piston group parts or damage to the rings and valves of the engine. - When using a vacuum reducer, the engine may not start due to the fact that a low vacuum is created in the intake manifold, which is insufficient to suck in gas. In this case, a separate electromagnetic pump helps out, which forcibly supplies fuel.
What are the advantages of gas
Many people ask why install HBO at all? After all, in fact, you have to drive with a gas cylinder in the car. This is oh so dangerous.
In fact, when it comes to professional installation of equipment in accordance with all safety standards and requirements, a gas cylinder is no more dangerous than a tank of gasoline or diesel fuel.
The cost of installation and the purchase of equipment itself is impressive if you want a truly high-quality device from famous brands. Therefore, it’s worth thinking about it, reading reviews and deciding for yourself whether you need gas.
I will tell you my personal opinion. It is important to install an LPG because the car is actively used. The same working Gazelle, which travels several tens of thousands of kilometers annually, will fully justify the costs and will save the owner money when compared with gasoline or diesel.
HBO allows you to save money only if the car is constantly in motion. I don’t see the point in spending 2-4 thousand dollars on modifications if the car spends 80% of its time in the garage and drives no more than 10-20 kilometers a day. It will take more than one year to recoup the costs of installing gas equipment.
So the main advantage is savings at gas stations. But it is conditional, as you understand.
Propane butane or methane
Another pressing question is what type of gas is best used for LPG? The answer is clear - propane-butane.
Yes, there are installations where the use of gas equipment is provided. If we take purely operational characteristics, then methane is not inferior to propane-butane.
There is only one problem - lack of infrastructure. Finding a gas station with methane gas even in a large city is quite difficult. The majority of gas stations specialize in propane-butane. That's the whole trick of choice.
Installation process
For car enthusiasts who have ever carried out repairs and maintenance of VAZ-made cars with their own hands, the installation of equipment will not cause great demands.
The main thing is to follow all prescribed instructions and check the reliability of the connections made.
There is no specific algorithm for installing a gas system on a car; you can start either by inserting the injectors or by securing the cylinder in the passenger compartment or trunk.
The stages of work can be divided into:
- design (fitting connections, planning the placement of parts);
- rough installation (drilling holes, laying lines);
- gearbox installation;
- injector insertion;
- securing the cylinder;
- final installation (connecting all elements together, securely tightening nuts and bolts, checking for leaks);
- electronic pairing and setup
Injection insertion and ramp installation
Let's start with the most difficult part, with inserting the injectors into the intake manifold. To do this, you will need to disconnect the air filter, electronic chips from the throttle and other elements attached to the intake tract. To remove the collector itself, you need to unscrew the fixing studs (less commonly, bolts) and carefully pull the collector off the studs.
Once the manifold is removed, it is necessary to mark the holes for inserting the gas injectors. The distance from the adjacent plane of the cylinder head manifold to the insertion point can vary in the range from 1 to 7 cm.
We select a place for insertion with the largest diameter so as not to interfere with the normal air flow. Once the location for the injectors has been selected, the areas on the manifold that will need to be drilled should be marked.
The holes for the injectors must be drilled at an angle of 45-90 degrees in the direction of the air flowing into the engine. You should work with a drill at low speeds, and it is better to start with a small drill, and towards the end of drilling, replace the drill with a suitable diameter and drill the holes to the end
After drilling the holes for the gas injectors, take a tap and cut the thread. Now we thoroughly clean the intake manifold and install the injectors. Before inserting, it is advisable to use a thread locker and secure the nozzles to a locklight or clamp.
Now, depending on the fasteners, you should install the ramp. The mounting location can be on the intake manifold (most often) or on the valve cover (if convenient). To install, we repeat the operation of marking the marks, then simply drill out the landing grooves (it is IMPOSSIBLE to drill through the collector , as this will lead to its failure).
Gearbox installation
The gearbox can be placed almost anywhere. It should be placed strictly parallel to the movement of the vehicle, and the height of the location should not be very low or high. The optimal placement is just below the cylinder head valve cover.
Installing the gearbox is quite simple - we select a suitable mount, then drill holes on the car body and only after that install the gearbox .
It is advisable to treat the holes made with solid oil or pushsal, this is necessary to prevent the appearance of pockets of corrosion. During installation, it is imperative to use bushing washers in order to eliminate parasitic vibration and premature failure of the gearbox.
Installing the cylinder and pulling lines
The location of the cylinder depends on its type; toroidal ones are great for placing in the spare tire niche, and cylindrical ones are right behind the backs of the rear seats.
There is nothing complicated in installing the cylinder - we select the optimal location and install the holding fasteners (in accordance with the instructions).
If there is a valve on the cylinder, its outlet channel should be reliably isolated from the external environment with a sealant and led out into its nozzle.
To draw the lines, you will need to drill several holes in the trunk floor and run the tubes from the cylinder into them.
The line should be routed near the brake pipes. As practice shows, this arrangement is extremely successful.
Highways will rarely come into contact with the road surface. In the front part, “on the apron,” we also make mounting holes through which we “run” the line. As soon as the line is “stretched”, we fix its ends in the cylinder and reducer.
We recommend: What is the difference between an injector and a carburetor in a car?
Electronics Testing and Calibration
It is better to entrust the adjustment of the electronic controller to specialists, since adjustment requires a lot of knowledge, experience and special equipment.
But checking connections for leaks is done by soaping all connections and visually checking for gas leaks; this can be done quite quickly and easily in a garage.
Do-it-yourself installation and configuration of gas equipment on a VAZ
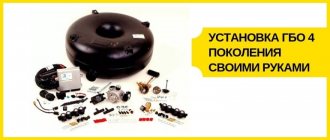
Installing a 4th generation LPG with your own hands is quite possible. However, first you need to determine the location of the gearbox, since it takes up a lot of space. In addition, it must be constantly accessible so that filters can be easily replaced.
The mounts are located only on the main frame of the machine, and in no case on the engine.
- The gearbox is installed away from the vibration site.
- When connecting hoses, position them in such a way that they are not twisted.
- Connect the antifreeze hoses parallel to the system.
- After installing the cylinder and hoses, the nozzles and electrical part are connected.
Of course, this work is not only painstaking, but also quite serious, since an incorrect connection can cause serious problems with gas equipment in a car: gas entering the cabin, high fuel consumption, popping noises, and others.
Therefore, it is better to entrust this work to professionals. Most often, HBO Lovato or Digitronic are installed. The equipment comes with instructions for the 4th generation LPG for the installation of the cylinder, electronic part, multi-valve and consumable part. Installation and connection are carried out according to the diagrams.
Digitronic program connection diagram
Connection diagram for HBO Lovato 4th generation
After installing HBO, it is necessary to periodically carry out preventive maintenance. If this is not done, the efficiency of the device will decrease. There are several types of settings:
- auto calibration;
- on fuel trim;
- while driving;
- at the stand.
Do-it-yourself tuning of the 4th generation LPG is carried out after 10 thousand mileage, and a “zero” inspection should be carried out after 2 thousand km.
Installation of cylinder, lines and filling equipment
You should start installing HBO from a cylinder. If the car has a sedan body and a large trunk, then it is better to use a cylindrical cylinder with a larger capacity. You need to attach it to the rear of the luggage compartment of the car.
Hatchbacks have small trunks, so it is better to use a toroidal cylinder. To ensure reliable fastening of the cylinder, it is necessary to use rubberized tapes.
To properly secure the cylinder, you should take measurements and mark points for future holes. It is also necessary to mark the places where the high pressure line will pass.
Having made the markings, you should drill holes in the body in the appropriate places and apply an anti-corrosion primer.
When installing the cylinder, you need to ensure that the special valve is placed on the top of the cylinder. After this, you need to install the refueling device.
It can be placed in any convenient place that does not become too dirty during operation of the machine.
The main requirement is to place the line from the filling device to the cylinder in a place that is inaccessible to damage.
The main line is made of brass tubes. To avoid damage, the line should be placed next to the gasoline pipeline.
Source: https://scart-avto.ru/remont/samostoyatelnaya-nastroyka-gbo-didzhitronik-4-pokoleniya/
Gearbox installation
After finishing the lines under the hood, they must be installed along the left side of the car. Installation of the gearbox is permitted only on the load-bearing part of the machine, but in no case on the engine. Also, good access to the gearbox is necessary. Next, you should connect the gearbox to the cooling system. It is necessary to make an insert into the pipes, and after that a pipe with a vacuum is supplied to the gearbox, which is taken from the intake manifold. A filter is mounted into the overall structure, and a reducer is attached to the main line.
Digitronic HBO adjustment - working with curves. — Portal about HBO
I will try to answer Alexander’s question asked on the forum, perhaps it will be useful to someone else.
Setting up equipment from Stag, Digitronic and some other companies is carried out using the coefficient curve (orange curve). And to understand the current state of the settings, a system for collecting and analyzing data on gasoline injection when operating on gasoline and gas was used. Injection data is displayed as green and blue curves.
- The green curve is the gasoline injection time when running on gas; it is plotted relative to the vacuum in the manifold (data from the MAP sensor).
- The blue curve is the gasoline injection time when running on gasoline; it is also plotted relative to the vacuum in the manifold (data from the MAP sensor).
- At the beginning of the Digitronic LPG settings, data on installed injectors, pressure in the reducer, sensors and other parameters are entered.
- Then auto-tuning is performed (make adjustments only on a well-warm-up engine).
- Next, you need to switch to gasoline and drive steadily, without accelerating sharply (preferably on an open highway, in 4th gear) for several kilometers to collect the gasoline curve (blue). Let's call it a reference - it shows what injection times are depending on the load when running on gasoline.
- Next, you switch to gas and repeat your trip. This is necessary to collect the green curve.
Comparison of green and blue curves
For clarity, I will use a picture from an incorrectly configured system.
As you can see, both curves are already collected, but after 3.5 ms they begin to diverge. Find the value 6 ms on the x-axis. Visually extend the line upward from this value until it intersects with the blue curve. I have done this in the picture below.
Now move the imaginary line to the right or left, towards the green curve.
In my picture, this is a blue straight line (if you look at the Y axis on the right, you will see what kind of vacuum there was in the manifold when gasoline was injected, 6 ms. In our example, it is 0.6 atm).
When an imaginary horizontal line intersects with the green curve, it will lower the perpendicular down onto the X axis. In my example, we get to the time of 7.5 ms.
It turns out that when driving on gasoline, with a vacuum in the manifold of 0.6 atm, the injection time was 6 ms. And when driving on gas at the same vacuum (roughly speaking, with the same air consumption), the gasoline injection time became 7.5 ms.
This suggests that the car adapted to the incorrect mixture composition and increased injection by 25%.
Therefore, in order to correctly configure the LPG, need to raise the coefficient (orange curve) to such a value that the injection time of gasoline on gasoline coincides with the injection time of gasoline on gas. This will be visually confirmed by the coincidence of the green and blue curves.
Making changes to the odds curve
- To begin with, at the point where the blue and green curves begin to diverge, we build an imaginary vertical line.
- Place a dot at the intersection of this line and the orange curve.
- All points to the right (in our example) are deleted.
- We put a point in the place where the gasoline (blue) curve does not reach. You don’t have to do this, but raise the right point itself, but then it will be raised very high and it will just look strange :). Ideally, at the stage of entering data about injectors and sensors, you can edit the maximum and minimum injection times, thereby excluding from the program values that are simply not used. For example, we see in the pictures that the injection time does not exceed 10 ms, why do we need a table up to 25 ms? But in the pictures in the example this was not done.
- Raise the added right point, approximately to the values as shown in the figure below. How much to raise the coefficient depends on the divergence of the curves.
We have raised the coefficient curve and now we need to check what happened. Erase the gas curve (green) and build a new one by driving on gas as described above. If everything is done correctly, the gas curve will shift closer to the gasoline curve (I drew this in the picture above), and perhaps (if we went too far with the coefficient) it will shift beyond it.
Repeat making adjustments to the coefficient curve until you achieve alignment of the curves. The combination of the blue and green curves indicates the correct setting of the Digitronic HBO .
Source: https://gazmap.ru/stati/nastroyka-gbo-digitronic
Diagnosis and adjustment
After the 4th generation HBO is fully installed, you can begin activities such as diagnostics and configuration. You will need an adapter that will connect to the laptop, and the software necessary for configuration and diagnostics.
It is better to purchase the program from the same manufacturer as the gas equipment. To connect, the control unit must be powered, i.e., turn on the ignition switch without starting the engine. If there is no connection, the laptop may be using an outdated version of the program or the power contacts are not tightly sealed.
If the connection is successful, all information about the engine will appear on the monitor: polarity, type of injectors, number of cylinders, pressure and temperature in the system. In the vehicle interior, the system control unit must display operation with warning lights. The green light will indicate that the engine is running on gasoline (it is constantly lit), and the red one should flash, indicating the possibility of switching to gas. When configured correctly, signals arrive at the unit under certain operating modes.
Popular option
It is worth presenting the most popular option, namely the reliable and time-tested manufacturer of gas equipment Digitronic, a world-famous company that is not in vain enjoying its popularity. After all, gas equipment for a car from this manufacturer is a wonderful combination of innovative work, comfort and practicality. You can safely use the equipment of this company for your car, and refueling your car will no longer be a big and wasteful problem for you. The company strictly certifies all offered equipment, conducts the necessary tests, which allow us to achieve the most probable confidence that the equipment will serve for a long time and with high quality. It is worth noting that all products of this company have a quality guarantee, so you can safely invest your money in this option and will be satisfied with the results obtained. The company uses only innovative technologies when creating its products, so you can safely trust it!
