An examination of the lighting equipment of domestic cars, carried out by experts from the magazine “Behind the Wheel”, clearly showed that a modern headlight, equipped with halogen lamps with a bulb temperature of about 700 degrees Celsius, does not comply with GOST parameters by the end of the fourth year of operation and does not provide proper illumination of the road surface .
Preparatory work
Before replacing the headlights of a VAZ-2110, the first thing you need to do is use a high-pressure washer on the front of the car. Many will say that this operation is useless, but after breaking several hidden fasteners, unscrewing bolts with threads clogged with dried dirt, they will agree that it would be better to wash off the dirt and lubricate the threads with WD-40 or similar liquid, and it would be much better to work with a clean car nicer.
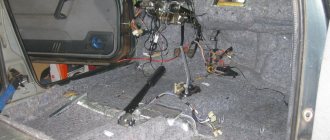
Having installed the car at the repair site, remove the negative terminal from the battery to avoid possible short circuits in the electrical wiring and disconnect the pads located on the back side of the headlight and turn signal housing.
If your car is equipped with a hydraulic headlight direction corrector, the next operation will require increased care. The old plastic becomes brittle, so without using excessive force, press the latch, turn the hydraulic corrector cylinder approximately 90 degrees counterclockwise and carefully remove it from the headlight housing.
Repair of optics on classic 2106
If the light bulbs fail, repair of VAZ-2106 headlights is carried out in the following order.
- We de-energize the car.
- Use a flat-head screwdriver to remove the black plastic sidelight.
- Using a Phillips screwdriver, unscrew the screws securing the iron headlight rim so that you can turn it.
- Turn the rim clockwise to the removal position and remove it.
- After this, the headlight is removed.
- Carefully disconnect the power plug.
- Remove the clamp and take out the faulty light bulb.
- We install a new lamp and mount the headlight in the reverse order.
Removing related parts
To get to the headlight mount on a VAZ-2110 car, you need to:
- remove the radiator trim;
- loosen the bumper fastenings;
- remove the trim, called by motorists “eyelash”.
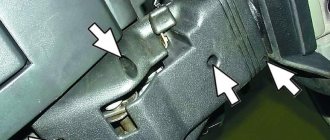
To remove the radiator lining, simply unscrew the fastening bolts located in the upper part and carefully, remembering the fragility of the plastic, pull it up until the latches are released.
After removing the cladding, unscrew the two top and one side bolts securing the headlight to obtain some freedom of movement of adjacent parts when removing the decorative trim under the headlight. To facilitate further dismantling, you can unscrew the two upper bumper mounting bolts, but this operation is not mandatory.
To remove the decorative trim, simply pull it towards the center of the car until it disengages from the wing of the fixing protrusion.
Replacing headlight glass
Replacement of headlight glass for VAZ 2110 Kirzhach
In order to correctly replace the headlight glass, you need to know the design of the entire lamp. Therefore, every motorist who encounters breakdowns in his car related to electronics is obliged to know the components of his vehicle.
What does the headlight consist of?
Replacing headlight glass on a VAZ 2110
The main component of any headlight is the reflector or flashlight reflector. Externally, it looks like a concave mirror surface that shapes the light from the headlight into the desired shape. Three types of special automobile lamps are used as a light source:
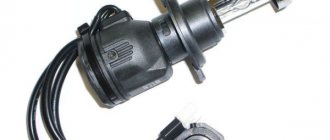
- Conventional incandescent lamps are an ordinary sealed flask with inert gases, inside of which there is a tungsten filament. Under the influence of electricity, the spiral heats up to 3000K and emits thermal and light energy;
- Halogen lamps are similar in components to an incandescent lamp, as well as in the principles of operation of the lamp. The only difference in such a part is the presence of bromine and chlorine inside it, and in addition various kinds of halogens. Lamps of this type allow the headlights to last much longer;
- Xenon lamps are classified as HID lamps. It is a gas-charging lamp, inside of which there is xenon. A xenon lamp is made of quartz glass inside two bulbs. One such light bulb consumes very little energy - only 35 W.
Corrugated glass is the most important part of any headlight.
Clear headlight glass
Another component of the headlight is corrugated glass, the replacement of which is discussed in this article. It can be transparent or tinted (see How to tint VAZ headlights with your own hands). The most popular is clear glass. There are other types of glass, such as crystal or reflective.
Two ways to replace glass
Replacing headlight glass on a VAZ 2110
There are two ways to replace the headlight glass of a VAZ 2110. The first method is used if you need to do it quickly. The second method is used when replacing parts inside the headlight itself. The most appropriate method in this case should be used. When choosing a technique, you need to take into account not only the breakdown, but also the location of the car when replacing the glass on the lamp. Let's consider both methods, but first it is recommended to watch this video, where everything is shown in detail.
1st glass replacement method
So, here is the first method of replacing glass on a car headlight, which can be done quickly, without any special tools, right on the street or on the road:
- The radiator grille is removed, which needs to be lifted and your fingers inserted into the gap between the bumper. Then, having found the latches, we unfasten them and take out the entire grille.
- Then you need to find the front bumper mounting bolts and unscrew them to pull out the bumper.
- After that, we find the headlight mounting bolts and unscrew them too.
- We push the headlight inside and pull it out by the eyelashes of the headlight towards the center of the car
- Use a screwdriver to pry up the headlight eyelashes from the outer side, thanks to this you can pry the headlight out from the bumper, as in the photo.
Replacing a headlight or glass
- Remove the headlight and unscrew the lower mounting nuts.
- Now you need to unhook the connectors from the headlights, turn signals and hydraulic corrector.
Note. If the headlight does not want to go out all the way, then one of the possible reasons is the side brackets, they can be picked up with a screwdriver.
When the headlight is removed, you need to remove the glass, then blow off dirt and dust particles from the reflectors, and then adjust the rubber gasket. Now you can install the new glass. We assemble everything in reverse order.
Note. By the way, installing the brackets is easier if you first hook them onto the body of the headlight itself, and then press, thus snapping the glass into place.
2nd glass replacement method
The second method will be needed when you need to repair the headlight inside. It is better to use it in the garage so as not to lose any parts from the car lamp:
- Special pads are disconnected along with thin wires.
- You need to remove the upper part of the radiator grille, for this you will need a ten key.
- When the block with wires has been disconnected, you need to remove the hydraulic corrector by pressing the latches and turning it in the direction of the clock hand.
Note. This can be done quickly using a narrow screwdriver.
- Now you need to find the bolts that secure the headlight and unscrew them. For this you will need a ten key.
- We push the headlight a little inside to continue dismantling it.
- You need to move the eyelashes to the center exactly four centimeters so that you can reach the headlight.
- Now you can push the headlight over the edge using a screwdriver or other sharp object.
Note. The work should be done carefully so as not to damage the parts.
- Loosen the bolt that secures the top of the headlight; a wrench and a screwdriver will help with this.
- You need to remove the eyelash by pressing on the lower perimeter of the lining with such force that the flange comes out. It's pretty simple.
- Then take a 10mm wrench and unscrew the last fixing nut - (the headlight is disassembled).
- You can now remove the lamp itself.
Now you need to completely disassemble the lamp if you need to replace some part in the headlight, and not just replace the glass:
- Using a knife or screwdriver, open the headlight by inserting the tool into the corner of the lamp.
- Using a utility knife, we cut off the excess old sealant that is no longer needed.
Note. When cutting off unnecessary sealant, the second hand should lift the corner part of the glass. If suddenly you can’t cut off the unnecessary sealant with a stationery knife, you can heat it until it starts to melt and then cut it off.
After the glass is removed from the car headlight, you can start repairing certain parts of the lamp, for this you need:
- Unscrew the three bolts that hold the headlight reflector and remove it.
- Then remove the board with the reflective surface.
- Remove the module from the car headlight.
Note: so that the board can be removed without any problems, we remove the special pressure spring. You can remove the pressure spring using the hole in the hydraulic corrector. After all the manipulations, tighten the adjustment tightly, and then unscrew the two adjustment screws in turn.
- We remove the board from the lantern.
Repair of headlight unit for VAZ-2110 car
The VAZ-2110 can be equipped with a Bosch or “Avtosvet” type headlight unit.
Headlight units vary in design.
Low beam headlight "Avtosvet" - with a flat screen and a lens between the lamp and the lens, the lens of the headlight unit is glued to the body, the side light lamp is located in the main beam headlight.
Bosch low beam headlight - without a lens, with a screen-cap on the lamp, side light lamp - in the low beam headlight.
The turn indicators for both headlight units are the same, the mounting points are the same: at the top - with bolts to the upper cross member of the radiator frame, at the bottom - with a nut to the stud on the mudguard bracket and a bolt - to the radiator frame strut.
The headlights are equipped with single-filament low and high beam lamps.
When you turn on the low beam of the headlights, the low beam lamps light up, and when you turn on the high beam, all the lamps (both low and high beam) light up.
The voltage for the low and high beam lamps is supplied respectively through relays K4 and K5 of type 904.3747-10, located in the mounting block.
The relay switching voltage at a temperature of 20±5°C is no more than 8 V, the winding resistance is 85±8.5 Ohms.
Voltage is supplied to the relay windings if the exterior lighting switch key is fully pressed (then the choice between low and high beams depends on the position of the steering column headlight switch) or, regardless of the position of the switch, if the driver pulls the steering column switch towards himself (then the high beam turns on headlights).
Oracal No. 351 and how to paint the headlight
Polyester film is quite elastic and adheres well to the treated and degreased surface. You can make a pattern, but as a rule, the reflector is of too complex a shape, so it is best to cut a piece of film with a margin and the third time you should be able to cover the surface with a minimum of wrinkles. To do this, you need to use a hair dryer, heat the film evenly and methodically remove air bubbles from under it and smooth out wrinkles.
Oracal tolerates high temperatures well and can last a season or two if the lampshade is properly sealed after gluing and assembly. The film does not like moisture.
For the laziest, there is another simple way - painting the reflector from a spray can with chrome paint. Frankly speaking, this method is not very useful, since the paint quickly fades and becomes dull, but for the first few days it will create the illusion of a dense beam of bright light, the main thing is not to overheat the headlight. Take optics seriously and they will provide excellent visibility in the most difficult conditions. Good luck on the roads and bright headlights!
Source
Improved taillights for the VAZ 2114 are a good addition to your car
To remove the rear “fireflies” of this car, it will be enough to unscrew 4 nuts. However, it is much more difficult to guess with wires. If you need to install a new “luminous” specimen, and you want to carry out the whole process yourself, so to speak, to study the “unknown” in practice, it’s time to have a partner.
Every detail in a car can be processed, but many are very interested in tuning the VAZ 2114 headlights. This is confirmed by reviews of forums on the Internet, where car enthusiasts from different countries, exchanging photos and video materials, express their opinions on this interesting issue.
Headlights on the VAZ 2114 are a necessary attribute of a domestic car. Custom headlights, selected with taste, give the vehicle an individual, recognizable image and logically complete the tuning of the body kit, not to mention more powerful and high-quality lighting for the safety of those who like to drive in the dark.
Repair of hydraulic corrector for VAZ 2110 headlights
Adjusting the light beam happens quite often, especially when the trunk of the car is heavily loaded; the light shines directly into the eyes of drivers of cars moving towards you. If the reflector has dropped and the adjustment does not work, our instructions will help you repair the headlight hydraulic corrector of the VAZ 2110; the repair will take very little time.
VAZ 2110 headlights Kirzhach - hydrocorrector repair
- Unscrew the headlight fasteners and remove them;
- We disassemble the headlights: carefully remove the glass, then the metal clips (6 pieces);
- Using a knife, clean the glass from the sealant;
- We cut off the convex profile (in the shape of the letter P) on the glass;
- Unscrew the screws (there are 3 of them) from the reverse side;
- Take out the paper reflector;
- Next to the hydraulic corrector hole inside the light housing there is a spring that must be removed;
- We perform the same actions with two plastic rosettes from two “turntables” securing the reflector.
Note: The hydraulic corrector ball snaps into a plastic groove, and the metal bobbin snaps into the second groove. It stops the adjustment, preventing it from being unscrewed further than itself. If you press the hydraulic corrector when adjusting the headlights, the metal latch will break. The ball will pop out of the plastic and then the headlight will “fall”;
- The repair will consist of replacing the broken latch with a gasket , which will not make it clear that the adjustment has reached the extreme position;
Broken iron latch of hydraulic corrector
Rubber gasket to replace a broken latch
- As a result, there is a high probability that the corrector will be compressed again;
- The correct solution is to improve the fastening by inserting a cotter pin made of solid wire between the petals of the plastic thing.
For the VAZ 2110, the repair of the headlight hydrocorrector has been completed. We assemble the headlights in the reverse order of disassembly. We first clean the old sealant, then apply a new one.
Second repair method
- We cut threads on the adjustment screws (metric 3);
- We screw them into the illuminator itself, then put on the washers;
- We take out the plastic fasteners;
- We put on the bar with the high beam and low beam modules located on it;
- We put a washer on top, a spring washer, and another washer on top of the spring. The use of a lock nut is recommended;
- We twist everything;
- We fix the structure using anaerobic sealant.
Differences in disassembling Kirzhach and Bosch headlights
Note: headlights, as mentioned above, come in two varieties. One of them is called “Kirzhach”, this type is explained on how to take it apart. Disassembling the lanterns of these two varieties is different and each in its own way. In order to disassemble the second type of headlights, called “Bosch”, you need to carry out even less complex operations.
- The glass should be removed from the headlights; it will come out by itself when the latches on the headlight are unfastened.
- Now you need to unscrew the adjusting bolt of the reflective surface until the end.
- Pull out the cap, which is located inside the reflector itself; it covers the near-view bulb. To do this, you can also use a screwdriver to pry up the reflector on the other side of the lamp.
- We are changing the parts in the headlight that were planned.
- Reassemble the car headlight in reverse order.
Note: when the headlight is reassembled, no matter after replacing which part, you must always use a special sealant. If it is not there, take note that you can also use a rubber seal for these purposes.
As you can see, everything can be done with your own hands, at no cost, very quickly and without harming the car. We remember that replacing only the glass is much easier than replacing the entire headlight. The instructions will tell you how to do this easily. This way you can save a lot of money, because the price of glass is much lower than for a new headlight.
To replace a broken or cracked headlight glass, you will need to remove the headlight unit from the vehicle.
We repair the light fixture without disassembling it
You can snap the ball into place without removing the glass, through the holes of the light bulbs on the back side of the illuminator:
- We drill a hole exactly opposite the latch at the top of the headlight;
- Insert a screwdriver into the hole;
- Attach the collet to the corrector ball;
- We seal the hole we drilled;
- We attach a hinged loop from a furniture cabinet (hinges 5-6 centimeters long, with mounting holes and a cutout on top on which it is attached) to each broken corrector unit;
- We insert the canopy into the slot of the adjustment screw;
- We move the screw so that the slot is in a narrow place of the canopy;
- Holding the canopy, unscrew the screw until it stops with force. This is how the canopy is fixed, which needs to be placed in a horizontal position;
- Using an electric drill, using a 3 mm drill, we make a hole in the base of the light where there is a hole on the canopy;
- We screw a shortened screw into the hole so that it does not reach the high beam reflector. This slot secures the adjustment screw securely; it can be broken again.
How to remove glass?
Removal will be necessary if, for example, it is necessary to replace broken glass on a VAZ 2110 or it has become cloudy, covered with microcracks, etc.
If you are dealing with Bosch, then you need to release the latches, then easily remove the glass. When installing a new one, it’s worth inspecting the rubber; replacing it won’t hurt either. Some also use sealant, although there is no particular need for this, unless, of course, you are dealing with genuine products and not Chinese fakes.
You'll have to tinker with Kirzhach a little longer. Here, in order to remove the glass, you must first carefully insert a flat-head screwdriver into the corner of the glass, forming a gap. Then connect a thin stationery knife to the process.
So, with the help of a knife and a screwdriver, you may be able to detach the glass. If the sealant “sticks”, you need to warm it up with a hairdryer and immediately continue removing the sealant while it is warm.
When installing new glass, the headlight block can be placed on a softer, construction sealant. In addition, by removing the glass, you can disassemble the reflector from the outside of the car if it also needs replacement.
DIY headlight repair for VAZ 2110
Many motorists, faced with malfunctions of the VAZ 2110 headlight, try to repair the headlight themselves, so to speak, with their own hands, or to improve the performance of the headlight, expanding its capabilities. However, finding high-quality optics is not so easy. Most often, cheap headlights from China or Taiwan come onto the market. Especially xenon headlights or lamps. They do not shine with quality workmanship, and durability leaves much to be desired; according to test results, they are inferior to standard classic copies.
The price of high-quality illuminators is considerable, however, they last several times longer. You can make repairs or modifications to the optics that you already have if you want to save money. You can easily do this yourself; the work does not require special knowledge or additional skills. Headlights for the VAZ 2110 differ in technology and manufacturer. Standard headlight brands:
- Bosch headlights (contain reflectors only, no focusing lens)
- Headlights from Kirzhach (including a focusing lens and reflector)
The most common headlight malfunctions:
- Broken hydraulic corrector, which is more practical to replace with an electric corrector;
- Trembling of the light beam;
- Lost adjustment of the light beam.
Setting the direction of the headlights
All tires must be evenly inflated before doing this. At a distance of about five meters in front of the car, a screen is placed perpendicularly, which must be positioned evenly so that glare from the windshield does not fall on it. The screen canvas is chosen from a matte material. A sheet of plywood, plasterboard or fiberboard works well for these purposes.
When adjusting the headlight position, an error is allowed. Once you have finished adjusting the front lights, do not forget to replace the protective glass.
Car headlights are the driver’s “eyes” at night
It is impossible to overestimate the importance of their serviceability and normal functioning. In case of any damage and failure of the headlight, it must be replaced immediately
Removing and replacing the front headlight of VAZ 2113, 2114, 2115 does not require special tools. Before removing the headlight, it is necessary to remove the inner and outer radiator trim, the hydraulic corrector working cylinder and the headlight trim. To make it more convenient to remove the right headlight, we dismantle the windshield washer reservoir. To make it easier to work with the left headlight, we remove the battery. Further:
1. Disconnect the wiring harness block from the headlight housing;
2. Using a Phillips screwdriver, unscrew the self-tapping screw securing the headlight housing to the bracket;
3. Unscrew the three nuts securing the headlight housing in the engine compartment (one on the radiator side and two on the fender side);
4. Remove the headlight.
To remove the headlight with trim:
1. Unscrew the self-tapping screw securing the headlight trim to the fender;
2. Remove the headlight with the lining;
3. Release the latches of the trim and remove it from the headlight housing.
Further, depending on the nature of the damage, the headlight is repaired, or the glass, lamp, or cladding is replaced. In serious cases, the headlight is replaced with a new one of the same model.
It is installed in the reverse order of removal.
If it is necessary to remove the headlight bracket, it is necessary to unscrew the nut securing the bracket to the radiator frame panel and remove the bracket. It is installed in the reverse order.
It must be remembered that car headlights play a huge role in the safety of the driver and passengers at night. Failure to promptly replace a damaged headlight can be life-threatening, so the damage must be repaired immediately as soon as it is discovered. It only takes a couple of hours and not a lot of effort.
Sources
- https://vsepoedem.com/story/fary-na-vaz-2114-korotko-o-glavnom
- https://expertvaz.ru/2114/fary-ustanovka-tyuning.html
- https://lada-avtovaz.ru/snyatie-i-zamena-perednej-fary-vaz-2113-2114-2115/