The vehicle coating provides not only a presentable appearance, but also additional protection. But, like other materials, the paint surface has a limited service life. Under the influence of loads, minor damage gradually appears on it. Therefore, it will be useful for car owners to know how to paint over a scratch on a damaged car with their own hands.
Different ways to remove grooves
Small cobwebs on a car's paintwork can be removed without touching up the defect, but using the polishing method. To do this, use abrasive or wax polishes. The first type of composition removes a very thin layer of varnish until the scratch disappears, so it cannot be used frequently so as not to remove the entire protective layer from the undamaged area. Wax polishes fill the cobwebs, but after two or three washes the procedure will have to be repeated again and again.
If the protection in the form of a varnish layer or enamel is damaged, then the grooves can be covered with a wax or gel pencil; in this case, touch-up is not required. Special products in tubes or in the form of pencils are also used in cases where it is necessary to mask scuffs of the paintwork.
There is an anti-scratch product on sale in the form of special brushes for removing coating defects, which can be used to cover fairly deep grooves. The composition contains fiberglass, so its use does not require preliminary priming.
Remember that this product can only be used once, as the paint dries very quickly after opening the tube.
If the depth of the groove reaches the ground or metal, then in order to remove it, a more complex repair of the damaged area is necessary - painting over the scratches on the car. To do this, prepare the following tools and materials:
- sandpaper P1500, P2000;
- polishing paste;
- a grinding machine or drill with a set of discs;
- putty;
- rubber or plastic spatulas;
- primer;
- auto enamel color of your car;
- protective varnish;
- surface degreasing composition;
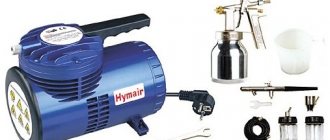
- brush, spray gun or roller.
Let's figure out how to paint over a scratch on a car with your own hands using these tools. By following step-by-step instructions, you can remove defects in your car's paintwork yourself, saving significant money.
What polishing wheels and pastes should I use?
Between the hardest and softest polishing wheels, different manufacturers may have many different options for wheels of varying degrees of hardness.
Depending on the hardness of the paintwork and the level of correction required, it is important to select the correct combination of wheel and polishing compound. This can be determined using a test (we will consider this point below).
The combination of at least 3 polishing pastes of different abrasiveness and 3 polishing wheels of different hardness gives you up to 9 different levels of “cutting” and finishing polishing, as well as the ability to properly polish almost any paint coating.
To select specific pastes, it is worth studying the products of various manufacturers and deciding which brand to use and sticking to its product line. Now many manufacturers produce pastes with self-disintegrating abrasives (DAT), they are more versatile, but give less control over the paint correction process. In contrast to this technology, micro-abrasive pastes (SMAT) give greater control over the polishing process. An example is the professional products of Meguiars. For more information about the types of pastes, read the article “types of polishing pastes DAT and SMAT”.
Since hard (cutting) wheels will do most of the work, you can purchase several of them so that you can change them during the polishing process, without waiting for the wheel, which is oversaturated with used polish and paint residues, and then the cleaned wheel to dry. This will speed up the work and increase the efficiency and quality of polishing.
Let us briefly consider the main types of polishing wheels and their purpose.
- Wool wheels are highly aggressive, used for cutting and removing extreme paint defects on very hard paints. These polishing pads remove defects much better than foam pads and generate less heat. That being said, wool is also safer to use on heat-sensitive car parts such as bumpers and spoilers. Wool can leave circular marks and usually requires an additional finishing step. Used with a rotary machine.
- Microfiber circles - used with eccentric machines for a more “aggressive” effect. There are different hardnesses. In general, they give a harsher effect than foam polishing pads.
- Foam hard wheels - used for non-aggressive cutting (moderate cutting compared to wool polishing pads). Used to remove circular scratches, paint oxidation and shallow scratches.
- Medium-hard foam rubber wheels are used for cleaning paint, removing circular micro-scratches, surface scratches and other minor defects in car paint.
- Foam Finishing Wheels - Provides minimal to no cutting. Used at the final stage of polishing and for applying wax and sealant.
When selecting the appropriate wheel or paste, always ensure that the aggressiveness of the mixture used matches the aggressiveness of the wheel. The wrong combination creates unnecessary work and wastes your time and product.
Local application products - fast, cheap and easy
Another way to restore a body is to use special automotive products aimed at masking and completely removing scratches. This group of products includes wax and gel correctors, as well as specific pencils. The color palette of the products presented is very wide, you can easily choose the pencil that perfectly matches the shade of your car.
The main advantages of using these tools include:
- Ease of work.
- High speed of the process.
- Low cost of goods.
The main disadvantage of correctors is that, as you can guess from the name, they do not so much restore scratches as simply mask them. The consequence of this is the need to periodically update the shaded layer. At first, the drying composition perfectly hides any damage to the car, but over time, the paint begins to crack and deteriorate, which leads to the reuse of pencils.
We recommend: Wheel rim repair
The automotive goods market can please us with many other interesting products that allow us to paint any minor body defects in the shortest possible time. Degreasers, special wipes, car varnishes, masking polymers - all these products make it possible to get rid of minor damage, as well as additionally protect the car body, preventing the possibility of rust.
Lighting
Lighting is very important when polishing a black car. Without an additional light source, it will be difficult to determine whether we have truly removed all the scratches. All defects will be visible in sunlight, so it is necessary to control the paint surface during the polishing process.
There are special lamps for detailing on sale, but they are very expensive.
Fluorescent lamps are usually used as general lighting as they will not show all the scratches. Halogen lamps can be used as a local source of reference light, but they heat up and give off an orange tint and can hide some defects. The most suitable inexpensive option would be LED lamps with a light temperature in the range from 4000K to 5000K. This way the scratches will be clearly visible.
Removing scratches on the body with a Fix it Pro pencil
If there is only superficial damage to the varnish coating, then there is an excellent way to remove such scratches that does not require specific skills and can be done by any amateur - this is a special pencil for removing scratches Fix it Pro.
After just a few uses, the Fix it Pro pencil will not leave any traces of scratches on the surface of the body. The main advantages of the Fix it Pro pencil are:
- Simplicity and ease of use;
- It matches any car color;
- Almost instantly removes small scratches and chips;
- Fix it Pro can be used multiple times;
- A very affordable price and an opportunity to save on a visit to a car service center.
However, in fairness, it is worth noting that small scratches can be easily removed not only with a pencil. According to “experienced” motorists, RENUMAX compositions cope more effectively with scratches and other minor damage to a car’s paintwork.
And given the low cost and ease of use, RENUMAX can confidently be called one of the most popular means for removing scratches on a car body without painting.
But still, miracles do not happen and you should remember that both the Fix it Pro pencil and the RENUMAX product will help restore ONLY the varnish coating of the car, and not the paint.
10 Runway (polish)
For a very low cost, this is an excellent product that helps add shine to the paint surface and get rid of minor scratches. When polishing by hand, it may not be effective enough, so it is better to use it when working with special machines. In reviews, users write that with minimal effort it is possible to get rid of ingrained traces of insects, paint oxidation, abrasions, and with careful polishing - from shallow scratches. But most of all they like the very low cost for a noticeable result of use.
How to paint over a scratch on a car
No matter how careful the driver is, scratches will still appear on the car. Damage of this type is divided into several groups depending on a number of signs:
- minor scratches of the first level that damaged the paintwork;
- medium scratches of the second level, damaging the top layer and primer;
- deep scratches of the third level, damaging all layers of the coating, including metal.
Special tools are used to paint scratches on a car. But to understand what kind of device you will need to restore the surface, you need to determine the type of scratch.
There are also several types of damage repair methods:
- spot;
- polishing;
- using a brush;
- using a can of spray paint;
- with a full renovation.
In most cases, no labor-intensive effort is required to remove the scratch. To do this, it is not necessary to contact a service center - you can paint over the scratch on the damaged area yourself.
Spot painting
Spot painting is also known as retouching. This method involves several ways to restore the surface of a car, depending on the level of damage.
Most often, this type of painting is used to remove level 1 scratches that have damaged the paintwork. When performing spot painting, the locations of scratches are determined, after which painting is carried out. The task is completed independently using marker pencils.
If there are second-level scratches on the coating that have damaged the paintwork and primer, local agents are used. These include a polymer chalk pencil and a paint brush. It is recommended to apply the paint in several layers.
Paint a scratch only in clean and dry areas. You need to wait until the surface dries before applying the next coat of paint.
Polishing
If there are scratches, painting is not always necessary. In some cases, polishing is sufficient. This method is only suitable if it is necessary to remove shallow scratches. To determine their presence, you need to wet the surface and wait until it dries. After this, the scratches will appear on their own.
We recommend: HBO for Suzuki Grand Vitara
You can remove the scratch by polishing it yourself or at a car wash. It requires a special wax paste. The substance fills the scratch, causing it to disappear. But it should be borne in mind that polishing provides a temporary effect. Therefore, in order to maintain the paintwork in a new condition, it is necessary to periodically repeat this action.
Checking the result
After polishing, oil residues from the paste can fill micro-scratches and hide the real result of the work done.
It is necessary to remove oily residues from the paintwork using a special degreaser, degreasing shampoo, or a mixture of isopropyl alcohol and water. The mixture can be in different ratios (1 to 1 or with a higher alcohol content). Plain alcohol without water evaporates too quickly. For convenience, you can pour a mixture of alcohol and water into a spray bottle. After spraying, the mixture should act for 30-45 seconds, after which it should be wiped off with a clean microfiber.
A degreasing process is also necessary before applying the protective coating. Polymer sealants do not form a proper bond with the paint surface, if oils are present, it will affect their durability.
Preparing the surface area for painting
Painting over scratches on a car begins with the process of preparing the damaged area of the paintwork, which can be reduced to the following sequence of actions.
- Sanding the damaged area. First you need to remove dirt and, if present, rust. For sanding, use a sander or sandpaper. Rub the area down to the metal or scratch depth level. The result should be a flat, smooth surface. Begin the initial sanding using P1500 sandpaper. Sand the intact paintwork around the working area with finer grit P2000 paper. Do the cleaning carefully and rationally, not forgetting that the larger the area you cover, the more you will need to paint.
- The prepared area on the car body must be degreased with white spirit, xylene or gasoline.
- Apply a layer of putty. You can use polyester putty along with a hardener. Mix the hardener and putty and apply the mixture to the work area. When working with the material, use the instructions for the specific composition. It is important to correctly observe the proportions of mixing the components, otherwise the putty may harden before being applied to the car body.
- After the putty has dried, sand it to a smooth surface.
- Your next step is to apply a primer. For local repair of car body paintwork, it is better to use the composition in aerosol packaging, which will give a good quality result and speed up the priming process. You can also use the compositions in jars, applying them with a brush.
- The dried primer layer must be sanded wet with fine-grained sandpaper.
At this point, the preparation of the car body is completed and the next step is directly painting over the scratches on the car.
Restoring the paint layer - preparation and main steps
Experienced motorists know very well that any damage to the car body can be repaired. Especially when it comes to such minor problems as scratches. Even without minimal experience in handling such damage, anyone can paint over a scratch on a car with their own hands, without visiting service stations. This saves time and, more importantly, money, since the result will be the same in any case.
Before painting a car, it is necessary to obtain some theoretical knowledge, in particular about the layers of the body surface. So, the following is the order, starting from the top:
- A layer of varnish.
- The base layer is enamel.
- Primer.
- Phosphate.
- Sheet steel is the deepest, last layer of the car body.
Depending on the layer damaged by contact with foreign bodies, the technology of restoration and restoration may differ significantly. The simplest, for obvious reasons, are scratches that only damage the paintwork. In this case, the operation to remove the damage may take a couple of minutes.
If during a trip you accidentally hit the fence and made a deep enough chip that touched the steel, then you will need to put in much more effort. But, we repeat, any damage of this nature, regardless of its depth, can be corrected at home.
