06/08/2021 6,670 VAZ 2109
Author: Ivan Baranov
A cigarette lighter is found in every car, but it is not always used for its intended purpose. Over time, this device may function unstably or fail altogether, resulting in the car owner needing to replace it. For what reasons does the VAZ 2109 cigarette lighter not work, and how to replace it yourself? You will find the answers below.
[Hide]
The cigarette lighter on the VAZ 2109 does not work
Every modern car has this device. Even non-smoking drivers use it. A lot of electronic devices are connected to the cigarette lighter socket. The connector is used for:
- direct purpose (lighting cigarettes);
- connecting a GPS navigator that plots the route;
- a video recorder that records the current traffic situation;
- an electric compressor that inflates tires;
- fan;
- additional batteries or chargers for a mobile phone, laptop or tablet.
Failure of the device is fraught with additional problems and inconveniences. Information on how to remove the cigarette lighter and repair it with your own hands on the VAZ 2109 model will help car owners.
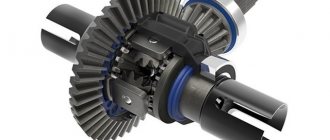
Device and purpose
The operating principle of the device is simple. Inside the metal cartridge there is a thin spiral. When the cigarette lighter is pressed into the working position, current begins to flow through the contacts, exposing the coil to thermal effects. After reaching the maximum value, the thermal relay is activated and the device returns to its original position.
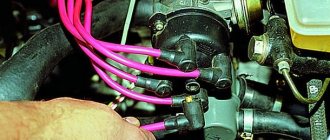
Three wires come to the VAZ 2109 cigarette lighter itself. The connection diagram is implemented as follows.
- Red cable. The positive wire goes directly to the cigarette lighter battery. Responsible for heating the element. This section of the circuit is protected by a 20 ampere fuse.
- Yellow cable. A constant plus that goes to the lamp. Responsible for lighting the cigarette lighter.
- Black cable. Minus. One end is powered to the cigarette lighter body, and the other ends to the car body.
When operating the device on a VAZ, it is important to adhere to several basic rules. It must be remembered that the total power of connected devices is calculated using the formula P=I*A (power=voltage*current). In this case, A = 20 amperes, and the voltage in the car circuit is 12 volts. The maximum power rating should not exceed 240 watts. The cigarette lighter fuse may blow, and the insulating part of the wires may melt.
Cigarette lighter 2108, 2109, 21099, connection diagram
The cigarette lighter of VAZ 2108, 2109, 21099 cars is constantly energized.
Electric current is supplied to it from terminal “30” of the generator and fuse No. 12 (8A) on cars with mounting block 17.3722 before 1998, or fuse F7 (16A) on cars after 1998 and mounting block 2114.
Cigarette lighter for VAZ 2108, 2109, 21099 cars, connection diagram
Notes and additions
— The cigarette lighter lamp is part of the interior lighting system of the VAZ 2108, 2109, 21099. It is powered through the instrument lighting switch, the instrument panel lighting lamp, and the heater lever illumination lamp. Read more: “Connection diagram for interior lighting (interior lighting) of VAZ 2108, 2109, 21099 cars.”
More articles on electrical circuit diagrams for VAZ 2108, 2109, 21099 cars
— Connection diagram for the rear wiper (rear window cleaner and washer)
— Scheme for switching on fog lights for VAZ 2108, 2109, 21099 cars
— Scheme for switching on the stove for VAZ 2108, 2109, 21099 cars
Causes of failure
Common reasons why the cigarette lighter does not work on a VAZ 2109.
- Broken wiring. If the car is old or due to illiterate manipulations with the electrical system, the wires may shorten and burn out, or a break may occur in the circuit itself. The fuse trips. This failure should be diagnosed using a multitester. The wires coming to the cigarette lighter are tested for resistance. If there is no power to the device, then one of the wires is broken.
- The cigarette lighter fuse is broken. If one or more high-power devices are driven into the socket, the circuit current may exceed the critical value of 20 amps, causing the fuse to blow. Additionally, the electric heated rear window will stop working, and in some cases, the car radio will stop working. Repairing the cigarette lighter is simple - you need to remove the front panel to get to the mounting block, where you can change the blown fuse.
- Bad connection. Over time, the contacts oxidize, causing the device to stop working. The reason for the appearance may also be the connection of a fuse with a high resistance, for example, a 25-amp one. If the cigarette lighter does not work, you must first remove the metal cartridge and check its contacts for the presence of oxides. It is recommended to clean them. Before carrying out the procedure, it is recommended to remove the negative terminal from the battery. This will eliminate the possibility of a short circuit and tripping the fuse on the VAZ 2109.
- Burnt out filament element. Inside the cartridge there is a nichrome spiral, which can burn out due to age. Restoration is impractical - such a malfunction is treated by replacing the cigarette lighter and installing a new element.
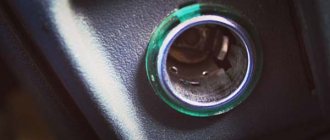
- Backlight lamp failure. There is additional lighting around the cigarette lighter to help you find the device in the dark. Over time, the light bulb may also stop lighting. You will need to remove the burnt element and then replace it with a working one.
Repair work
To begin with, we advise you to make room for yourself near the car so that you can open the doors without any problems, nothing prevents them from always being in the open position, and you have the opportunity to approach and move away from the car without overcoming multiple obstacles.
If in summer you can simply drive your car outside, then in winter you will have to limit yourself to the available space of a closed garage.
You are ready? Then you can start repairing.
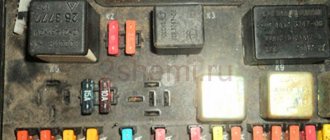
Dedicated place where the cigarette lighter fuse is located on the VAZ 2114
The first situation is that the fuse for the VAZ 2114 cigarette lighter has failed. A popular problem that is not so difficult to solve. The primary task is to determine where the cigarette lighter fuse is located on the VAZ 2114. It's simple. Open the hatch where the entire fuse box is located. The element you are looking for is located to the left of the steering column. This is a 20-amp fuse, which has a special marking - F4. It is difficult to confuse it with others, so finding the fuse is not a problem at all. Take a tester and check its functionality. If it works, we continue to look for the problem. If the fuse fails, you can simply purchase a new one. It’s cheap, so there shouldn’t be any problems finding and purchasing it.
Since the old fuse has burned out, you won’t be able to simply take a new one, put it in place and supposedly complete the repair.
It is extremely important to understand exactly why the old fuse blew. Figuring out how to remove the cigarette lighter on a VAZ 2114 is quite simple. Be sure to check the quality of the contacts in the blocks when leaving the mounting block
It is designated X1. This block has connections from the cigarette lighter located in the passenger compartment. If the reason is in the contacts, tighten them
Be sure to check the quality of the contacts in the blocks when leaving the mounting block. It is designated X1. This block has connections from the cigarette lighter located in the passenger compartment. If the reason is in the contacts, tighten them.
The most popular problem with a cigarette lighter malfunction is the car owner’s own mistakes during operation. When connecting external devices to the device, there is no need to unscrew the plugs in different directions. Because of this, the plates short out and the cigarette lighter simply stops working.
Another fairly common problem is a burnt-out backlight bulb. It is quite simple to replace, but to do this, our device must first be removed from its socket.
Pay attention to the moving core of your cigarette lighter. Examine it externally, check the quality and integrity of the spring coils. If there is damage, you will have to replace this element
The problem is that the core is not sold separately; auto parts stores offer only a prefabricated design. The only search option is all kinds of car flea markets, where grandfathers sell spare parts from their old cars. Despite the apparent absurdity, in such places you can often find excellent parts for cars such as the VAZ 2114.
Installing an additional cigarette lighter in a VAZ-2115
Repairing the cigarette lighter and its socket
Before you remove the device on a VAZ 2109 with a high panel and replace it with a working one, you need to stock up on suitable tools. You will need:
- gloves for protection;
- screwdriver with a standard blade.
To restore and repair the cigarette lighter or fuse on a VAZ, the following will be useful:
- insulating or shrink tape;
- blowtorch, tin, rosin;
- serviceable wires (if you need to change cables);
- multitester;
- spare parts.
You can buy different car cigarette lighters on the market. The standard long version has disadvantages. Most electrical appliances are designed for a short cartridge. Therefore, many drivers prefer to replace the device with European standard samples.
The cost of the device ranges between 400 – 1100 rubles. The low price of the device indicates that low-quality materials were used in the production process. Such a device will not work for long. It is better to choose parts from the original manufacturer with a quality hologram and certificates of conformity.
We further refine the high panel. — Lada 2109, 1.5 liter, 2003 year on DRIVE2
We'll talk about:
1.Replacement of cigarette lighter 2109 with high panel for Euro.
2.
Replacing the backlight of the heater control unit ver.2.0
What do we need? Cigarette lighter and socket of course, 3 female clamps, connector for the cigarette lighter into the wiring (socket), tool
a normal understanding that due to an error (short circuit, poor contact) the machine will burn out quickly. My panel was removed. But it seems that you can crawl from the side of the space under the BC without removing it. Nothing complicated. We cut off the old cigarette lighter, hang the clips on the wires, and insert them into the block like this:
Here we look only at the order of the wires. This is exactly the color they are in the original 2109 wiring.
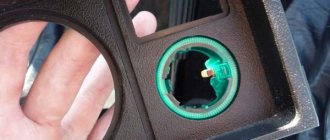
In our case, only then we insert the block into the cigarette lighter and we can test it. Next, we disassemble the cigarette lighter. The green part made of plexiglass (sort of) is separated from the socket itself. By the way, I threw out that plastic mask that limits the illumination of the ashtray. Now let’s slightly cut the standard place of the cigarette lighter (because it is smaller than it should be) evenly across the diameter. We first insert the part that is illuminated (plexiglass), then the iron socket itself into it. We can connect and rejoice.
I'm pleased with the result. True, now I want red) And of course, I immediately put an LED on the backlight instead of an incandescent lamp. (!) Don't confuse the polarity.
Now about the heater control unit
(hereinafter referred to as BOO): I previously wrote about how and with what I overexposed it. While disassembling the panel, I tore off the positive backlight wire - I decided to disassemble the control unit. I saw that the tape that had been there (at that time for a year and a half) had all turned yellow. I wasn't happy with the look and decided to replace it. Yes, and also, so to speak, to finalize the modification ;D I noticed that there is a hole in the same place, going under the fan speed knob. I thought, “that arrow was just shining dimly.” Did the following:
12v LED (I had an extra one lying around to illuminate the button) parallel to the strip
Everything is visible and clear here.
For those who haven’t seen it: I covered the hole with white light-transmitting film.
Extended the ribbon to cover its area
Glass not inserted) only fitting. I am pleased with the uniformity and finally a normally glowing pen ^^
Everything is heat-shrinkable, and in the car we use standard +- BUO backlights.
Smooth roads and good nines to everyone!
Removal instructions
Armed with the tools, you can begin the repair. Before removing the cigarette lighter of the VAZ 2109, you must open the hood and remove the negative terminal from the battery. This will eliminate the possibility of a short circuit during removal.
- Unscrew the two fastening screws on each side of the decorative panel.
- Disconnect the wires of the control buttons.
- We remember where the plus of the contact chip is and take it out.
- We remove the cigarette lighter from its seat for subsequent repair or replacement.
The device should be connected in the reverse order to that described. If you don’t have a backlight bulb, you can add one to the design. Before starting, you should check the battery voltage with the ignition off. Then turn it on and try it again. If there is a drawdown of more than 0.5 Volts, then there is a short circuit.
Cigarette lighter from 2110 to 2108 2109 21099 low panel — Lada 21099, 1.3 l., 1992 on DRIVE2
Good day everyone. The following is not intended to be correct.
way to solve the problem, but is only one of them.
Are your chargers in your cigarette lighter 2108 2109 21099 not working? Most likely you have an old style cigarette lighter. The problem with it is that it is too long.
In order to fix this, there is this way: We go to a car store and buy
a cigarette lighter for a VAZ 2110
In place of the connector for it, I used “
mothers
” and “
fathers
” with
heat shrink
.
Let's get to work.
Bend in half and unscrew
the four self-tapping screws from the center console.
Next, pull it towards you
and pull out the “twist”
and
three damper control knobs
Little by little we pull
the console
towards us.
Having pulled it out a couple of centimeters, we remember the positions of the buttons connected on top. The easiest way is to photograph everything from above. Now you need to turn off the cigarette lighter at the bottom. We disconnect the backlight connector with the yellow wire and remember where the plus and where the minus is for the second connector on the cigarette lighter itself. We take the old cigarette lighter in our hand and remove the tint from it by squeezing it with our fingers. Now we bend the backlight antennae a little. Why this is needed will become clear a little later. We grab the ten cigarette lighter in our hands and disassemble it. Bend the plastic cover on the under-color and pull it up or down
Pressing the inside of the cigarette lighter onto the two “
pimples
”
1
and grabbing the green rim between them with your fingers, pull the cigarette lighter out of the rim
.
Then we take out the light bulb with the socket from the green rim, which is fixed by point 2
.
This can be done by prying it into slot 3
. Having disassembled the entire structure, we separate out the excess. The seat for the light bulb with the socket on the green rim was in the way, and I “bite it off” with wire cutters. Then, with the same wire cutters, I picked out the space for the connector, leaving only 2 terminals there. The central one is a plus, the outer one is a constant minus, and the one that is closer to the place where the light bulb is attached has a plus on it (the light bulb). In the process of picking the connector, the plus bulb fell off on its own. So we were left with a new cigarette lighter with 2 terminals, a chewed rim for it and a light bulb from the old cigarette lighter. The rest is aside. Having previously bent the socket of the old light bulb, we attach it to the new cigarette lighter. When assembled, the entire structure looks like this:
.
We connect the cigarette lighter wires using terminals and a piece of wire to where we memorized earlier. We insulate the terminals well. Alternatively, find suitable connectors. We connect the color to the appropriate connector and check its functionality. Next, we drill out or slightly
the seat in the console for the new cigarette lighter rim; in fact, we need to drill out a couple of mm, and we insert our structure there. The structure should fit tightly so that nothing dangles or spins. We put on the console, connecting all the toggle switches as they were, and screw it on with self-tapping screws. We put on the “twists” and “turners” and see the result
Video “replacing the cigarette lighter of a VAZ 2109 high panel”
In this case, the device will be removed in the same way. True, there is a quick dismantling method practiced by experienced owners. In order to remove the cigarette lighter of a VAZ 2109 equipped with a high panel, it is enough.
- Pull out the metal part of the device.
- Bend the antennae located inside the cigarette lighter connector.
- Remove the socket through the panel hole.
- Disconnect the wire block.
- Remove the backlit filter.
The following video will help you understand how to repair the cigarette lighter for a VAZ 2109 with a high panel.
Author of the material: Dumchenkov Mikhail
Did you like the material? Share with your friends:
Have questions about car repairs? Ask them in the consultation section, to do this, click on the link below.
auto mechanic
- New cars 2021
- New cars 2022
- Test drives
- Jeeps
- Crossovers
- Repair and maintenance Engine
- Chassis
- Electrical equipment
- Alarms
- Cigarette lighters
- Car Reviews
- Photo and video galleries
- News
- Tires
- Celebrity cars
© 2021 Daciaclubmd.ru. If you do not agree with any provision of this Disclaimer, do not use this Site. Please read Disclaimer and Privacy Policy before use.
Copying materials is permitted only with an active hyperlink to our website.
Source
We further refine the high panel. — Lada 2109, 1.5 l., 2003 on DRIVE2
We'll talk about:
1.Replacement of cigarette lighter 2109 with high panel for Euro.
2.
Replacing the backlight of the heater control unit ver.2.0
What do we need? Cigarette lighter and socket of course, 3 female clamps, connector for the cigarette lighter into the wiring (socket), tool
a normal understanding that due to an error (short circuit, poor contact) the machine will burn out quickly. My panel was removed. But it seems that you can crawl from the side of the space under the BC without removing it. Nothing complicated. We cut off the old cigarette lighter, hang the clips on the wires, and insert them into the block like this:
Here we look only at the order of the wires. This is exactly the color they are in the original 2109 wiring.
In our case, only then we insert the block into the cigarette lighter and we can test it. Next, we disassemble the cigarette lighter. The green part made of plexiglass (sort of) is separated from the socket itself. By the way, I threw out that plastic mask that limits the illumination of the ashtray. Now let’s slightly cut the standard place of the cigarette lighter (because it is smaller than it should be) evenly across the diameter. We first insert the part that is illuminated (plexiglass), then the iron socket itself into it. We can connect and rejoice.
I'm pleased with the result. True, now I want red) And of course, I immediately put an LED on the backlight instead of an incandescent lamp. (!) Don't confuse the polarity.
Now about the heater control unit
(hereinafter referred to as BOO): I previously wrote about how and with what I overexposed it. While disassembling the panel, I tore off the positive backlight wire - I decided to disassemble the control unit. I saw that the tape that had been there (at that time for a year and a half) had all turned yellow. I wasn't happy with the look and decided to replace it. Yes, and also, so to speak, to finalize the modification ;D I noticed that there is a hole in the same place, going under the fan speed knob. I thought, “that arrow was just shining dimly.” Did the following:
12v LED (I had an extra one lying around to illuminate the button) parallel to the strip
Everything is visible and clear here.
For those who haven’t seen it: I covered the hole with white light-transmitting film.
Extended the ribbon to cover its area
Glass not inserted) only fitting. I am pleased with the uniformity and finally a normally glowing pen ^^
Everything is heat-shrinkable, and in the car we use standard +- BUO backlights.
Smooth roads and good nines to everyone!
Operating rules
If at some point the cigarette lighter stops working, what will happen? All your additional equipment will no longer receive power. As a result, you will be left without a media center, navigator, will not be able to charge your phone, and so on.
There are several important rules that are recommended to be followed when operating your VAZ 2109 equipped with a cigarette lighter.
- It is not recommended to connect compressors directly through the cigarette lighter, which many people use today to pump up their tires on the road. It is better to connect it directly through the battery. Such devices consume a lot of energy and create an impressive load on the vehicle's electrical wiring. At some point it may melt or a fuse may blow.
- Do not try to insert devices whose connectors are larger than the size of the cigarette lighter into the cigarette lighter socket.
- Do not connect metal objects. Also, when connecting the device, do not use equipment that has metal rings on the body. They often fly out, resulting in a short circuit. At best, your battery will quickly run out.
And what's behind it?
“cigarette lighter for VAZ ignition” — Lada 21099, 1.5 l., 1998 on DRIVE2
Hi all!
As you understand, we are talking about electrics)
After I bought myself a video recorder, I had to turn the power on and off every time due to the fact that the designers of the VAZ 2108-99 had not yet thought about installing a snout to turn off the power to the cigarette lighter, because this was not necessary in those years. And so, the first thing I decided to do was look at what our “Kulibins” were doing on the Internet and, like everyone else, I came across a series of all kinds of heresy and nonsense. However, among this garbage, not surprisingly, I came across an article from Drive2 from Jamal57rus, in which he schematically
describes everything.
Now I will try to describe in detail
how and where I connected everything. Let's begin.
We will need (more precisely, I needed
): - electrical tape - knife (in my case there were wire cutters) - 6 female terminals - soldering iron with solder and acid - 4-pin relay with socket - 10A fuse with socket - 1-1.5 m wires - double-sided tape
Stage 1.
Because I also installed an additional cigarette lighter, then at home I soldered additional wires to the cigarette lighter mothers, which are located inside the block, because of this no additional insulation was required.
Full size
you can clearly see what exactly is soldered and where
Stage 2
(
we don’t connect
until we read
to the end
of the article)
MANDATORY!
— Remove the terminals from the battery — Next. We are looking for +12v, which is the voltage after turning the key to position 3 (2108-99 has 4 ignition positions). Mine was blue. If the braid has not been changed and it is factory, then there should be exactly the same wire. We cut the wire in there, insulate it and pull it through the dashboard to the cigarette lighter. The length was enough for me to be 40-45 cm so as not to dangle. — We attach a mother to it and crimp it, cut off a wire about 5 cm long and crimp it on both sides with mothers. This will be required to connect the fuse and connect to the relay. — “+” wire from the cigarette lighter, which goes after the block to the block (red with a blue stripe, there are 2 of them), cut it approximately 5 cm from the block and on the first end we crimp both wires with the mother, and on the other side (inside the dashboard, which) We'll have to extend the wire, otherwise it won't be enough and we'll also crimp it with mom. — We don’t touch the cigarette lighter mass. -Under the dashboard there is 1 more mass, which goes through a jumper on the back side of the dashboard (2 thin single wires next to the emergency lights), we cut the mass there and isolate it, and put the mother on the other end. -We're collecting.
Connection:
We connect the relay exactly as shown in the photo.
Full size
If you connect incorrectly and without protection it will turn out like this:
Full size
The result should look like this:
Full size
everything is indicated without protective pads, so that it is clearly visible
By the way, there is one small BUT
. If you do not insert a jumper on the ground that we crashed into at the time of the test, then nothing will work)
Result:
When the key is turned to
position 3
, the cigarette lighter is turned on, when turned to
position 2
, the cigarette lighter is turned off.
Time spent ~ 1 hour.
Learn from other people's mistakes and be careful. Subscribe - the further, the more interesting.
Causes
Practice shows that there are two main reasons for cigarette lighter failure on a VAZ 2109.
| Cause | Your actions |
| Fuse burned out | You should look for the fuse inside the mounting block. Depending on the year of manufacture of your nine, the fuse for the cigarette lighter is designated F4 or F10. If it burns out, remove the fuse from the mounting block, replace it with a new one and watch to see if the situation repeats. If it burns out again after a while, this indicates a shortening in the wiring. The peculiarity of this fuse is that it is responsible for several devices connected to it at once. Therefore, check the condition of the remaining elements. Maybe it's because of them that the fuse melts, and not because of the cigarette light |
| Poor contact | It may be partially damaged or absent completely. Remove the cigarette lighter, check whether the wires are seated properly on the terminals, and whether the device is loose. A visual inspection is good, but it’s better to be more precise. Take a multimeter, turn it into voltmeter mode and check what voltage is between the black and red wires. If the device shows 12 volts, look for the source of the problem in the cigarette socket. If there is no voltage, there is a break in the wiring. |
Repair
If cigarette lighter failure cannot be avoided, you need to take troubleshooting steps. To do this, use the following algorithm of actions.
- Check the condition of the fuse, as well as the fuses adjacent to F4 or F10. In some cases, the melting of one provokes deformation of other fusible elements.
- If replacing the fuse does not give the desired result, you will have to disassemble the socket.
- Remove the cigarette lighter completely. Connect a test light to the socket located on the back of the unit and turn on the ignition. If the lamp lights up, this indicates the presence of electricity in the circuit. This means that the problem is in the cigarette lighter itself.
- Unscrew the fastening nut from the back of the cigarette lighter. But first sketch or photograph the position of the contacts before disassembling the assembly. This way you won't have any problems during the reassembly process.
- Unscrew the nut, bend the metal component away from the plastic element, and disconnect the metal components.
- Now you have a mica plate in front of you, which acts as a semiconductor. It needs to be dismantled.
- Next, we assemble the assembly in the reverse order, only without the plate. To install the cigarette lighter, you will have to work a little with a file, removing some of the metal for a comfortable fit of the element.
- A destroyed semiconductor is the most rare problem with cigarette lighters on the VAZ 2109.
- A more common problem is oxidation of contacts or a loose connector.
- Therefore, remove the cigarette lighter and visually inspect the condition of the contacts and connectors. If you suspect a malfunction, disconnect all contacts, clean and reinstall everything. This also applies to terminals.
- Or another option: violation of the integrity of the electrical wiring. This is not the rarest case that will require you to ring every wire going to a faulty car unit. After this, you can verify whether there are breaks or short circuits in the circuit. Damaged wires are replaced with new ones.
Repair work
When working with wiring, terminals and the cigarette lighter in general, be sure to follow safety precautions. Car electrical repairs involve potential risks, so follow the instructions carefully or leave the work to a professional.
Source
Check and replacement
Replacing the cigarette lighter in a VAZ 2110
- Turn on the ignition.
- Insert the cigarette lighter into the socket.
- Wait 10-15 seconds.
- Take it out.
Note: if it has not warmed up during this time, then it really does not work.
Replacing the cigarette lighter for VAZ 2110
Of course, you can go to a dealership to have it replaced by a qualified automotive technician, but you can also replace and install it yourself to save money. Replacement instructions:
- First you need to find a fuse (see VAZ 2110: how to replace fuses) that protects the cigarette lighter from spontaneous combustion. To easily remove it, you need to break the chain.
Note: Removing the fuse is important because if the wiring located at the top is tangled, it can cause damage to other electrical things in the car. The wiring will simply burn out and will need to be replaced. Before you begin replacing the fuse that protects against spontaneous combustion, you should read the machine's user manual.
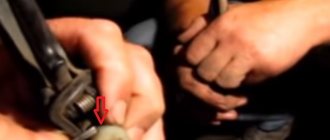
- Now you have to remove the faulty device. To do this, you need to take a flat screwdriver and insert it into the slot (the cigarette is placed there). The screwdriver needs to be turned several times.
Note: this should be done extremely carefully so as not to tear out the socket, since in this case the other cigarette lighter is unlikely to function normally.
The process of replacing the cigarette lighter of a VAZ 2110
- If this method does not work, you will have to try to release the metal clips that hold it in place.
Note: these clamps are very easy to unfold, but there is no need to rush. It is better to do the work longer, but with better quality.
VAZ 2110 how to remove the cigarette lighter
- After removing it, you will have access to two wires with spade connectors. You need to remove both wires so that they are completely disconnected.
Note: if they are not turned off, they may short out and catch fire during operation.
- Now it will be much easier to replace this device. It is necessary to connect the spade-shaped connectors to the peaks located on the back of the device. You need to insert the black into black and white into white wires accordingly.
Note: otherwise the circuit will not be closed and the device will not work.
- After connecting the wires, you can install it in place by pushing it into the hole provided for this.
Note: Press it lightly and then twist it clockwise until it is secured by the two metal clips. He must be motionless.
- Now all that's left is to replace the fuse in the fuse box (if it doesn't work) or install the old one.
Note: this is a prerequisite, since without it a short circuit is possible.
Visual instructions on installing a double socket in a stationary cigarette lighter are in the video below (the video was shot and published by Andrey Kostrov).
If the cigarette lighter on a VAZ 2109 car does not work
If the cigarette lighter of a VAZ 2109 does not work, the main problem is rarely that there is nothing in the car to light a cigarette. Few people remember this now, but the idea of having a cigarette lighter in the cab was to allow the driver to light a cigarette with one hand while holding the steering wheel with the other. Lighting matches with both hands while walking was considered simply dangerous. Now the number of smoking motorists has greatly decreased, and those who remain, as a rule, have lighters. The cigarette lighter is no longer needed.
Why is a cigarette lighter used in a car?
Nowadays, its nest is increasingly being used for other purposes than its intended purpose. Almost forty years ago, when AvtoVAZ designers conceived the first cars of the Samara family, which included the VAZ 2109, they could not imagine how else this unit would be used.
DVRs had not yet been invented, and the question of where to turn on the recorder was not raised in principle. In the same way, there was no task to connect satellite navigation equipment to the on-board network - there was no such equipment at all. And there was no need to even charge cell phones due to the lack of such in nature. Now it’s all there and is powered by the cigarette lighter.
Such abnormal operation leads to an increase in the load on its nest. This may lead to its failure. Particularly dangerous in this sense is a portable electric compressor, which has become widely used by motorists today. On long and even short trips, drivers often have with them such a compressor, which allows them to drive for quite a long time on a punctured tubeless tire, periodically pumping it up and leaving the issue of repairing the wheel until the tire shop. Care should be taken when making such swaps.
Remember that the cigarette lighter is only designed to light a cigarette, but not to pump up a completely flat tire over and over again. At the very least, for such a swap you should connect the crocodile clips to the battery terminals, and not to the cigarette lighter socket.
Removal instructions
Armed with the tools, you can begin the repair. Before removing the cigarette lighter of the VAZ 2109, you must open the hood and remove the negative terminal from the battery. This will eliminate the possibility of a short circuit during removal.
- Unscrew the two fastening screws on each side of the decorative panel.
- Disconnect the wires of the control buttons.
- We remember where the plus of the contact chip is and take it out.
- We remove the cigarette lighter from its seat for subsequent repair or replacement.
The device should be connected in the reverse order to that described. If you don’t have a backlight bulb, you can add one to the design. Before starting, you should check the battery voltage with the ignition off. Then turn it on and try it again. If there is a drawdown of more than 0.5 Volts, then there is a short circuit.
Malfunctions of the cigarette lighter and its socket
If the inspection of the fuse shows its proper condition, but the device, nevertheless, does not work, it is necessary to ring the circuit supplying voltage. Take a portable voltmeter and measure the voltage between the black and red wires that go to its socket. The voltage should be approximately 12 V.
If there is no voltage, inspect the contacts, move the contact groups, and clean the wires from acidification. Make sure that the contacts have not become loose due to vibration during operation. If voltage is properly supplied to the socket, but the cigarette lighter itself does not work, then you have a choice of one of three options.
| Options | Possible actions |
| Coming to terms with a broken device. | Using its socket to connect current-consuming agents. |
| Replacing the VAZ 2109 cigarette lighter with a new one. | This is the best way out of the situation. |
| Attempting to repair the device. | The third option is the least rational. The cigarette lighter circuit is such that most often the thermoelastic element fails. As a rule, it is not sold separately at all. |
It is easier to buy a ready-made cigarette lighter than to repair a broken one.
replacing cigarette lighter 2109 with 2123 — DRIVE2
it's time to replace the cigarette lighter from 2109 with a euro cigarette lighter because I wanted to charge my phone via USB and the adapters did not reach the central wire, so it was decided to replace it with a euro
I bought a cigarette lighter from Chevrolet Niva
the incandescent lamp on it was replaced with a green LED with modifications since the LED took longer, I had to drill a hole in the plastic with a D 5mm drill, but not all the way
test, everything seems to be working
then crimp the wires
We take the wires from the old cigarette lighter from 2109; the wires fit with difficulty, but they fell into place
since the hole was smaller in diameter I had to cut it a little
and voila PS - when connecting the wires were mixed up and I burned the adapter 
issue price: cigarette lighter 2123- 350 RUR + burnt USB - 150 RUR
Possible malfunctions: signs and causes
The device itself may not function for the following reasons:
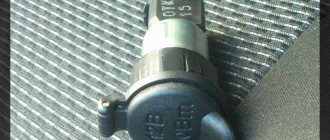
- The safety element has failed. The fuse itself is marked as F4, it is in a block in the engine compartment under the windshield. This fuse is responsible for the operation of not only the cigarette lighter, but also the heated rear window, and in some cars it also protects the electrical circuit of the radio. The fuse is rated at 20 amperes, so additional energy consumers can be connected to the socket.
- Damage or breakage of the wiring, the reason lies in the disconnection of the cable. An electrical circuit consists of several components; damage could affect any of them. It is necessary to ring the wiring to determine and, if necessary, replace the wire.
- Faults in the contact circuit directly in the device socket. During intensive use, there may be a problem with the washer melting, through which voltage is supplied to the output of the device. Such a malfunction cannot be repaired, since in practice restoring the functionality of the cigarette lighter is possible, but not for long. Therefore, if the terminals are damaged, it is still better to replace the device.
If the cigarette lighter fails, a sign may be not only its inoperability, but also a non-working car radio (video published by the Avtogarazh channel).
Cigarette lighter operation
The main danger when using the device is related to its overload and how to connect the cigarette lighter. Many consumers plugged into its socket, including through a splitter, can lead to melting of the wires and even a fire in the engine compartment or under the dashboard of a VAZ 2109 car if the fuse is delayed.
In order to avoid such troubles, do not overload the socket with numerous high-power consumers. Remember, it is designed to only heat up the ignition element for a few seconds and immediately turn off automatically. Please take this into account when operating the vehicle.
Source
Installing a cigarette lighter from a VAZ-2109 — Opel Corsa, 1.4 l., 2007 on DRIVE2
Everyone who reads this will have one simple question: why the hell? I’ll answer, this action was dictated by the absolute impossibility of using a standard cigarette lighter as a socket; in my case, for a radar detector purchased the day before, the plug constantly slipped out and did not really fix at all, contact was lost at the slightest touch to the plug, at the slightest bump, the same situation and with a phone charger and a socket splitter, and the culprit is the same socket with a negligibly small depth. Well, I finally got over it by the fact that when I removed the standard cigarette lighter I discovered that it had been removed many times and had been carefully placed with glue by the previous owners, and the plastic ring around the cigarette lighter socket, which is used for illumination, had burst in several places. It works without any modifications, except that I removed the plastic plugs from the wires from the cigarette lighter itself, since the connector in the car is tricky, plus and minus stand like the letter “G” to each other, and on the wire that goes to the backlight, I ground off a metal connector with a file on the sides (in the car there is a narrower hole for lighting). Next, I wrapped the protruding excess metal parts on the three wires with electrical tape to prevent contact and short circuits. Everything works, including the cigarette lighter itself, any device fits like a glove, it’s especially nice that the coil itself for lighting is zero, without ash stuck on, it was standard (they smoked in the car before me). Oh yes, a cigarette lighter from a Viburnum or a Chevrolet Niva will be of no use, it is just as poor and of the same shallow depth, like the Euro motherfucker, only from the nine or from the classic, but from the classic the cigarette lighter is thinner, it will dangle in the panel, the nine sits very tightly .
Price: 300 ₽ Mileage: 107,300 km